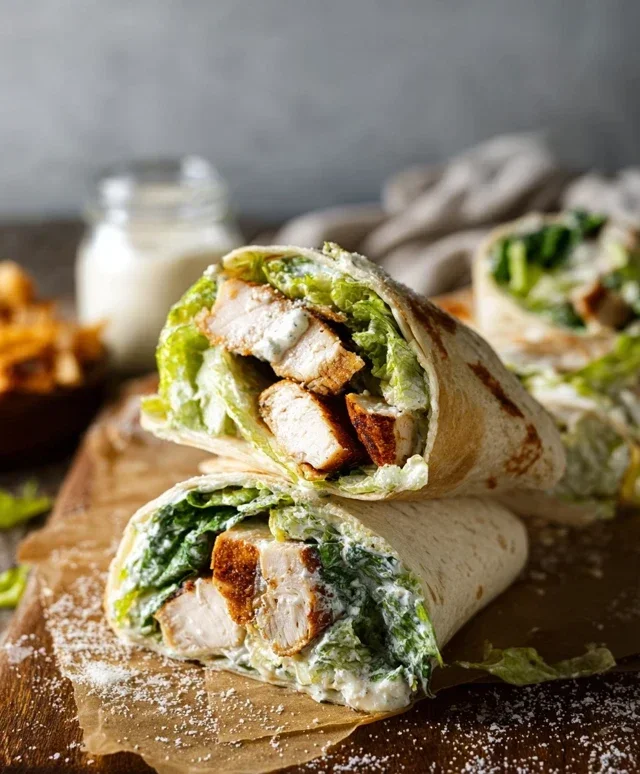
Crispy Chicken Caesar Sandwich Recipe
Crispy Chicken Caesar Sandwich, oh, how we adore you! There’s something undeniably satisfying about that perfect symphony of textures and flavors that makes this sandwich a perennial favorite. It’s the ultimate comfort food, elevated. Imagin extracte biting into a golden, perfectly fried piece of chicken, its exterior shatteringly crisp, giving way to juicy, tender meat within. This delightful crunch is then embraced by the creamy, zesty embrace of classic Caesar dressing, studded with salty Parmesan cheese and the slight bite of crisp romaine lettuce. It’s a flavor explosion that hits all the right notes. What truly makes the Crispy Chicken Caesar Sandwich so special is its ability to transform simple ingredients into a culinary masterpiece. It’s hearty enough for a satisfying lunch, yet sophisticated enough to be a delightful weeknight dinner. This isn’t just any sandwich; it’s an experience, a little bite of happiness that’s surprisingly easy to recreate at home, allowing you to savor every element of this beloved classic whenever the craving strikes.
Ingredients:
- ½ cup full-fat mayonnaise
- 3 tbsp Greek yogurt
- 1 tsp Dijon mustard
- 1 tsp Worcestershire sauce
- 2 tbsp fresh lemon juice
- ¼ cup freshly grated Parmesan cheese
- 1-2 garlic cloves, minced
- ¼ tsp black pepper
- Pinch of sea salt
- 5 chicken cutlets (boneless, skinless chicken breasts, pounded to about ½-inch thickness)
- Sea salt, to taste
- Ground black pepper, to taste
- Oil, for frying (a neutral oil like vegetable or canola is recommended)
- ⅓ cup all-purpose flour
- ½ tsp salt (for the flour mixture)
Preparing the Caesar Dressing
The heart of any great Caesar sandwich is its dressing. We’re going to make a quick and incredibly flavorful Caesar dressing from scratch, which will elevate your sandwich far beyond anything you’d get from a bottle. In a medium bowl, combine the full-fat mayonnaise and the Greek yogurt. The mayonnaise provides richness, while the Greek yogurt adds a tangy counterpoint and a lighter texture. Next, stir in the Dijon mustard for a pungent kick and the Worcestershire sauce for a layer of umami depth. Fresh lemon juice is crucial here; it brightens everything up and cuts through the richness. Add the freshly grated Parmesan cheese – the real stuff makes a huge difference! Finally, incorporate the minced garlic, black pepper, and a pinch of sea salt. Whisk everything together thoroughly until it’s smooth and creamy. Taste it and adjust seasonings if needed. You might want a little more lemon for brightness or a touch more salt. Set this delicious dressing aside; it will need a little time for the flavors to meld.
Coating and Frying the Chicken
This is where we achieve that irresistible crispy exterior for our chicken. Start by patting your chicken cutlets thoroughly dry with paper towels. This is a critical step for achieving a crispy coating; moisture is the enemy of crispiness. Season both sides of each chicken cutlet generously with sea salt and ground black pepper to taste. In a shallow dish or a pie plate, combine the all-purpose flour with ½ teaspoon of salt. This seasoned flour will be our first coating. Dredge each chicken cutlet in the seasoned flour, ensuring it’s evenly coated on all sides. Shake off any excess flour. Next, heat about ½ inch of oil in a large, heavy-bottomed skillet over medium-high heat. You’ll know the oil is ready when a tiny drop of water sizzles and evaporates immediately, or when a pinch of flour dropped into the oil immediately starts to bubble. Carefully place the floured chicken cutlets into the hot oil, being careful not to overcrowd the pan. You may need to cook them in batches. Fry for about 3-4 minutes per side, or until golden brown and cooked through. The internal temperature of the chicken should reach 165°F (74°C). Once cooked, remove the chicken from the skillet and place it on a wire rack set over a baking sheet to drain off any excess oil. This wire rack method helps keep the bottom of the chicken from becoming soggy.
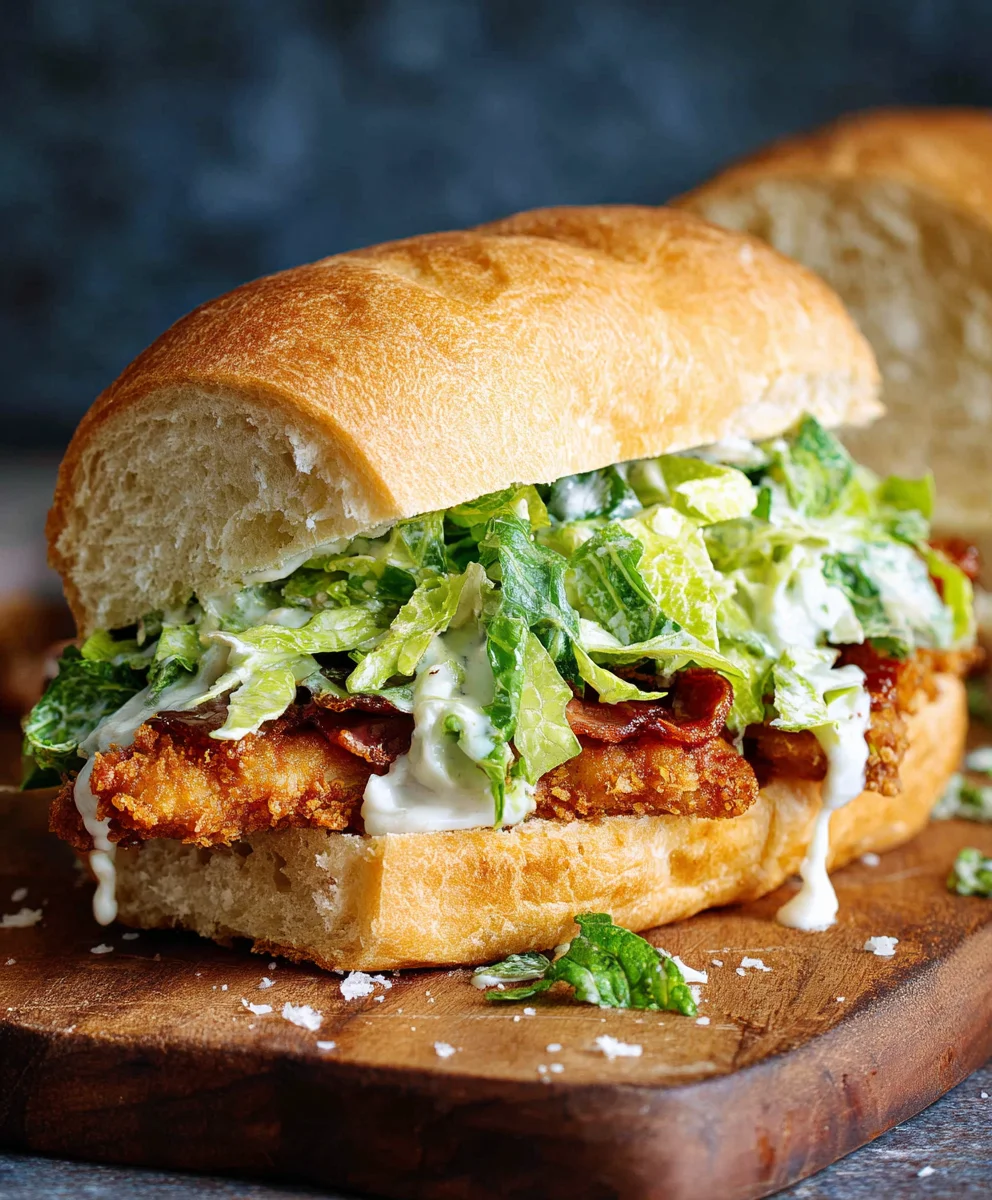
Assembling the Crispy Chicken Caesar Sandwich
Now for the best part: bringin extractg all these components together to create an amazing sandwich. While the chicken is still warm, you’ll want to assemble your sandwiches. Toast your favorite sandwich rolls or buns to your liking. A lightly toasted bun offers a nice textural contrast to the crispy chicken and creamy dressing. Spread a generous amount of the prepared Caesar dressing on the bottom half of each toasted bun. This is where that homemade dressing really shines, coating the bun with all those delicious flavors. Place a crispy fried chicken cutlet on top of the dressing on each bottom bun.
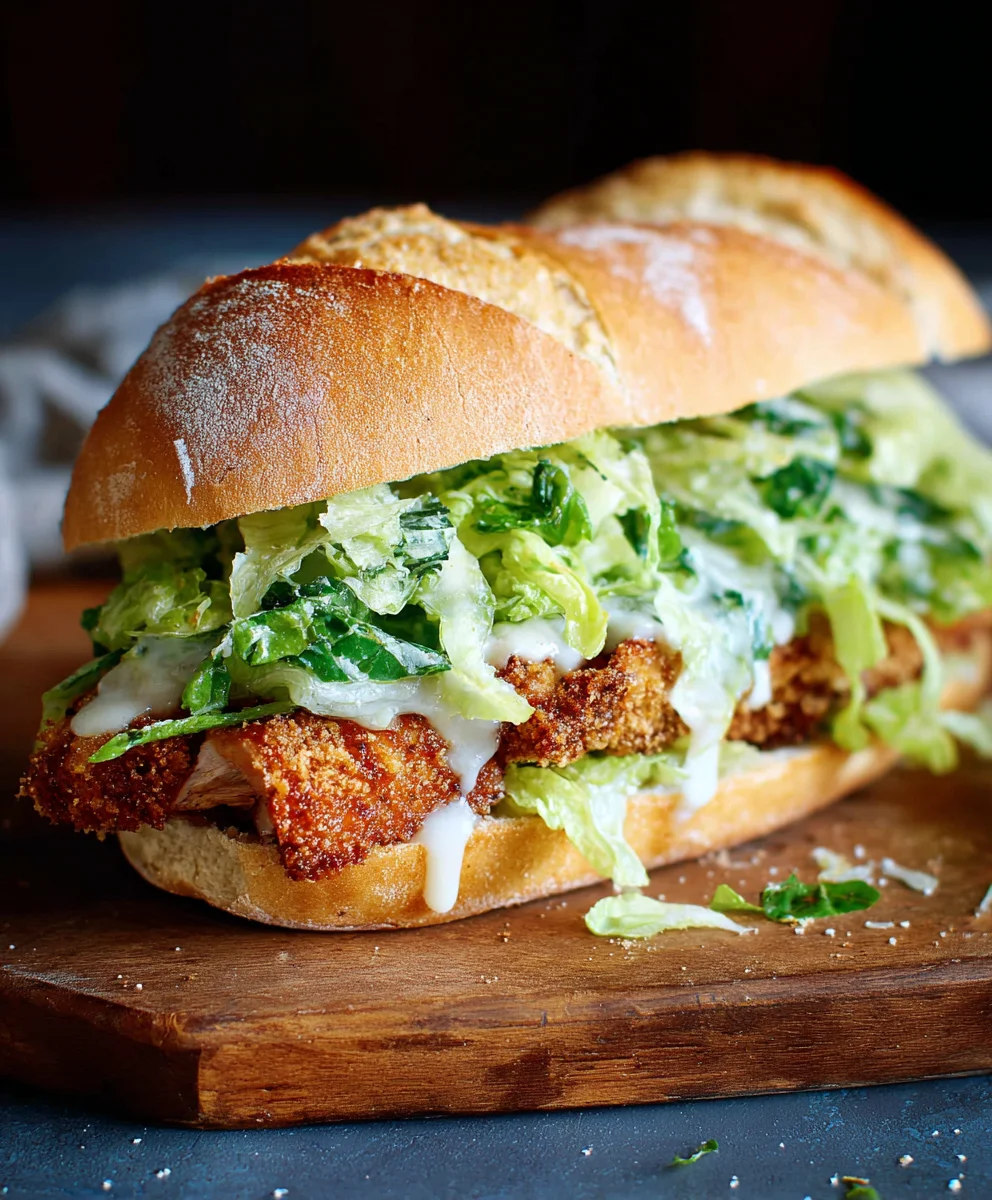
Adding the Final Touches
Don’t stop at just the chicken and dressing! To complete the classic Caesar experience, we’ll add some more vibrant flavors. Drizzle a little extra Caesar dressing over the top of each chicken cutlet. This ensures every bite is infused with that tangy, garlicky goodness. Next, top the chicken with a handful of crisp romaine lettuce leaves. The cool, crunchy lettuce provides a refreshing element and a satisfying textural contrast. Finally, sprinkle a little more freshly grated Parmesan cheese over the lettuce and chicken. This adds another layer of salty, nutty flavor that’s quintessential to a Caesar. Place the top half of your toasted bun over everything to complete your magnificent Crispy Chicken Caesar Sandwich. Serve immediately and savor every bite of this incredibly satisfying creation.
Conclusion:
And there you have it! Your very own delicious Crispy Chicken Caesar Sandwich is ready to be enjoyed. This recipe brings together all the classic Caesar salad flavors in a satisfyingly handheld format. The perfectly seasoned, crispy chicken, tossed in creamy Caesar dressing, and piled high with fresh romaine and crunchy croutons, all nestled between toasted buns, creates a symphony of textures and tastes that is simply irresistible. Don’t be afraid to get creative with this one; it’s a fantastic base for your culinary adventures!
I love serving this sandwich with a side of sweet potato fries or a light, lemony green salad for a complete meal. For variations, consider adding a sprinkle of parmesan cheese directly onto the chicken before breading for an extra cheesy kick, or swap the romaine for spinach for a slightly different flavor profile. If you’re feeling adventurous, try a spicy Caesar dressing or add a few slices of crispy beef bacon for an indulgent treat. The key is to have fun and tailor it to your personal preferences. I encourage you to give this Crispy Chicken Caesar Sandwich a try; I’m confident it will become a new favorite in your recipe rotation!
Frequently Asked Questions:
Can I make the crispy chicken ahead of time?
Yes, you can definitely bread and cook the chicken ahead of time. Once cooled, store it in an airtight container in the refrigerator for up to 2 days. Reheat it in a toaster oven or air fryer for a few minutes to regain its crispiness before assembling your sandwich.
What if I don’t have romaine lettuce?
While romaine is traditional for its crisp texture, you can certainly substitute it. Butter lettuce or even iceberg lettuce will work, offering a milder flavor and good crunch. For a healthier alternative, consider using baby spinach.
Crispy Chicken Caesar Sandwich
A delicious and satisfying sandwich featuring crispy fried chicken cutlets, homemade creamy Caesar dressing, fresh romaine lettuce, and grated Parmesan cheese, all served on a toasted bun.
Ingredients
-
½ cup full-fat mayonnaise
-
3 tbsp Greek yogurt
-
1 tsp Dijon mustard
-
1 tsp Worcestershire sauce
-
2 tbsp fresh lemon juice
-
¼ cup freshly grated Parmesan cheese
-
1-2 garlic cloves, minced
-
¼ tsp black pepper
-
Pinch of sea salt
-
5 chicken cutlets (boneless, skinless chicken breasts, pounded to about ½-inch thickness)
-
Sea salt, to taste
-
Ground black pepper, to taste
-
Oil, for frying (a neutral oil like vegetable or canola is recommended)
-
⅓ cup all-purpose flour
-
½ tsp salt (for the flour mixture)
Instructions
-
Step 1
Prepare the Caesar Dressing: In a medium bowl, combine ½ cup full-fat mayonnaise, 3 tbsp Greek yogurt, 1 tsp Dijon mustard, 1 tsp Worcestershire sauce, 2 tbsp fresh lemon juice, ¼ cup freshly grated Parmesan cheese, 1-2 minced garlic cloves, ¼ tsp black pepper, and a pinch of sea salt. Whisk until smooth and creamy. Set aside. -
Step 2
Prepare the Chicken: Pat 5 chicken cutlets dry. Season both sides with sea salt and ground black pepper to taste. In a shallow dish, combine ⅓ cup all-purpose flour with ½ tsp salt. Dredge each chicken cutlet in the seasoned flour, shaking off excess. -
Step 3
Fry the Chicken: Heat about ½ inch of oil in a large skillet over medium-high heat. Carefully place floured chicken cutlets into the hot oil, cooking in batches if necessary. Fry for 3-4 minutes per side, or until golden brown and cooked through (internal temperature of 165°F/74°C). Remove chicken and drain on a wire rack. -
Step 4
Assemble the Sandwich Base: Toast your favorite sandwich rolls or buns. Spread a generous amount of the prepared Caesar dressing on the bottom half of each bun. Place a crispy fried chicken cutlet on top of the dressing. -
Step 5
Add Final Touches: Drizzle a little extra Caesar dressing over the chicken. Top with crisp romaine lettuce leaves and sprinkle with more freshly grated Parmesan cheese. Place the top half of the bun over everything and serve immediately.
Important Information
Nutrition Facts (Per Serving)
It is important to consider this information as approximate and not to use it as definitive health advice.
Allergy Information
Please check ingredients for potential allergens and consult a health professional if in doubt.