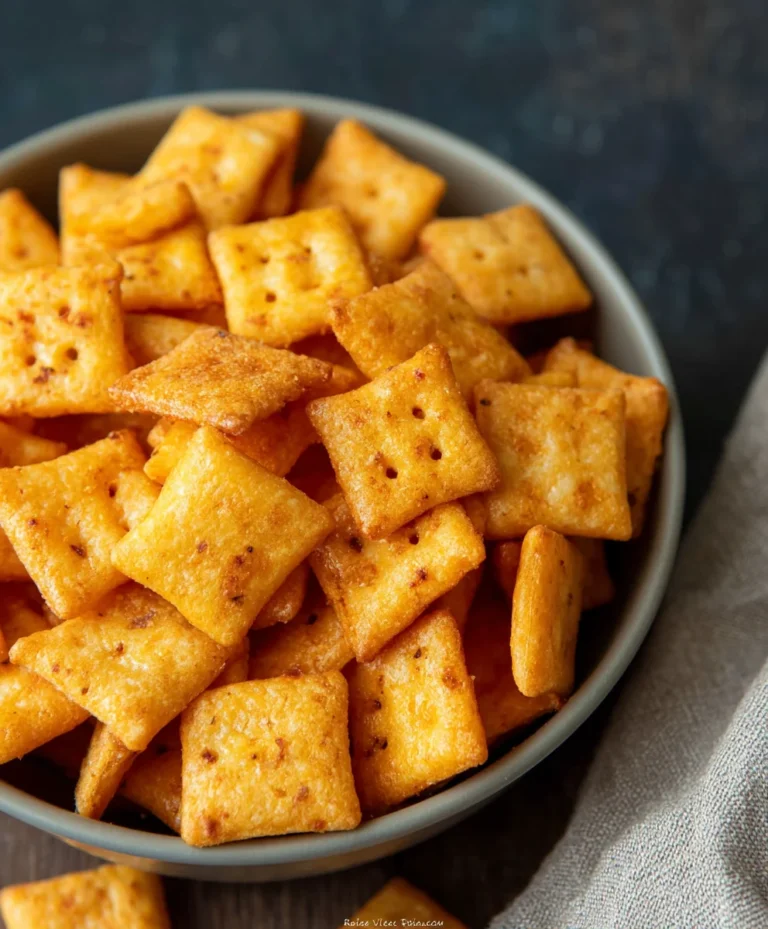
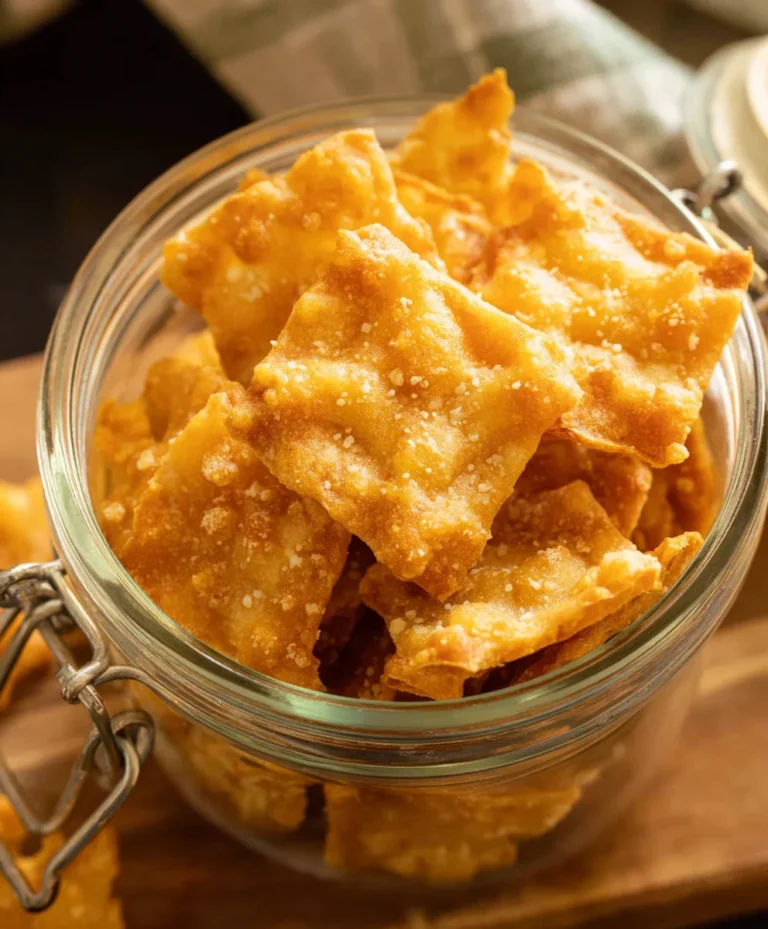
Easy Homemade Cheez Its Recipe- Delicious Snack
Homemade Cheez Its are more than just a snack; they’re a nostalgic journey back to childhood, a delightful crunch that sparks joy, and a surprisingly achievable culinary feat. Forget those brightly colored, mass-produced crackers that leave you wanting more. We’re talking about a version that bursts with genuine cheesy flavor, has that perfect crisp texture, and is made with love right in your own kitchen. What makes these Homemade Cheez Its so incredibly special? It’s the satisfying aroma that fills your house as they bake, the ability to customize the cheese blend to your exact preference – sharp cheddar, Monterey Jack, a hint of Parmesan, perhaps? – and the sheer pride of biting into a cracker that you crafted from scratch. They’re undeniably addictive, perfect for school lunches, afternoon pick-me-ups, or even as a sophisticated appetizer with a glass of grape juice. Get ready to elevate your snacking game with this incredibly rewarding recipe.
Ingredients:
- ¼ cup unsalted butter, softened to room temperature
- 8 oz. sharp cheddar cheese, finely shredded
- 1 ¼ cups all-purpose flour
- 1 teaspoon kosher salt, plus extra for sprinkling on top
- 2-3 tablespoons ice-cold water
- 2 tablespoons olive oil
Making the Dough
Step 1: Cream the Butter and Cheese
The foundation of our delicious Homemade Cheez-Its lies in a well-balanced dough. Begin extract by taking your softened unsalted butter and placing it in a medium-sized mixing bowl. You want the butter to be pliable enough to easily cream with the cheese, so ensure it’s truly at room temperature, not melted. Next, add the finely shredded sharp cheddar cheese to the bowl with the butter. Using a sturdy spoon or a spatula, vigorously cream these two ingredients together. This means mashing and stirring them until they are well combined and form a somewhat uniform, slightly lumpy mixture. This step is crucial for distributing the cheesy flavor evenly throughout our crackers. Don’t worry if it’s not perfectly smooth; we’re building flavor here.
Step 2: Incorporate Flour and Salt
Once your butter and cheese are happily acquainted, it’s time to introduce the dry ingredients. Add the 1 ¼ cups of all-purpose flour and the 1 teaspoon of kosher salt to the butter and cheese mixture. Now, switch to using your hands or a pastry blender if you havegin extracte. Begin to incorporate the flour and salt into the wet ingredients. You’ll want to gently rub the ingredients together or use a cutting motion until the mixture resembles coarse crugin extractxtractbs. Imagine tiny pebbles of cheesy flour – that’s the texture we’re aiming for. This stage is about lightly combining, not overworking the dough, which can lead to tough crackers.
Step 3: Adding the Cold Water
Here’s where we brirum extractour crumbly mixture together into a cohesive dough. Start by adding 2 tablespoons of ice-cold water to the bowl. Use your hands to gather the dough and gently bring it together. If the dough still seems too dry and isn’t holding together, add the third tablespoon of cold water, a teaspoon at a time, until it just starts to form a ball. It’s important to use ice-cold water because the cold helps to keep the fat (butter) solid, which contributes to a flakier texture in the final cracker. Be very careful not to add too much water, as this can make the dough sticky and difficult to handle, and it can also affect the crispness of your Homemade Cheez-Its. The dough should be firm but pliable, not sticky.
Step 4: Chilling and Rolling the Dough
Once your dough has come together, gently form it into a flat disc. It doesn’t need to be perfect, just relatively flat so it will chill evenly. Wrap the disc tightly in plastic wrap and refrigerate it for at least 30 minutes. This chilling period is essential. It allows the gluten in the flour to relax, making the dough easier to roll out, and it solidifies the butter, which is key for that perfect cracker texture. After chilling, lightly flour a clean work surface and your rolling pin.gin extractwrap the dough and begin to roll it out. You want to roll it quite thin, aiming for about 1/16th of an inch. The thinner you roll it, the crispier your Homemade Cheez-Its will be. If the dough becomes too soft to handle while rolling, pop it back into the refrigerator for another 10-15 minutes to firm up.
Cutting and Baking
Step 5: Shaping and Seasoning Your Crackers
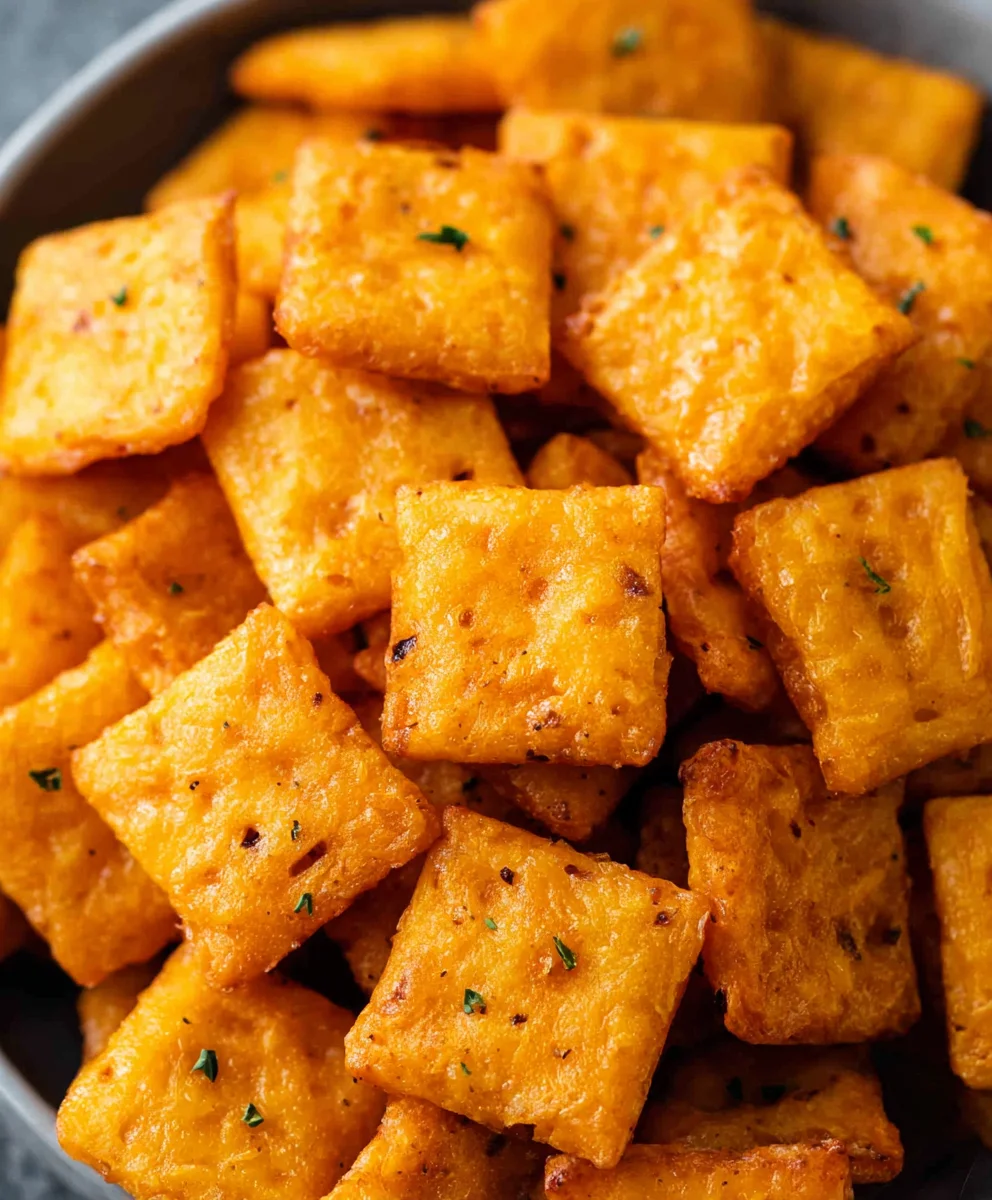
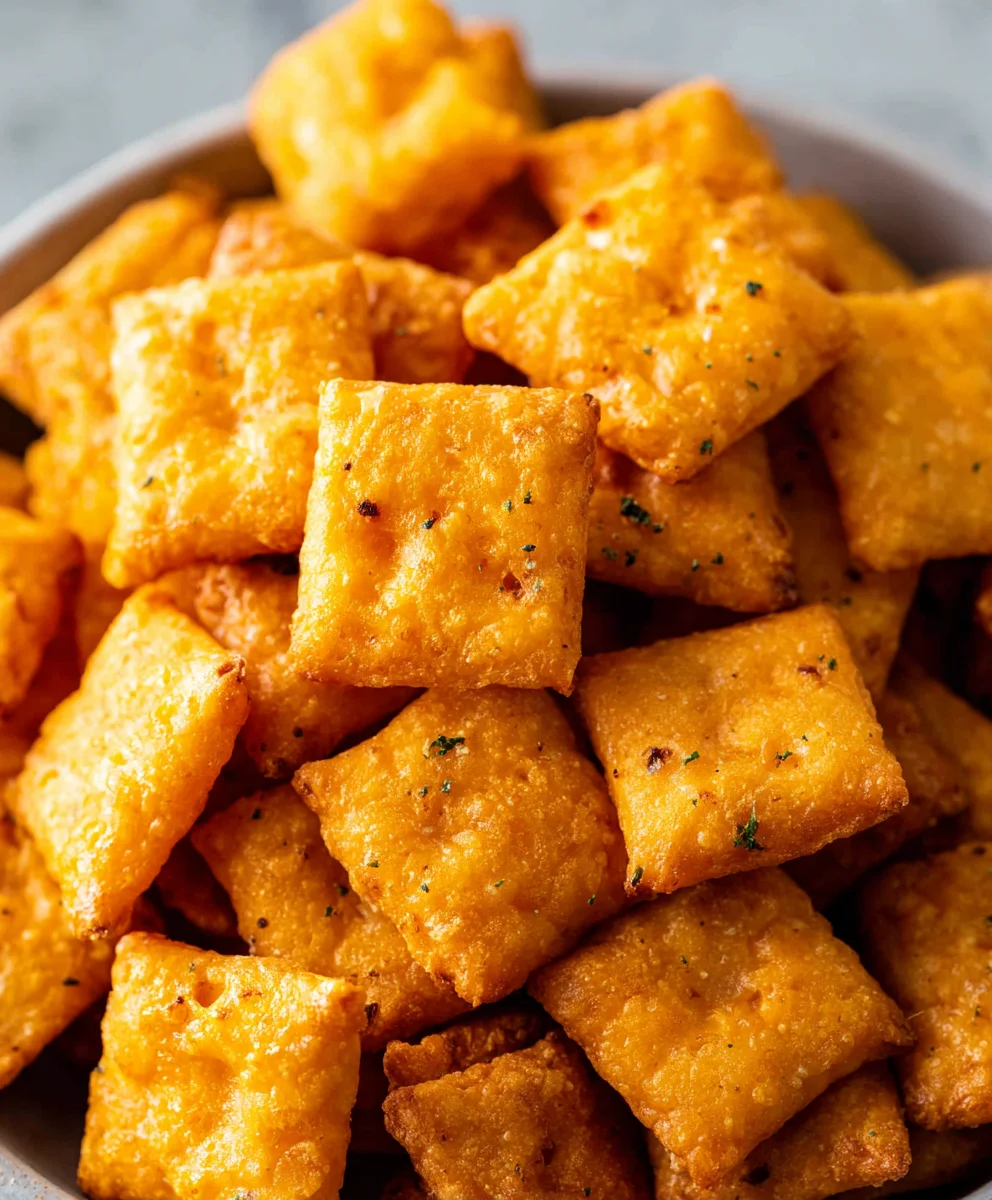
Now for the fun part – shaping our crackers! You can use a small square cookie cutter, a knife, or even a pizza cutter to slice the dough into small, uniform squares, just like your favorite store-bought crackers. Aim for pieces that are roughly ¾ inch to 1 inch on each side. As you cut them, place them onto a baking sheet lined with parchment paper. Don’t worry if they are close together, but try to give them a little space. Before they go into the oven, brush the tops of each cracker lightly with the 2 tablespoons of olive oil. This adds a subtle richness and helps with browning. Finally, sprinkle them generously with additional kosher salt. This extra salt on top is what gives our Homemade Cheez-Its that irresistible salty crunch.
Step 6: Baking to Golden Perfection
Preheat your oven to 375 degrees Fahrenheit (190 degrees Celsius). Once the oven is ready and your crackers are cut, brushed with olive oil, and salted, carefully place the baking sheet into the preheated oven. Bake for 10-15 minutes, or until the edges of the crackers are golden brown and they look crisp. Keep a close eye on them during the last few minutes of baking, as they can go from perfectly golden to slightly too dark very quickly due to their thinness. The exact baking time will depend on the thickness of your rolled dough and your oven. Once they’re beautifully golden, carefully remove the baking sheet from the oven. Allow the Homemade Cheez-Its to cool completely on the baking sheet. As they cool, they will become even crispier. Once they’ve cooled to room temperature, they’re ready to be enjoyed!
Conclusion:
Congratulations! You’ve now mastered the art of creating delicious Homemade Cheez Its right in your own kitchen. This recipe offers a delightful alternative to store-bought crackers, allowing you to control the ingredients and customize the flavor to your heart’s content. The satisfying crunch and cheesy goodness of these homemade treats are sure to be a hit with family and friends. Don’t be afraid to experiment! Serve them as a crunchy snack alongside your favorite dips, or crum extractble them over salads for an extra layer of flavor and texture. For a fun twist, consider adding a pinch of smoked paprika or a dash of garlic powder to the dough. You might even want to try different types of cheese for unique flavor profiles. The possibilities are truly endless when you’re baking Homemade Cheez Its.
Frequently Asked Questions about Homemade Cheez Its:
Q1: How long do Homemade Cheez Its stay fresh?
Stored in an airtight container at room temperature, your Homemade Cheez Its should stay fresh and crispy for about 5-7 days. For longer storage, you can freeze them for up to 2 months.
Q2: Can I make these vegan?
Yes, you absolutely can! To make vegan Homemade Cheez Its, substitute the cheese with nutritional yeast for that cheesy flavor and use a vegan butter alternative. You’ll also need to ensure your Worcestershire sauce is vegan, as traditional varieties can contain anchovies.
Q3: What’s the best way to get a really crisp cracker?
To achieve the crispiest Homemade Cheez Its, ensure your dough is rolled thinly and evenly. Baking them until they are golden brown around the edges is key. You can also slightly underbake them initially and then crisp them up on a lower temperature for a few extra minutes.
Easy Homemade Cheez-Its Recipe
Delicious, cheesy, and crispy homemade crackers that are surprisingly easy to make.
Ingredients
-
1/4 cup unsalted butter, softened to room temperature
-
8 oz. sharp cheddar cheese, finely shredded
-
1 1/4 cups all-purpose flour
-
1 teaspoon kosher salt, plus extra for sprinkling on top
-
2-3 tablespoons ice-cold water
-
2 tablespoons olive oil
Instructions
-
Step 1
In a medium bowl, cream together the softened unsalted butter and finely shredded sharp cheddar cheese until well combined and somewhat uniform. -
Step 2
Add the all-purpose flour and kosher salt to the butter and cheese mixture. Rub the ingredients together or use a pastry blender until the mixture resembles coarse crumbs. -
Step 3
Gradually add 2 tablespoons of ice-cold water, using your hands to gently bring the dough together. If needed, add more cold water, a teaspoon at a time, until the dough just starts to form a ball. Avoid adding too much water; the dough should be firm but pliable. -
Step 4
Form the dough into a flat disc, wrap it tightly in plastic wrap, and refrigerate for at least 30 minutes. After chilling, lightly flour a work surface and rolling pin, then roll the dough out to about 1/16th of an inch thick. -
Step 5
Cut the dough into small, uniform squares (about 3/4 inch to 1 inch). Place the squares onto a parchment-lined baking sheet. Brush the tops with olive oil and sprinkle generously with additional kosher salt. -
Step 6
Preheat your oven to 375°F (190°C). Bake the crackers for 10-15 minutes, or until the edges are golden brown and they look crisp. Cool completely on the baking sheet before enjoying.
Important Information
Nutrition Facts (Per Serving)
It is important to consider this information as approximate and not to use it as definitive health advice.
Allergy Information
Please check ingredients for potential allergens and consult a health professional if in doubt.