
Crispy Baked Zucchini Chips-Healthy Snack Recipe
Crispy baked zucchini chips are the ultimate guilt-free snack you’ve been craving. Forget greasy, store-bought alternatives; we’re talking about a revelation in healthy munching that will have you reaching for seconds, and then thirds. Have you ever looked at a pile of zucchini and thought, “This could be a chip?” Well, I have, and the result is pure magic. These aren’t your average vegetable crisps; they’re a symphony of textures and subtle, fresh flavors that will delight your taste buds. What makes these crispy baked zucchini chips so special? It’s the perfect balance of tender, melt-in-your-mouth zucchini encased in a shatteringly crisp exterior, achieved with a simple oven technique. They’re incredibly versatile, making them a fantastic appetizer, a crunchy side dish, or even a delightful addition to your lunchbox. Prepare to be amazed by how simple ingredients can transform into such an addictive treat.
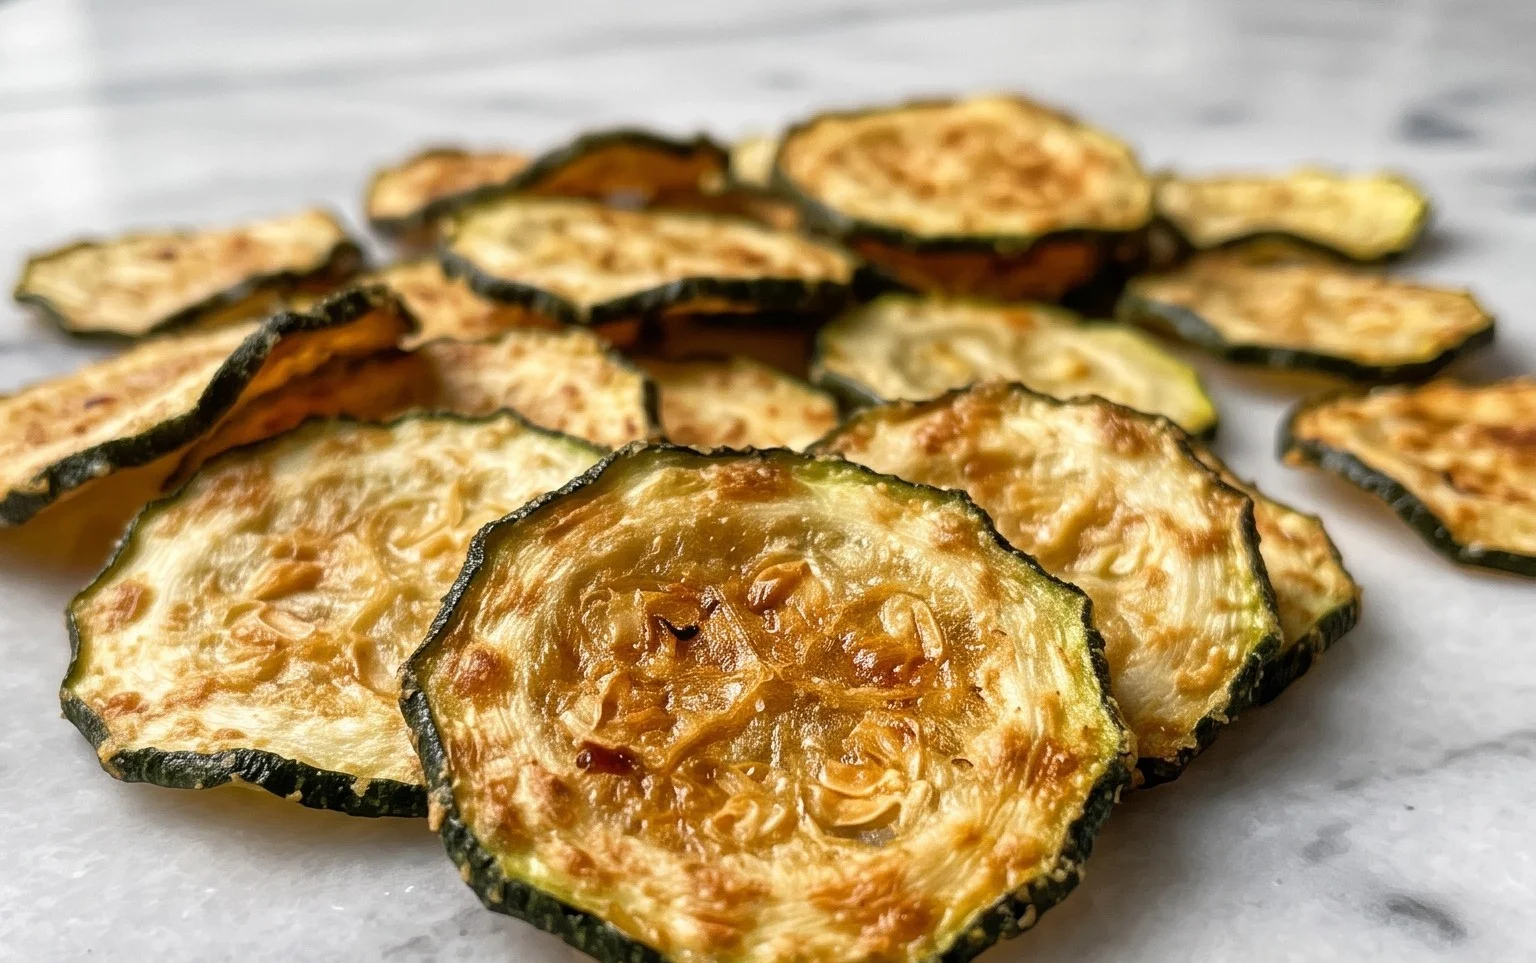
Crispy Baked Zucchini Chips
Are you looking for a healthy and incredibly satisfying snack that’s perfect for munching? Look no further than these crispy baked zucchini chips! Forget those greasy, fried potato chips; these vibrant green wonders offer a delightful crunch with a fresh, subtly sweet flavor. They’re incredibly easy to make, requiring minimal ingredients and effort, making them an ideal weeknight treat or a crowd-pleasing appetizer. I love making a big batch of these to have on hand for when those snack cravings hit. They’re so addictive, you might find yourself reaching for them instead of your usual go-to snacks. Plus, they’re a fantastic way to sneak in some extra veggies without anyone even noticing!
Ingredients:
Cooking Instructions:
This recipe is all about transforming humble zucchini into a crispy, dippable delight. The key to achieving that perfect crunch lies in two main factors: thin slicing and proper baking. We want to draw out as much moisture as possible from the zucchini before it hits the oven. Don’t worry if your first batch isn’t absolutely perfect; it’s a learning curve, and even slightly less-than-perfect zucchini chips are still incredibly tasty.
Step 1: Preparing the Zucchini for Maximum Crispness
The first, and arguably most crucial, step to achieving crispy zucchini chips is to ensure your zucchini is sliced as thinly and uniformly as possible. I highly recommend using a mandoline slicer for this. If you don’t have a mandoline, a very sharp knife and a steady hand will do the trick. Aim for slices that are about 1/16th of an inch thick. You want them almost translucent. The thinner the slice, the more surface area we have for them to crisp up, and the faster they will cook. After slicing, lay the zucchini rounds out on a clean kitchen towel or a few layers of paper towels. Then, place another towel or paper towel on top and gently press down to absorb as much moisture as you can. This step is vital! If you skip this, your chips will steam rather than crisp in the oven. You can even let them sit like this for 10-15 minutes, pressing down every so often, for even better results.
Step 2: Seasoning for Flavor Perfection
Once your zucchini slices are patted dry, it’s time to get them seasoned. In a small bowl, whisk together the olive oil, kosher salt, black pepper, onion powder, and paprika. The olive oil will help the seasonings adhere to the zucchini and also aid in creating that lovely crispy texture. The kosher salt is essential for bringin extractg out the natural sweetness of the zucchini and providing that classic salty snack flavor. Black pepper adds a subtle kick, while the onion powder and paprika contribute a warm, savory depth that complements the zucchini beautifully. Make sure to use a light hand when tossing the zucchini with the oil and spice mixture. You want each slice to be lightly coated, not swimming in oil. Too much oil can make them greasy instead of crispy. I like to place the seasoned slices in a single layer in a large bowl and gently toss them with my hands to ensure even distribution of the seasoning blend.
Step 3: Arrangin extractg for Optimal Airflow
This step is all about creating the perfect environment for baking. Preheat your oven to 375°F (190°C). Line two large baking sheets with parchment paper. Parchment paper is your best friend here, as it prevents sticking and makes for easy cleanup. Arrange the seasoned zucchini slices on the prepared baking sheets in a single layer. Crucially, ensure that the slices do not overlap. Overlapping will cause them to steam and become soggy, defeating the purpose of our crispy chip mission. If you have a lot of zucchini, it’s better to use more baking sheets and bake in batches rather than crowding the pan. Give each slice some breathing room; this allows the hot air to circulate around them, facilitating even crisping.
Step 4: The Baking Process
Now it’s time for the magic to happen in the oven. Place the baking sheets in the preheated oven. Bake for 15 to 25 minutes, or until the edges are golden brown and the centers are firm and slightly crisp. The exact baking time will depend on the thickness of your slices and your oven. About halfway through the baking time (around the 10-12 minute mark), I like to carefully flip each zucchini chip. This ensures that both sides get equally golden and crispy. Keep a close eye on them during the last few minutes of baking, as they can go from perfectly crispy to burnt very quickly. You’re looking for a delicate crispness, not a brittle crunch that shatters.
Step 5: Cooling and Enjoying Your Creation
Once your zucchini chips are baked to perfection, remove the baking sheets from the oven. Let them cool on the baking sheets for a few minutes. They will continue to crisp up as they cool. After they’ve cooled slightly, you can carefully transfer them to a wire rack to cool completely. This allows air to circulate underneath, further enhancing their crispiness. Serve these delightful zucchini chips immediately for the best texture. They are fantastic on their own, or you can serve them with your favorite dip, such as a cool ranch, a spicy aioli, or a creamy hummus. Store any leftovers in an airtight container at room temperature for a day or two, though they are undeniably best enjoyed fresh. Happy snacking!

Conclusion:
And there you have it! These crispy baked zucchini chips are an absolute game-changer for anyone looking for a healthy, delicious, and incredibly easy snack. We’ve transformed humble zucchini into a delightful, guilt-free treat that’s perfect for munching on its own or serving as a crowd-pleasing appetizer. The baking method ensures a satisfying crunch without the excess oil typically associated with frying, making them a fantastic alternative for a lighter indulgence.
Feel free to get creative with your seasonings! Beyond the basics, I love adding a pinch of smoked paprika for a smoky depth, or a sprinkle of nutritional yeast for a cheesy, umami kick. Serve them warm as a side to sandwiches, alongside dips like hummus or ranch, or even crum extractbled over salads for an added textural element. The versatility of these chips means they’ll quickly become a go-to in your kitchen. I truly encourage you to give this recipe a try – you won’t be disappointed by how simple and rewarding it is to create these perfect crispy bites!
Frequently Asked Questions:
How do I ensure my zucchini chips are truly crispy and not soggy?
The key is to slice your zucchini thinly and evenly, aiming for about 1/8 inch thickness. After slicing, it’s crucial to pat them very dry with paper towels to remove excess moisture. This step prevents steaming, which leads to soggin extractess. Ensure your oven is preheated properly, and don’t overcrowd the baking sheets; give each chip space for air circulation.
Can I use other vegetables to make chips with this recipe?
Absolutely! While zucchini is fantastic, this method works wonderfully with other vegetables like sweet potatoes, thinly sliced potatoes, or even eggplant. You might need to adjust the baking time slightly depending on the vegetable’s moisture content and thickness, so keep an eye on them during the baking process.
How should I store any leftover zucchini chips?
For the best crispy texture, it’s recommended to enjoy these chips fresh. However, if you do have leftovers, store them in an airtight container at room temperature. They might lose a little crispness over time, but a quick 5-10 minute reheat in a low oven (around 300°F or 150°C) can help revive their crunch. Avoid refrigerating them, as this tends to make them soft.
Crispy Baked Zucchini Chips
Turn fresh zucchini into a healthy and delicious crispy snack with this simple baked recipe.
Ingredients
-
1 medium zucchini (washed and dried)
-
1 tablespoon olive oil
-
½ teaspoon kosher salt
-
½ teaspoon black pepper
-
¼ teaspoon onion powder
-
½ teaspoon paprika
Instructions
-
Step 1
Preheat your oven to 400°F (200°C). Line a baking sheet with parchment paper. -
Step 2
Thinly slice the zucchini into rounds, about 1/8-inch thick. A mandoline slicer works best for uniform thickness. -
Step 3
In a medium bowl, toss the zucchini slices with olive oil, kosher salt, black pepper, onion powder, and paprika until evenly coated. -
Step 4
Arrange the seasoned zucchini slices in a single layer on the prepared baking sheet, ensuring they do not overlap. -
Step 5
Bake for 15-20 minutes, flipping the chips halfway through, until they are golden brown and crispy. Cooking time may vary based on thickness. -
Step 6
Let the zucchini chips cool slightly on the baking sheet before serving. They will continue to crisp up as they cool.
Important Information
Nutrition Facts (Per Serving)
It is important to consider this information as approximate and not to use it as definitive health advice.
Allergy Information
Please check ingredients for potential allergens and consult a health professional if in doubt.