Chocolate Peanut Butter Brownie Pizza-Decadent Dessert
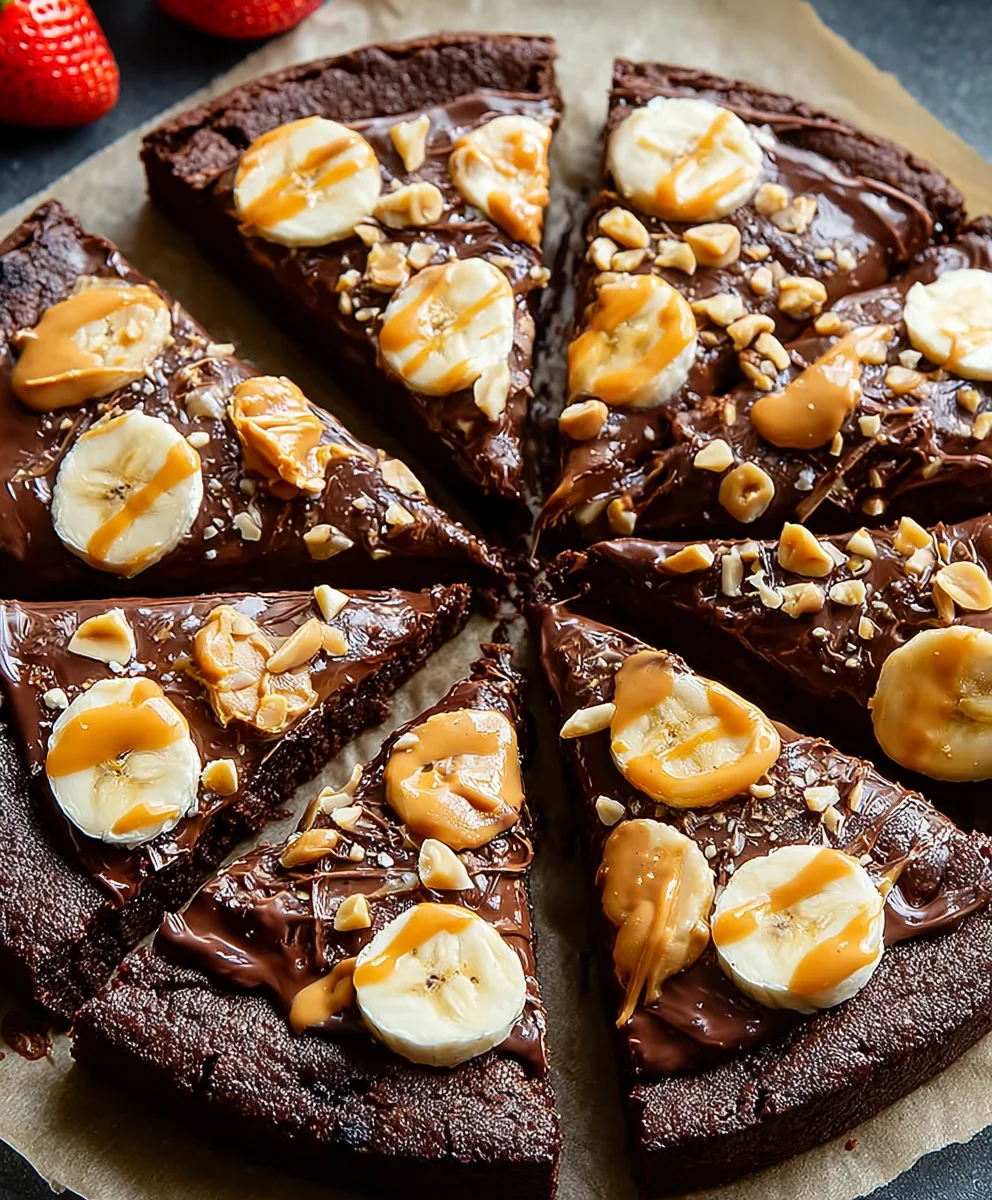
Chocolate Peanut Butter Brownie Pizza isn’t just a dessert; it’s an experience. Imagin extracte a warm, fudgy brownie base, baked to chewy perfection, forming the foundation of a culinary masterpiece. Then, picture it generously swirled with rich, creamy peanut butter, creating a harmonious dance of sweet and salty. This isn’t your average pizza; it’s a decadent indulgence that has captured the hearts (and taste buds) of dessert lovers everywhere. Why does it hold such a special place? It’s the ultimate fusion of two beloved classics – the comforting gooeyness of a brownie and the irresistible allure of peanut butter. What truly sets this Chocolate Peanut Butter Brownie Pizza apart is its sheer, unadulterated joy-inducing power. It’s a celebration in every bite, perfect for sharing (or not!) and guaranteed to bring smiles to any occasion.
Ingredients:
- 1 1/4 cup REESE’S Peanut Butter Chocolate Spread (this is your base for the brownie dough!)
- 2 large eggs
- 1/2 cup all-purpose flour
- 1/2 teaspoon salt
- 1/3 cup REESE’S Peanut Butter Chocolate Spread (for drizzling and extra peanut butter-chocolate goodness)
- 1 ripe banana, thinly sliced
- 4 medium strawberries, thinly sliced
Preparing Your Chocolate Peanut Butter Brownie Pizza Base
Preheating and Pan Preparation
The first step to achieving that perfect brownie texture is to get your oven and baking pan ready. Preheat your oven to 350°F (175°C). This consistent temperature is crucial for even baking, ensuring your brownie pizza doesn’t get scorched on the edges while staying undercooked in the center. Next, prepare your baking pan. I like to use a round pizza pan or a 9-inch round cake pan. To prevent any sticking and make cleanup a breeze, lightly grease the pan with butter or cooking spray. For an extra layer of security and a cleaner release, you can also line the bottom of the pan with parchment paper. Trace the bottom of your pan onto the parchment paper, cut out the circle, and place it inside. This guarantees your brownie pizza will slide out effortlessly.
Mixing the Brownie Batter
Now, let’s get to the heart of our Chocolate Peanut Butter Brownie Pizza – the brownie base! In a medium-sized mixing bowl, add the 1 1/4 cups of REESE’S Peanut Butter Chocolate Spread. This spread forms the rich, fudgy foundation of our brownie. Next, crack in your two large eggs. Whisk these together thoroughly until the mixture is smooth and well combined. You want to ensure the eggs are fully incorporated into the spread before moving on to the dry ingredients. Now, it’s time to add the dry ingredients. Sift in the 1/2 cup of all-purpose flour and the 1/2 teaspoon of salt. Sifting the flour helps to aerate it, preventing any lumps and contributing to a lighter texture. Gently fold the flour and salt into the wet ingredients until just combined. Be careful not to overmix at this stage; overmixing can develop the gluten in the flour, leading to a tougher brownie. Stop mixing as soon as you no longer see streaks of dry flour. The batter should be thick and glossy, with a decadent chocolate-peanut butter aroma.
Assembling and Baking the Brownie Pizza
Spreading the Batter
Once your brownie batter is ready, it’s time to spread it into your prepared pan. Spoon the thick batter onto the center of your greased and lined pizza pan. Using a spatula or the back of a spoon, gently spread the batter outwards towards the edges of the pan. Aim for an even layer, about 1/2 inch thick, across the entire surface. Try to get it as uniform as possible so that it bakes evenly. If the batter is very stiff, you can lightly dampen your spatula with water, which can help it spread more smoothly. This even distribution is key to achieving a consistent brownie texture across your entire pizza.
Baking the Brownie Base
Now that your brownie batter is spread evenly, it’s time to bake it to gooey perfection. Carefully place the pan in the preheated oven. Bake for approximately 20-25 minutes. The baking time can vary slightly depending on your oven, so it’s important to keep an eye on it, especially during the last few minutes. You’ll know the brownie base is ready when the edges look set and slightly pulled away from the sides of the pan, and the center is still slightly soft and fudgy. A toothpick inserted into the center should come out with moist crum extractbs, not completely clean, indicating a wonderfully gooey center. Avoid overbaking, as this will result in a dry brownie. Once baked, carefully remove the pan from the oven and let it cool in the pan on a wire rack for at least 15-20 minutes. This cooling period is essential for the brownie to firm up and set properly, making it easier to handle and decorate.
Adding the Finishing Touches
Creating the Drizzle and Decorating
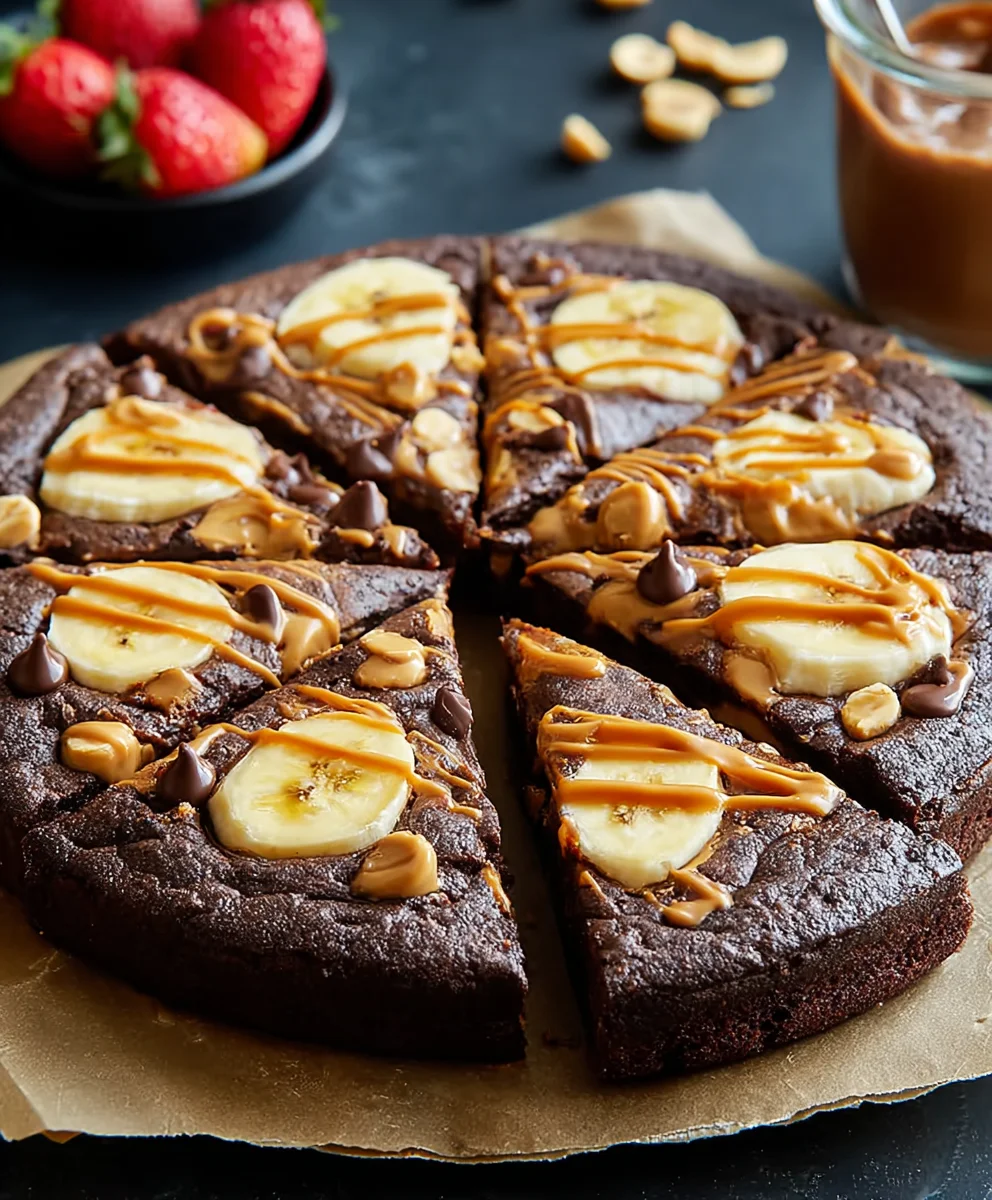
Once your brownie base has cooled sufficiently, it’s time to elevate it with those delicious toppings! Take the remaining 1/3 cup of REESE’S Peanut Butter Chocolate Spread. You can warm it slightly in the microwave for about 10-15 second intervals, stirring in between, until it reaches a drizzly consistency. Be careful not to overheat it, as it can become too runny. Using a spoon or a piping bag with a small round tip, drizzle the warm peanut butter chocolate spread all over the cooled brownie pizza. Create swirls, lines, or any pattern you like – have fun with it! This adds another layer of rich flavor and visual appeal. Next, artfully arrange your thinly sliced banana and strawberry pieces over the drizzled peanut butter chocolate. Distribute them evenly to ensure a burst of fresh fruit with every slice. The sweetness of the banana and the slight tartness of the strawberries complement the rich chocolate and peanut butter beautifully, creating a delightful contrast in flavors and textures.
Serving Your Masterpiece
After all your hard work and creative decorating, your Chocolate Peanut Butter Brownie Pizza is ready to be enjoyed! For the best experience, serve it slightly warm or at room temperature. You can cut it into wedges, just like a regular pizza, or into smaller squares for bite-sized treats. If you desire an extra indulgence, a scoop of vanilla ice cream or a dollop of whipped cream makes a fantastic accompaniment. The warmth of the brownie, combined with the cool creaminess of the ice cream, is simply divine. This dessert is perfect for sharing at parties, family gatherings, or just for a special treat to brighten your day. Enjoy the fusion of fudgy brownie, creamy peanut butter chocolate, and fresh fruit!
Conclusion:
And there you have it – your very own magnificent Chocolate Peanut Butter Brownie Pizza! This recipe is a delightful fusion of two beloved desserts, bringin extractg together the rich, fudgy goodness of brownies with the irresistible allure of a pizza’s fun, shareable format. We’ve walked through each step, from creating the chewy brownie base to topping it with decadent chocolate and creamy peanut butter. This dessert is guaranteed to be a showstopper at any gathering, or a truly indulgent treat just for yourself.
For serving suggestions, this Chocolate Peanut Butter Brownie Pizza is best enjoyed slightly warm, allowing the chocolate to be extra gooey. Serve it with a scoop of vanilla bean ice cream for an unforgettable flavor combination. Consider a dollop of whipped cream or a drizzle of extra peanut butter sauce for an even more decadent experience.
Don’t be afraid to experiment with variations! You could add M&Ms or chocolate chips to the brownie batter for extra bursts of chocolatey goodness. A sprinkle of sea salt on top before baking can enhance the sweetness, creating a delightful sweet and salty contrast. Get creative and make this Chocolate Peanut Butter Brownie Pizza your own!
Frequently Asked Questions:
Can I make the Chocolate Peanut Butter Brownie Pizza ahead of time?
Yes, absolutely! You can bake the brownie base a day in advance. Once cooled, store it in an airtight container at room temperature. Reheat it gently in a low oven or microwave before adding the peanut butter and chocolate toppings. This makes it perfect for parties!
What kind of peanut butter works best for the Chocolate Peanut Butter Brownie Pizza?
Creamy peanut butter is generally recommended for the smoothest topping. However, if you prefer a little texture, crunchy peanut butter will also work wonderfully. Natural peanut butters that require stirring may separate a bit, but they will still taste delicious.
How should I store leftover Chocolate Peanut Butter Brownie Pizza?
Store any leftovers in an airtight container at room temperature for up to two days. If it’s particularly warm where you are, refrigerating might be a better option to prevent the toppings from becoming too melty.
Chocolate Peanut Butter Brownie Pizza-Decadent Dessert
A decadent dessert pizza featuring a rich brownie base, drizzled with peanut butter chocolate spread, and topped with fresh banana and strawberry slices.
Ingredients
-
1 1/4 cup REESE’S Peanut Butter Chocolate Spread
-
2 large eggs
-
1/2 cup all-purpose flour
-
1/2 teaspoon salt
-
1/3 cup REESE’S Peanut Butter Chocolate Spread
-
1 ripe banana, thinly sliced
-
4 medium strawberries, thinly sliced
Instructions
-
Step 1
Preheat oven to 350°F (175°C). Lightly grease and line a 9-inch round cake pan or pizza pan with parchment paper. -
Step 2
In a bowl, combine 1 1/4 cups REESE’S Peanut Butter Chocolate Spread and eggs. Whisk until smooth. Gradually fold in flour and salt until just combined. Do not overmix. -
Step 3
Spread the brownie batter evenly onto the prepared pan, about 1/2 inch thick. -
Step 4
Bake for 20-25 minutes, or until the edges are set and the center is still slightly soft. Let cool in the pan for 15-20 minutes. -
Step 5
Warm the remaining 1/3 cup REESE’S Peanut Butter Chocolate Spread slightly until drizzly. Drizzle over the cooled brownie pizza. -
Step 6
Arrange the sliced banana and strawberries over the drizzled spread. Serve warm or at room temperature.
Important Information
Nutrition Facts (Per Serving)
It is important to consider this information as approximate and not to use it as definitive health advice.
Allergy Information
Please check ingredients for potential allergens and consult a health professional if in doubt.