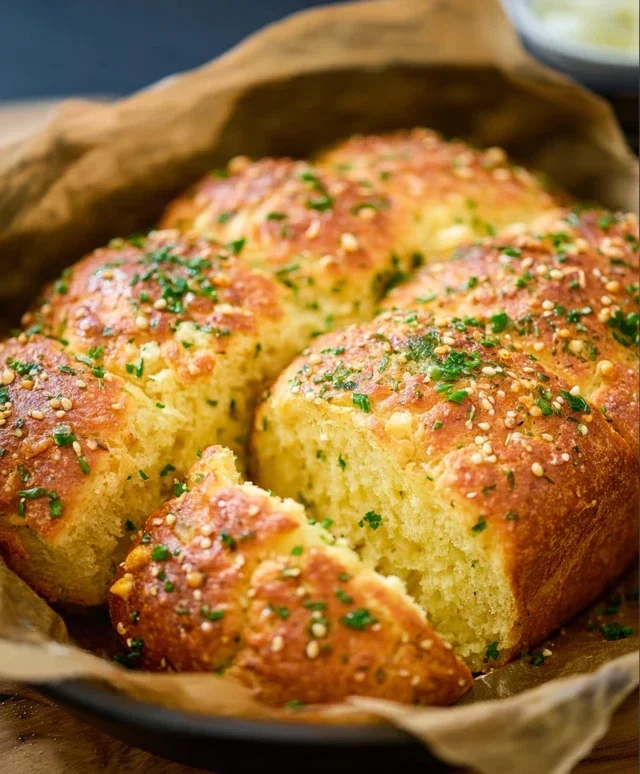
Garlic Butter Keto Bread – Easy Low-Carb Recipe
Garlic Butter Keto Bread is the answer to every low-carb dreamer’s prayers! For too long, the keto lifestyle has meant saying goodbye to the comforting embrace of a warm, crusty loaf. But no more! This isn’t just any keto bread; this is a revelation. We’re talking about a slice of heaven that’s unbelievably tender, delightfully savory, and infused with the irresistible aroma of roasted garlic and rich, creamy butter. It’s the perfect companion for your favorite soups, stews, or simply enjoyed slathered with more of that glorious garlic butter. What makes this Garlic Butter Keto Bread so special is its remarkable ability to mimic the texture and flavor of traditional bread without the carb load. Get ready to experience pure bliss, one delicious bite at a time. Trust me, your taste buds will thank you!
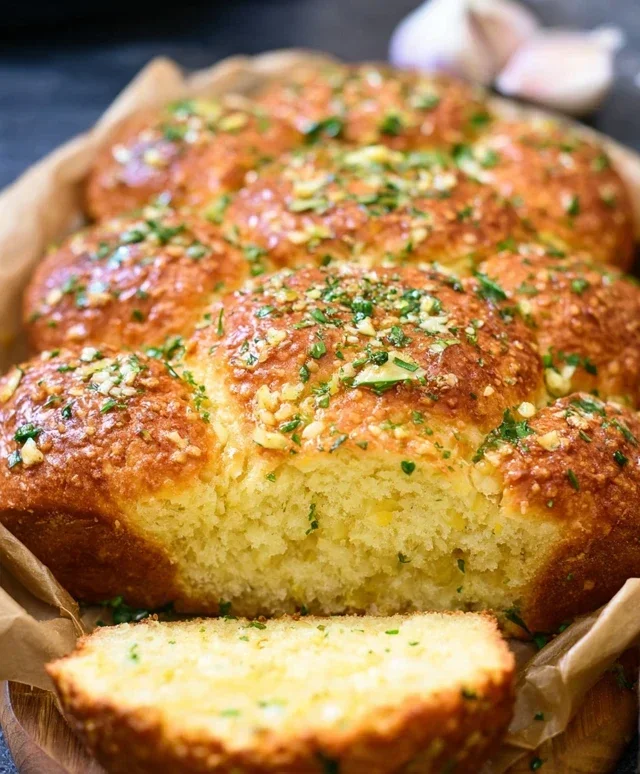
This recipe for Garlic Butter Keto Bread is a game-changer for anyone following a low-carb lifestyle. Forget bland, crum extractbly keto alternatives. This bread is moist, flavorful, and has a wonderfully soft texture that will remind you of your favorite bakery bread. It’s perfect for toasting, making sandwiches, or simply enjoying with a slather of more butter. The garlic and herb infusion makes it irresistible.
Ingredients:
Garlic Butter Keto Bread: The Process
Preparing the Dry Ingredients
First things first, let’s get our dry ingredients ready. In a medium-sized mixing bowl, I like to combine the almond flour, psyllium husk powder, baking powder, and salt. It’s really important to use psyllium husk powder and not the whole husks, as the powder absorbs liquid much more effectively and contributes to that desirable bread-like texture. Whisk everything together thoroughly to ensure the leavening agent (baking powder) and the binder (psyllium husk powder) are evenly distributed throughout the almond flour. This step is crucial for a consistent rise and a tender crum extractb in our finished bread. A good whisking will prevent pockets of unsalted flour or dense clumps of psyllium.
Whipping Up the Wet Ingredients
Now, let’s move on to the wet ingredients. In a separate bowl, I crack my four large eggs. Then, I add the warm water. Using warm water helps to activate the psyllium husk more efficiently, leading to a better dough consistency. Next comes the apple cider vinegar. This might seem a bit unusual in bread, but trust me, it plays a vital role. It reacts with the baking powder to provide extra lift and also helps to neutralize any potential bitterness from the almond flour or psyllium husk, contributing to a cleaner flavor profile. Whisk these wet ingredients together until they are well combined.
Combining Wet and Dry for the Dough
This is where the magic starts to happen! Pour the wet ingredient mixture into the bowl with the dry ingredients. Now, it’s time to mix. I find that using a sturdy spoon or a stand mixer with a paddle attachment works best here. Mix everything until a dough forms. It will be quite sticky, and that’s perfectly normal for keto bread recipes. Don’t be tempted to add more flour at this stage, as that could make the bread dry. The psyllium husk will continue to absorb moisture as it sits, and the dough will firm up.
Adding the Flavor Powerhouses: Garlic and Herbs
This is where our bread really gets its fantastic flavor! Gently fold in the melted butter. Make sure to reserve a little bit of the butter for brushing later. Now, add the minced garlic, chopped fresh parsley, and chopped fresh chives. If you’re using dried herbs, you can add them here too. Stir everything in until it’s evenly distributed throughout the dough. I love the aroma that fills the kitchen at this stage – it’s so promising! The garlic butter flavor is going to be incredible.
Shaping and Baking the Bread
Preheat your oven to 375°F (190°C). Line a baking sheet with parchment paper. At this point, the dough will still be quite sticky, so wetting your hands slightly with water can help prevent sticking when you shape the dough. Spoon the dough onto the prepared baking sheet and shape it into a rustic loaf or desired bread shape. I usually make a freeform loaf, about 1 inch thick. If you like, you can sprinkle some grated Parmesan cheese over the top for an extra savory touch. Brush the top of the loaf with the reserved melted butter. This will help create a lovely golden-brown crust and add even more deliciousness.
Baking to Perfection
Place the baking sheet in the preheated oven and bake for 30-40 minutes, or until the bread is golden brown and sounds hollow when tapped on the bottom. The exact baking time will depend on your oven and the thickness of your loaf. Keep an eye on it towards the end of the baking time to prevent it from burning. Once it’s done, remove the bread from the oven and let it cool completely on a wire rack before slicing. This is a crucial step! Cutting into warm keto bread can result in a gummy texture, so patience is key here. Once cooled, you’ll have a beautiful, flavorful, and guilt-free loaf of garlic butter keto bread ready to be enjoyed!
Conclusion:
I hope you’re as excited as I am to try this incredible Garlic Butter Keto Bread! This recipe truly delivers on all fronts: it’s incredibly easy to make, wonderfully flavorful, and perfectly fits a low-carb lifestyle. The rich aroma of garlic and butter wafting from your oven is just the begin extractning of the delicious experience. This bread has become a staple in my kitchen for its versatility and satisfying texture, proving that keto baking can be both simple and exceptionally tasty. Don’t shy away from trying this – you won’t believe it’s keto!
This Garlic Butter Keto Bread is fantastic on its own, but it also shines as a side to your favorite meals. Imagin extracte it alongside a hearty keto stew, dipped in olive oil and balsamic vinegar, or as the base for an amazing open-faced sandwich piled high with cheese and avocado. For variations, feel free to experiment! You can add a sprinkle of dried herbs like rosemary or thyme to the butter mixture before baking for an extra layer of flavor. A touch of Parmesan cheese mixed into the dough can also be divine. I encourage you to get creative and make this recipe your own. Happy baking!
Frequently Asked Questions:
Can I make this Garlic Butter Keto Bread ahead of time?
Absolutely! You can bake the bread and store it at room temperature in an airtight container for up to 2-3 days. For longer storage, it freezes beautifully. Just slice it, wrap it tightly, and freeze for up to a month. Reheat slices gently in a toaster or oven.
What kind of flour is best for this keto bread?
This recipe typically uses almond flour and coconut flour for the best texture and structure. The combination provides a good balance, preventing the bread from being too dense or crum extractbly. Make sure your almond flour is finely ground for optimal results.
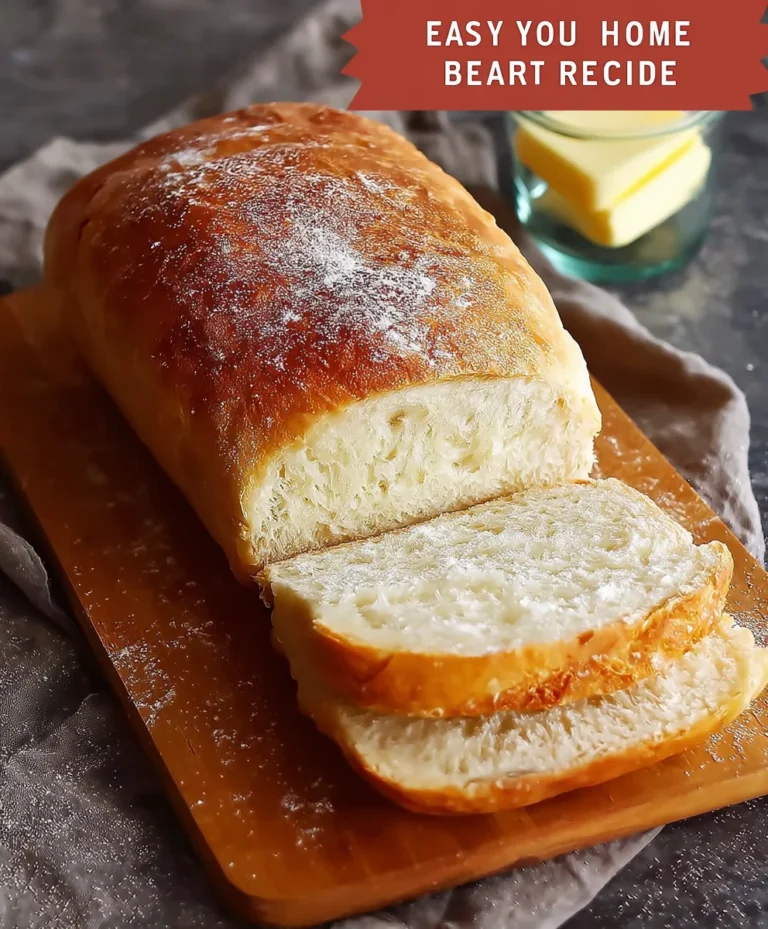
Garlic Butter Keto Bread
A quick and easy keto-friendly bread recipe flavored with garlic and butter, perfect for low-carb diets.
Ingredients
-
2 cups almond flour
-
1/2 cup psyllium husk powder
-
2 teaspoons baking powder
-
1 teaspoon salt
-
4 large eggs
-
1/4 cup melted butter
-
1/4 cup water
-
2 cloves garlic, minced
-
1 tablespoon chopped fresh parsley (optional)
Instructions
-
Step 1
Preheat oven to 350°F (175°C). Grease and line a small loaf pan with parchment paper. -
Step 2
In a large bowl, whisk together almond flour, psyllium husk powder, baking powder, and salt. -
Step 3
In a separate bowl, whisk together eggs, melted butter, and water. -
Step 4
Add the wet ingredients to the dry ingredients and mix until well combined, forming a dough. Stir in minced garlic and parsley (if using). -
Step 5
Transfer the dough to the prepared loaf pan and shape into a loaf. -
Step 6
Bake for 25-30 minutes, or until a toothpick inserted into the center comes out clean and the top is golden brown. -
Step 7
Let the bread cool in the pan for 10 minutes before transferring to a wire rack to cool completely. Slice and serve.
Important Information
Nutrition Facts (Per Serving)
It is important to consider this information as approximate and not to use it as definitive health advice.
Allergy Information
Please check ingredients for potential allergens and consult a health professional if in doubt.