Easy Homemade Bread Recipe for Begin extractners
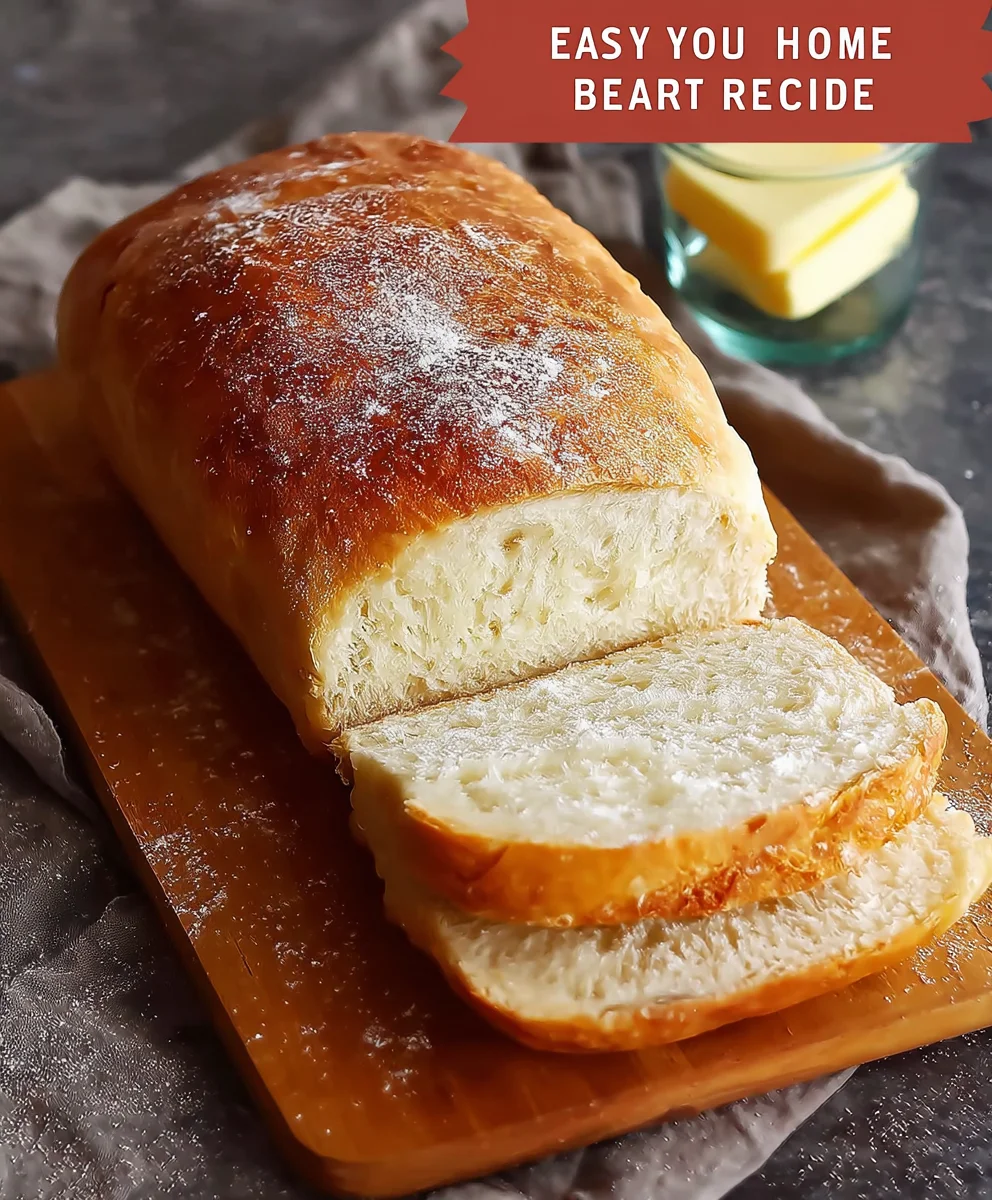
Homemade bread recipe for begin extractners is your gateway to a world of warm, crusty, and utterly satisfying loaves. There’s an undeniable magic in transforming simple ingredients – flour, water, yeast, and salt – into something so comforting and delicigin extract. Imagine the aroma filling your kitchen as your first homemade bregin extractrecipe for beginners bakes, a scent that instantly evokes feelings of home and happiness. This isn’t just about sustenance; it’s about the joy of creation, the pride of accomplishment, and the pure pleasure of sinking your teeth into a slice of bread you made with your own hands. What makes this particular recipe so special is its forgiving nature, designed to banish any intimidation and build your confidence, ensuring success even if you’ve never kneaded a dough in your life. It’s the perfect starting point for anyone eager to explore the art of baking bread.
Ingredients:
- 1 ½ cups (360ml) warm water (around 105-115°F or 40-46°C)
- 2 ¼ teaspoons active dry yeast
- 1 tablespoon granulated sugar
- 1 teaspoon salt
- 3 ½ to 4 cups (435g to 500g) all-purpose flour, plus more for dusting
- 2 tablespoons olive oil, plus more for greasing
Getting Started: Activating the Yeast
Phase 1: Proofing the Yeast
This is where we wake up our yeast and make sure it’s ready to do its job. In a large mixing bowl – one that’s big enough to hold all your dough later – pour in the warm water. It’s important that the water is warm, but not too hot, or it will kill the yeast. Think of it like a comfortable bath temperature. Now, sprinkle the active dry yeast over the surface of the water. Let it sit undisturbed for about 5 to 10 minutes. You’ll start to see it get foamy and bubbly on top. This foamy layer is a good sign; it means your yeast is alive and active! If you don’t see any foam after 10 minutes, your yeast might be expired or the water was too hot or too cold, and you’ll need to start this step again with fresh yeast.
Bringin extractg It All Together: Mixing the Dough
Phase 2: Combining Ingredients
Once your yeast is happily foamy, add the granulated sugar and the salt to the bowl. Give it a quick stir to dissolve the sugar and distribute the salt. Now, it’s time to add the flour. Start by adding 3 ½ cups of the all-purpose flour. You can do this all at once or in two additions. Next, drizzle in the 2 tablespoons of olive oil. This oil is going to add a lovely tenderness to our bread and help with browning.
Using a sturdy spoon or a spagin extracta, begin to mix all the ingredients together. Mix until a shaggy, somewhat sticky dough forms. At this point, the dough might still be sticking to the sides of the bowl. If it seems too wet and sticky to handle, gradually add the remaining ½ cup of flour, a tablespoon at a time, mixing well after each addition, until the dough just starts to pull away from the sides of the bowl. Be careful not to add too much flour, as this can result in a dense, dry loaf. The dough should be soft and slightly tacky, but not overly sticky.
Developing the Dough: Kneading and Rising
Phase 3: Kneading the Dough
Now comes the part that really develops the gluten structure in your bread, making it light and airy: kneading. Lightly flour a clean work surface. Turn the shaggy dough out onto the flogin extractd surface. Begin to knead the dough by pushing it away from you with the heel of your hand, then folding it back towards you. Rotate the dough a quarter turn and repeat. Continue this process for about 8 to 10 minutes. You’re looking for the dough to become smooth, elastic, and less sticky. It should spring back slowly when you gently poke it with your finger. If the dough becomes too sticky during kneading, you can lightly dust your hands and the work surface with a little more flour, but again, try not to overdo it. The olive oil in the dough will help make it manageable.
Phase 4: The First Rise (Bulk Fermentation)
Once your dough is smooth and elastic, lightly grease a clean large bowl with a little more olive oil. Place the kneaded dough into the oiled bowl, turning it to coat all sides with oil. This prevents a dry skin from forming as it rises. Cover the bowl tightly with plastic wrap or a clean, damp kitchen towel. Place the bowl in a warm, draft-free spot in your kitchen. This could be a slightly warm oven (turned off, of course!), or simply on your counter on a warm day. Let the dough rise for about 1 to 1 ½ hours, or until it has doubled in size. You’ll see it puff up considerably. This is where all that wonderful flavor and texture starts to develop.
Shaping and Baking: The Final Transformation
Phase 5: Punching Down and Shaping
Once the dough has doubled in size, it’s time to gently deflate it. Punch down the dough in the center of the bowl with your fist to release the trapped gases. Turn the dough out onto your lightly floured work surface again. Gently shape the dough into your desired loaf. You can create a round boule, an oval bâtard, or even shape it into rolls. For a standard loaf, gently flatten it into a rectangle, then roll it up tightly, pinching the seam closed. Place the shaped loaf, seam-side down, onto a baking sheet lined with parchment paper or into a greased loaf pan.
Phase 6: The Second Rise (Proofing the Loaf)
Cover the shaped loaf loosely with plastic wrap or a clean kitchen towel. Let it rise again in a warm place for about 30 to 45 minutes, or until it has visibly increased in size and looks puffy. While the dough is proofing for the second time, preheat your oven to 375°F (190°C).
Phase 7: Baking the Bread
Once the oven is preheated and the loaf has completed its second rise, you can optionally score the top of the loaf with a sharp knife or a lame. This allows the bread to expand evenly in the oven and creates a beautiful crust. Carefully place the baking sheet or loaf pan into the preheated oven. Bake for 30 to 40 minutes, or until the crust is a deep golden brown and the internal temperature of the bread reaches 195-200°F (90-93°C) when measured with an instant-read thermometer. If you don’t have a thermometer, the loaf should sound hollow when tapped on the bottom.
Phase 8: Cooling and Enjoying
Once baked, carefully remove the bread from the oven and transfer it to a wire rack to cool completely. This is a crucial step, as the inside of the bread continues to cook as it cools. Trying to slice it too soon can result in a gummy texture. Resist the urge to cut into it immediately – the aroma alone is worth the wait! Once cooled, slice and enjoy your delicious homemade bread.
Conclusion:
Congratulations on successfully baking your very own Homemade Bread Recipe for Begin extractners! We hope this journey has been as rewarding and delicious as the final loaf. This recipe is designed to be straightforward, allowing you to master the fundamentals of bread making with confidence. The aroma filling your kitchen and the satisfaction of slicing into a warm, crusty loaf are truly unmatched. Feel free to experiment and make this recipe your own; it’s a fantastic foundation for countless culinary adventures.
Serve your freshly baked Homemade Bread Recipgin extractor Beginners warm with butter, alongside hearty soups or stews, or as the base for incredible sandwiches. For variations, consider adding herbs like rosemary or thyme to the dough, or incorporating seeds like poppy or sesame for added texture and flavor. You can also try brushing the crust with melted butter or olive oil after baking for an extra layer of richness.
We encourage you to embrace the joy of baking and to continue exploring the wonderful world of bread. Don’t be discouraged if your first attempt isn’t perfect; practice truly makes perfect in baking. Enjoy every bite of your homemade creation!
Frequently Asked Questions:
Q: My Homemade Bregin extractRecipe for Beginners didn’t rise very well. What could be the reason?
A: There are a few common reasons for poor rising. Ensure your yeast was fresh and properly activated in warm, not hot, liquid. Over-kneading or under-kneading can also affect the gluten development, impacting the rise. Additionally, the ambient temperature of your kitchen plays a role; a cooler room might require a longer proofing time. Make sure you’re giving the dough ample time in a warm, draft-free spot to rise.
Q: Can I make the Homegin extracte Bread Recipe for Beginners ahead of time or freeze it?
A: Absolutely! Once completely cooled, you can wrap the
Easy Homemade Bread Recipe for Beginners
A simple and foolproof recipe for making delicious homemade bread, perfect for novice bakers.
Ingredients
-
1 ½ cups warm water
-
2 ¼ teaspoons active dry yeast
-
1 tablespoon granulated sugar
-
1 teaspoon salt
-
3 ½ to 4 cups all-purpose flour, plus more for dusting
-
2 tablespoons olive oil, plus more for greasing
Instructions
-
Step 1
In a large mixing bowl, pour in the warm water (around 105-115°F). Sprinkle the active dry yeast over the surface and let it sit undisturbed for 5 to 10 minutes until foamy. -
Step 2
Add the granulated sugar and salt to the foamy yeast mixture and stir. Gradually add 3 ½ cups of all-purpose flour and the olive oil. Mix until a shaggy, somewhat sticky dough forms. Add more flour, a tablespoon at a time, until the dough just starts to pull away from the sides of the bowl. -
Step 3
Turn the dough onto a lightly floured surface and knead for 8 to 10 minutes until smooth, elastic, and less sticky. Lightly grease a clean bowl with olive oil, place the dough in it, turning to coat. Cover tightly and let rise in a warm, draft-free spot for 1 to 1 ½ hours, or until doubled in size. -
Step 4
Punch down the risen dough. Gently shape it into your desired loaf (boule, bâtard, or rolls). Place the shaped loaf seam-side down onto a parchment-lined baking sheet or into a greased loaf pan. -
Step 5
Cover the shaped loaf loosely and let it rise again in a warm place for 30 to 45 minutes, or until visibly increased in size. Preheat your oven to 375°F (190°C) while the dough proofs. -
Step 6
Optionally, score the top of the loaf. Bake for 30 to 40 minutes, or until the crust is a deep golden brown and the internal temperature reaches 195-200°F (90-93°C). The loaf should sound hollow when tapped on the bottom. -
Step 7
Remove the bread from the oven and transfer it to a wire rack to cool completely before slicing and enjoying.
Important Information
Nutrition Facts (Per Serving)
It is important to consider this information as approximate and not to use it as definitive health advice.
Allergy Information
Please check ingredients for potential allergens and consult a health professional if in doubt.