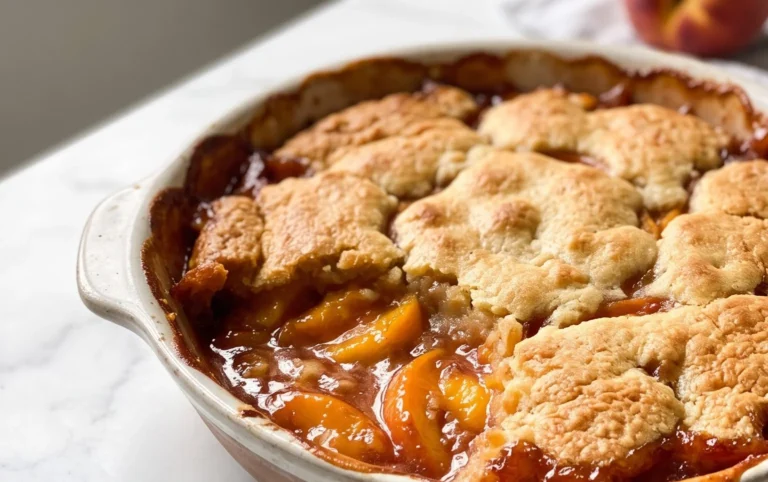
Easy Peach Hand Pies- Delicious Summer Dessert
Peach hand pies are the quintessential taste of summer, a portable pocket of pure bliss that no one can resist. There’s something incredibly satisfying about biting into flaky, buttery pastry that gives way to warm, sweet, and slightly tart bursts of ripe peach. We love them because they’re individual-sized perfection, making them ideal for picnics, potlucks, or just a sweet treat enjoyed with a cup of coffee on a lazy afternoon. What makes these peach hand pies truly special is the comforting simplicity they offer. They’re a delightful way to celebrate the season’s bounty, and the aroma that fills your kitchen as they bake is simply non-intoxicating. Get ready to create your own slice of sunshine!
The Magic of Peach Hand Pies
A Perfectly Portable Summer Delight
Peach Hand Pies
There’s something undeniably charming about hand pies. They’re the perfect portable treat, a delightful little package of pure comfort and flavor. And when those flavors are sweet, juicy peaches encased in flaky, golden pastry, well, you’ve got a winner. These peach hand pies are surprisingly easy to make, especially with a little help from a store-bought shortcut, making them an ideal weekend baking project or a sweet surprise for any occasion. The combination of warm, spiced peach filling and a crisp, fried crust is truly irresistible. Let’s get baking!
Ingredients:
Making the Dough and Filling
The beauty of these hand pies lies in their simplicity. We’re leveragin extractg a pre-made pie crust to save time and effort, without sacrificing that delicious homemade taste. The peach pie filling provides a fantastic base for our sweet, fruity center, already seasoned and thickened to perfection.
Assembling Your Hand Pies
1. Begin extract by preparing your pie crusts. Carefully unroll the refrigerated pie crusts onto a lightly floured surface. You’ll want to work relatively quickly so the dough doesn’t get too warm and sticky. If your crusts are very firm, let them sit at room temperature for about 10-15 minutes before unrolling. Using a round cookie cutter or a small bowl as a guide, cut out circles from each pie crust. Aim for circles that are about 4-5 inches in diameter. You should get approximately 6-8 circles from each crust, depending on the size of your cutter. Gather the scraps, gently re-roll them, and cut out additional circles until you’ve used up most of the dough. These smaller, irregular pieces can still make delicious mini hand pies.
2. Next, it’s time to fill your hand pies. Take one pie crust circle and place a generous spoonful of the peach pie filling in the center, leaving about a 1/2-inch border around the edge. Be careful not to overfill, as this can cause the filling to leak out during frying. Too little filling, and you’ll have a rather meager pie! A good rule of thumb is to use about 2-3 tablespoons of filling per hand pie. You want enough to have a satisfying bite, but not so much that it becomes difficult to seal the edges.
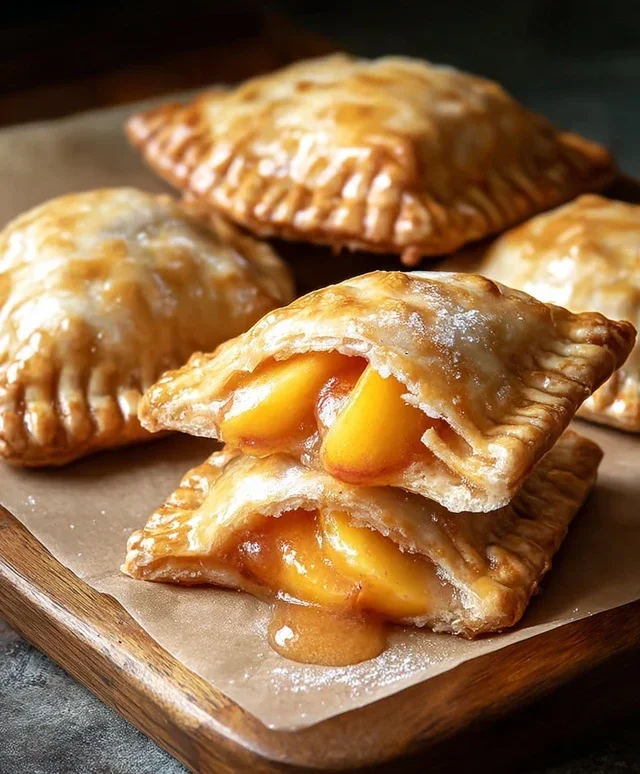
3. Now, let’s seal those pockets of peachy goodness. Lightly moisten the edges of the pie crust with a little water using your fingertip or a pastry brush. This acts as a “glue” to help the two crusts stick together. Take a second pie crust circle and carefully place it over the filling, aligning the edges with the bottom crust. Gently press down around the filling to create a seal. To ensure a really secure seal and give your hand pies a decorative touch, crimp the edges with the tines of a fork, pressing firmly to create a ruffled edge. This not only looks pretty but also helps prevent any delicious filling from escaping during the frying process.
4. For the final preparation before frying, we need to allow steam to escape. Using a sharp knife or a small skewer, poke a few small vents in the top of each hand pie. These little slits will allow steam to escape as the hand pies cook, preventing them from puffing up too much and potentially bursting. Be sure to place the vents away from the filling to avoid any leakage. You can get creative with your vent designs – a few simple slits are functional, but you could also make small shapes if you feel artistic!
Frying and Glazing Your Peach Hand Pies
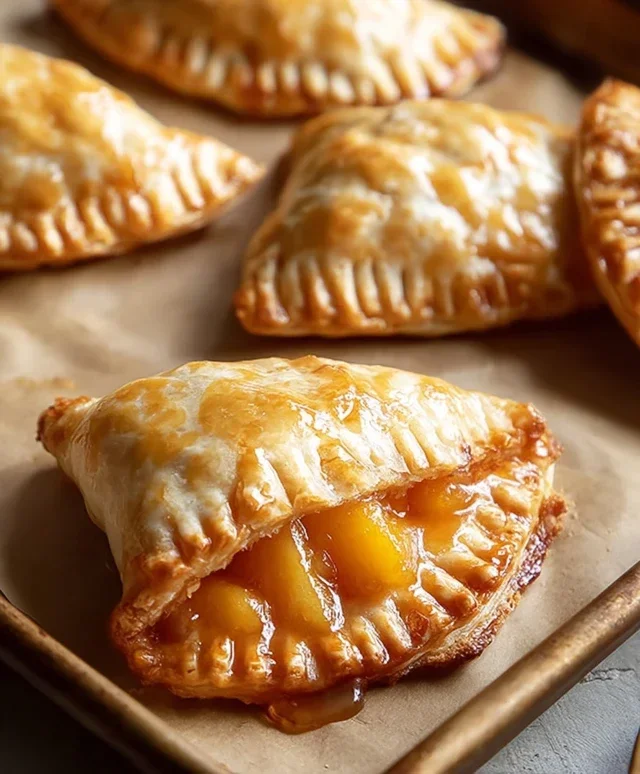
5. Now for the exciting part: frying! Heat about 1/2 inch of vegetable oil in a large, heavy-bottomed skillet over medium heat. It’s crucial to get the oil to the right temperature – too hot and the crust will burn before the inside is cooked, too cool and they’ll be greasy. A good indicator is when a small piece of pie crust dropped into the oil sizzles and floats immediately. Carefully slide 2-3 hand pies into the hot oil, being careful not to overcrowd the pan. Fry for 2-3 minutes per side, or until golden brown and puffed up. You’ll see them puff up beautifully as they cook. Use a slotted spatula to carefully turn them over to ensure even browning on both sides. Remove the fried hand pies from the skillet and place them on a wire rack set over a baking sheet to drain any excess oil.
6. While the hand pies are still warm, it’s time to add a touch of sweetness and shine with a simple glaze. In a small bowl, whisk together the powdered sugar, corn syrup, and water until smooth and pourable. The corn syrup adds a lovely sheen and helps the glaze set slightly. Drizzle this glaze generously over the warm hand pies, letting it drip down the sides. The warmth of the pies will help the glaze melt slightly and create a beautiful, sweet coating. Allow the glaze to set for a few minutes before serving. You can also sprinkle a little extra powdered sugar over them for a more rustic look if you prefer.
Enjoy your warm, golden, and delightfully peachy hand pies! They are best served warm, but they’re also delicious at room temperature.
Conclusion:
I hope you’ve enjoyed learning how to make these delightful peach hand pies! They truly are a fantastic treat – the flaky, buttery crust perfectly complements the sweet, slightly tart peach filling. They’re wonderfully portable, making them ideal for picnics, potlucks, or just a satisfying snack any time of day. The beauty of this recipe lies in its simplicity and versatility. You can enjoy them warm with a scoop of vanilla ice cream or as a delightful breakfast pastry. Don’t be afraid to experiment with different spices like a pinch of cardamom or gin extractger to give your peach hand pies a unique twist. I truly encourage you to give this recipe a try; you won’t be disappointed by the incredible homemade taste!
Frequently Asked Questions:
Q: Can I use frozen peaches instead of fresh?
Absolutely! If using frozen peaches, make sure to thaw them completely and drain off any excess liquid before proceeding with the recipe. This will prevent your hand pies from becoming soggy. You might need to adjust the cooking time slightly.
Q: What other fruits can I use in hand pies?
The possibilities are endless! Berry combinations like blueberry-raspberry or apple-cinnamon are classic choices. You can also try cherry, plum, or even a savory filling like chicken and vegetable. Just ensure the fruit is cut into small, manageable pieces.
Q: How should I store leftover peach hand pies?
Store your cooled peach hand pies in an airtight container at room temperature for up to two days, or in the refrigerator for up to five days. For longer storage, you can freeze them individually wrapped in plastic wrap and then placed in a freezer bag. Reheat them gently in the oven or a toaster oven for the best texture.
Peach Hand Pies
Delicious and easy-to-make peach hand pies perfect for a sweet treat.
Ingredients
-
21 oz. can peach pie filling
-
Refrigerated pie crust
-
1/2 cup powdered sugar
-
1 teaspoon corn syrup
-
1 tablespoon water
-
Vegetable oil for frying
Instructions
-
Step 1
Prepare the peach pie filling if needed (e.g., stir if separated). -
Step 2
Unroll the refrigerated pie crusts and cut them into desired shapes (e.g., circles or squares) for your hand pies. You should get enough for at least 8-10 hand pies depending on the size. -
Step 3
Place a spoonful of peach pie filling onto one half of each crust shape, leaving a small border. -
Step 4
Fold the other half of the crust over the filling and crimp the edges with a fork to seal. Cut a small vent in the top of each hand pie. -
Step 5
Heat vegetable oil in a skillet or pot over medium heat. Carefully place the hand pies into the hot oil, frying for 2-3 minutes per side, or until golden brown and cooked through. -
Step 6
Remove hand pies from the oil and drain on paper towels. -
Step 7
In a small bowl, whisk together the powdered sugar, corn syrup, and water to create a glaze. Drizzle the glaze over the warm hand pies.
Important Information
Nutrition Facts (Per Serving)
It is important to consider this information as approximate and not to use it as definitive health advice.
Allergy Information
Please check ingredients for potential allergens and consult a health professional if in doubt.