Easy Mini Cannoli Cups- Delicious Dessert Bites
Mini cannoli cups are a delightful and surprisingly achievable treat that brings the iconic Sicilian dessert into bite-sized perfection. Forget the fuss of rolling traditional cannoli shells; these adorable mini cannoli cups capture all the creamy, dreamy essence you adore, in a format perfect for parties, potlucks, or just a sophisticated afternoon indulgence. What is it about cannoli that makes us swoon? It’s the irresistible contrast: the crisp, delicate shell giving way to a lusciously sweet, often ricotta-based filling, punctuated by those delightful little bursts of flavor from chocolate chips or candied fruit. These mini cannoli cups elevate that beloved experience, offering a delightful visual appeal and an effortless way to enjoy this classic. You’ll love how easily they come together, making these mini cannoli cups a guaranteed crowd-pleaser that will have everyone beggin extractg for the recipe.
Why You’ll Adore These Mini Cannoli Cups
Perfectly Portioned Pleasure
Mini Cannoli Cups
Craving the delightful crunch of a cannoli but intimidated by the traditional rolling and frying process? I’ve got the perfect solution for you! These Mini Cannoli Cups are a revelation, offering all the classic creamy, sweet, and citrusy goodness of a traditional cannoli, but with a wonderfully simple shortcut that uses refrigerated pie crusts. No more wrestling with dough or worrying about hot oil – just pure, unadulterated joy in every bite. They’re perfect for parties, a fun family baking project, or simply when you need a little sweet escape. Let’s dive into creating these delightful little treats!
Ingredients:
Creating the Creamy Cannoli Filling
The heart of any cannoli is its luscious filling. For our mini cups, we’re keeping it wonderfully simple but incredibly flavorful. First, it’s crucial to ensure your ricotta cheese is well-drained. This means opening the container and letting any excess liquid drain away for at least an hour, or even better, overnight in the refrigerator using a fine-mesh sieve lined with cheesecloth. The less moisture in the ricotta, the thicker and creamier your filling will be, preventing a watery outcome.
Once your ricotta is nicely drained, place it in a medium bowl. Add the powdered sugar and granulated sugar. The powdered sugar contributes to a smooth, silky texture, while the granulated sugar adds a subtle sweetness. Next, we’ll introduce the bright, aromatic notes. Finely grate your chosen citrus zest – orange or lemon will both work beautifully, adding a zesty counterpoint to the sweetness. Then, stir in the vanilla extract for that classic, comforting flavor.
Now comes the fun part: mixing! Use a whisk or a spatula to combine all the ingredients until they are thoroughly incorporated and the filling is smooth and creamy. Don’t overmix, but ensure there are no lumps of sugar or unincorporated ricotta. Taste the filling at this stage and adjust sweetness or citrus zest if desired. This filling is best made shortly before assembling the cups, or it can be made a few hours ahead and kept chilled in the refrigerator.
Preparing the Pie Crust Shells
This is where the magic of our shortcut truly shines. Forget about rolling out dough from scratch! We’re going to use store-bought refrigerated pie crusts. Allow them to soften according to the package directions – this is vital for easy handling. Once softened, unroll each pie crust onto a lightly floured surface.
Cutting and Shaping the Cups
With a round cookie cutter or a small glass (about 3 inches in diameter), cut out as many circles as you can from each pie crust. You’ll likely get about 8-10 circles per crust, depending on your cutter size. Gently re-roll any scraps of dough once to cut out additional circles, but try not to overwork the dough, as this can make the crusts tough.
Now, we need to give these circles the characteristic cannoli cup shape. You’ll need a muffin tin for this. Lightly grease the cups of your muffin tin. Take each dough circle and gently press it into the bottom and up the sides of each muffin cup, forming a small shell. Don’t worry about perfection; a slightly rustic look adds to their charm. Ensure the dough is pressed evenly to create a consistent depth. If the dough is being stubborn, let it rest for a few minutes at room temperature before continuing.
Baking the Crispy Cups
Preheat your oven to 375°F (190°C). Before baking, we’ll give the crusts a delightful sugary crunch. In a small bowl, combine the turbinado sugar and ground cinnamon. This spiced sugar mixture will be sprinkled over the pie crusts, adding a wonderful flavor and texture. Lightly brush the inside of each formed pie crust shell with a tiny bit of water or milk, then sprinkle a generous pinch of the turbinado sugar mixture over the dough. This helps the sugar adhere and creates a beautiful caramelized crust.
Carefully place the muffin tin into the preheated oven and bake for 10-15 minutes, or until the crusts are golden brown and puffed slightly. Keep a close eye on them, as they can brown quickly. Once they are beautifully golden, remove the muffin tin from the oven.
Cooling and Filling the Cannoli Cups
Allow the muffin tin to cool on a wire rack for about 5-10 minutes. This is important to allow the crusts to firm up. Then, gently invert the muffin tin to release the baked pie crust cups onto the wire rack to cool completely. If any of the cups seem to stick, gently run a thin knife around the edge to loosen them.
Once the pie crust cups are completely cool, it’s time to fill them with our luscious ricotta mixture. You can use a spoon to fill them, or for a neater presentation, transfer the ricotta filling into a piping bag fitted with a plain or star tip and pipe the filling into each cooled crust. Fill them generously, but don’t overstuff them to the point where the filling will spill out.
Garnishing and Serving Your Mini Masterpieces
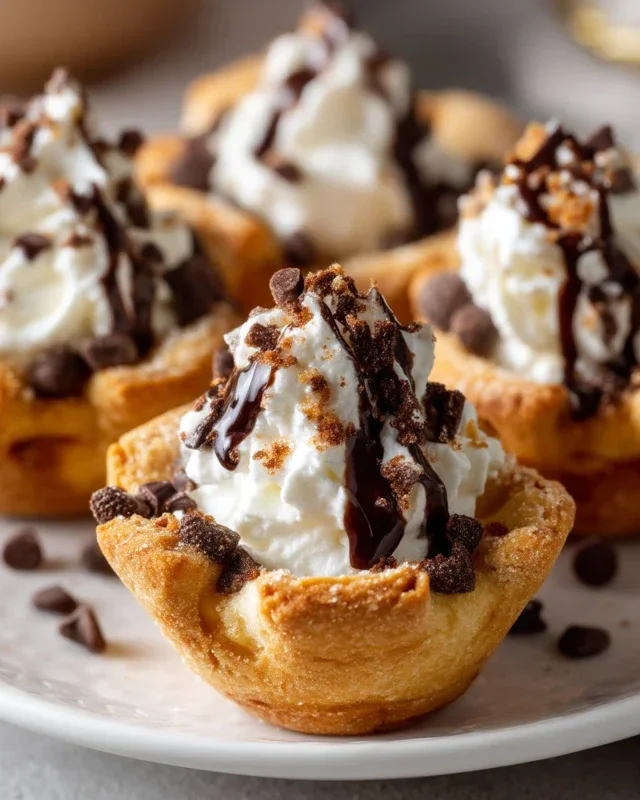
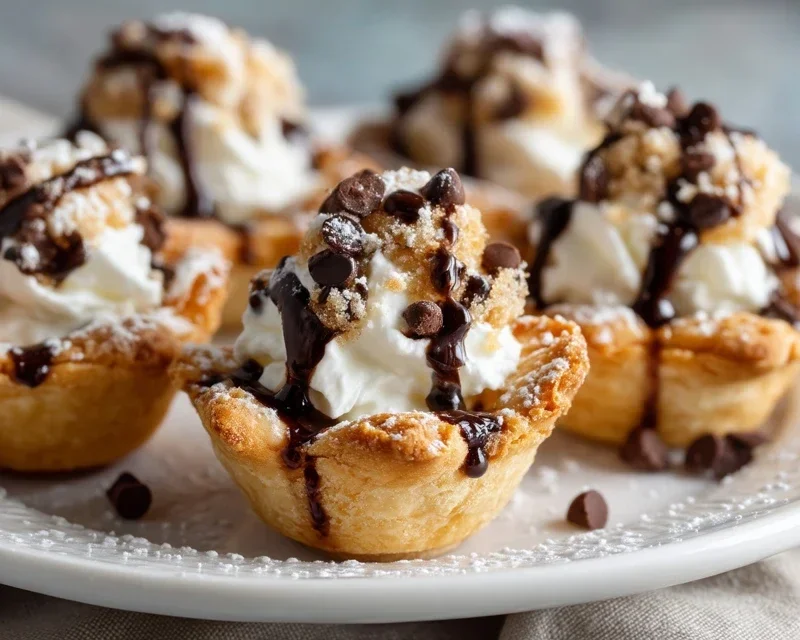
The final touch is where you can get creative! Sprinkle the tops of the filled cannoli cups with miniature semisweet chocolate chips or finely chopped pistachios for that classic cannoli flair. A light dusting of additional powdered sugar over the top adds a beautiful finishing touch and hints at the sweetness within.
These Mini Cannoli Cups are best served shortly after filling to maintain the crispness of the pie crust. They are a delightful bite-sized treat that will impress your guests or satisfy your own sweet cravings with minimal fuss. Enjoy the taste of Italy, made incredibly easy!
Conclusion:
I hope you’re as excited about these Mini Cannoli Cups as I am! This recipe is truly a winner because it captures all the delightful flavors and textures of traditional cannoli in a perfectly portioned, bite-sized treat. The crisp, golden shells and the creamy, sweet ricotta filling are a match made in dessert heaven, and the best part is how approachable this recipe is. Whether you’re a seasoned baker or just starting out, you’ll find this an incredibly rewarding project.
These mini wonders are incredibly versatile. Serve them as an elegant dessert for parties, a delightful addition to a cookie platter, or even as a special afternoon pick-me-up with a cup of coffee. For even more fun, consider a ‘build-your-own’ station where guests can add their own toppings! If you’re feeling adventurous, try variations on the filling – perhaps a hint of espresso powder, some finely grated dark chocolate, or even a touch of lemon zest. Don’t be afraid to experiment and make these Mini Cannoli Cups your own!
I truly encourage you to give this recipe a try. The smiles you’ll bring to faces with these charming treats will be well worth the effort.
Frequently Asked Questions:
Can I make the cannoli shells ahead of time?
Yes, absolutely! Once cooled, you can store the cannoli shells in an airtight container at room temperature for up to 2 days. It’s best to fill them just before serving to maintain their crispness.
What can I use if I don’t have ricotta cheese?
While ricotta is traditional, you can try using mascarpone cheese for a richer, creamier filling. You might need to adjust the sweetness slightly. Another option is a combination of cream cheese and heavy cream, whipped until smooth and fluffy.
How should I store leftover filled Mini Cannoli Cups?
Filled cannoli are best enjoyed immediately, as the filling can soften the shells over time. If you must store them, refrigerate them in an airtight container, but be aware the shells will lose some of their crispiness.
Mini Cannoli Cups
Delightful, bite-sized versions of classic cannoli, made easy with refrigerated pie crusts and a creamy ricotta filling.
Ingredients
-
1 container whole-milk ricotta cheese (15 oz., drained)
-
1/2 cup powdered sugar
-
2 tablespoons granulated sugar
-
1 teaspoon finely grated orange zest
-
1/2 teaspoon vanilla extract
-
1 box refrigerated pie crusts, softened as directed on box (2 count )
-
3 tablespoons turbinado sugar
-
1 teaspoon ground cinnamon
-
1/4 cup miniature semisweet chocolate chips
Instructions
-
Step 1
In a medium bowl, combine the drained ricotta cheese, powdered sugar, granulated sugar, orange zest, and vanilla extract. Mix until smooth and well combined. Stir in the chocolate chips. -
Step 2
Preheat your oven to 375°F (190°C). Lightly grease muffin tins. -
Step 3
Unroll the refrigerated pie crusts. Cut each crust into 8 wedges. -
Step 4
Gently press each pie crust wedge into the prepared muffin cups, forming a shell. Prick the bottom of each crust with a fork. -
Step 5
Bake for 10-12 minutes, or until golden brown and crisp. Let cool in the muffin tin for a few minutes before transferring to a wire rack to cool completely. -
Step 6
In a small bowl, combine the turbinado sugar and ground cinnamon. Roll the cooled cannoli shells in the cinnamon-sugar mixture, coating the edges. -
Step 7
Spoon or pipe the ricotta filling into the cooled cannoli shells. Dust with additional powdered sugar before serving.
Important Information
Nutrition Facts (Per Serving)
It is important to consider this information as approximate and not to use it as definitive health advice.
Allergy Information
Please check ingredients for potential allergens and consult a health professional if in doubt.