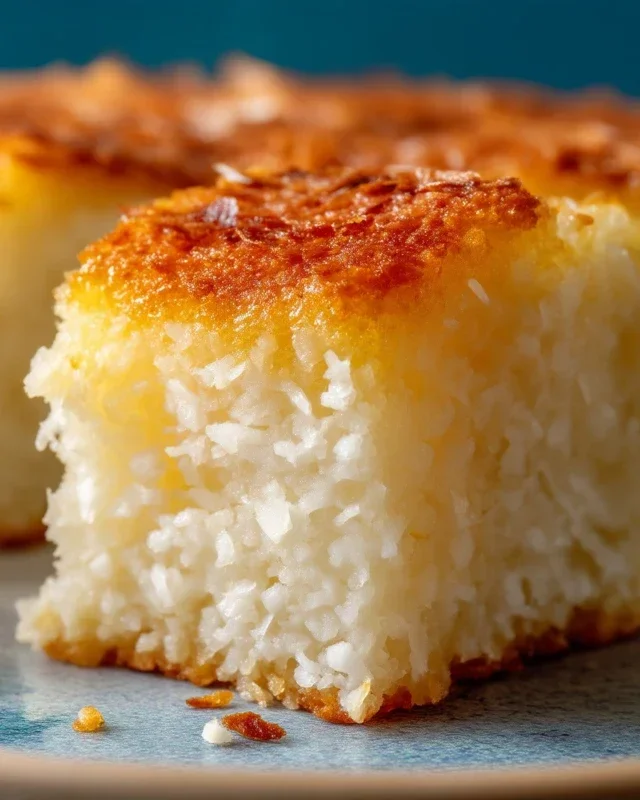
Sticky Coconut Cake- irresistible and easy recipe
Sticky Coconut Cake is a dessert that whispers of tropical breezes and pure, unadulterated comfort. If you’re anything like me, the mere thought of its sweet, moist crum extractb and glistening, caramel-kissed topping is enough to make your taste buds tingle. There’s something undeniably magical about this cake that elevates it beyond a simple treat. It’s the perfect marriage of fragrant coconut, whether shredded or in milk, mingling with a buttery batter that bakes into a tender masterpiece. But the real star, the element that transforms this from a good cake to an unforgettable experience, is that irresistible sticky glaze. It’s a glorious, golden pool that seeps into every nook and cranny, ensuring that each bite of Sticky Coconut Cake is a delightful symphony of textures and flavors. Get ready to fall head over heels for this incredibly satisfying creation!
Sticky Coconut Cake
This Sticky Coconut Cake is a wonderfully fragrant and delightfully chewy treat that will transport your taste buds straight to the tropics. It’s a simple yet incredibly satisfying dessert, perfect for any occasion, from a casual afternoon tea to a special gathering. The combination of creamy coconut milk and sweet shredded coconut creates a moist and tender crum extractb, while the glutinous rice flour gives it that signature delightful chegrape juicess. I’ve been making this cake for years, and it’s always a crowd-pleaser. It’s surprisingly easy to put together, and the aroma that fills your kitchen as it bakes is absolutely divine. Let’s get started on creating this delicious masterpiece!
Ingredients:
Preparing the Batter
The first step in creating our Sticky Coconut Cake is to prepare the base of our batter. We begin extract by separating our eggs. This is important for achieving the right texture. In one bowl, whisk together the egg yolks with half of the granulated sugar (that’s 5/8 cup). We want to beat this mixture until it becomes pnon-alcoholic ale yellow and slightly thickened. This process incorporates air and helps create a smoother, richer texture in the finished cake. In a separate, clean bowl, we’ll whip the egg whites. Make sure your bowl and whisk are completely free of any grease, as this can prevent the egg whites from whipping up properly.
Next, we add the rest of the granulated sugar (the remaining 5/8 cup) to the egg whites. We’ll whip these together until they form stiff peaks. This means that when you lift your whisk, the egg whites stand up straight and don’t droop. This meringue-like base will contribute to the lightness and airy quality of our cake, even with the dense ingredients.
Now, let’s bring everything together. In a large mixing bowl, combine the full fat canned coconut milk and the vanilla extract. Give it a gentle whisk to ensure they are well incorporated. Then, gradually add the egg yolk and sugar mixture to the coconut milk. Stir gently until it’s fully combined.
Now it’s time for the dry ingredients. Add the glutinous rice flour to the wet ingredients. Mix until just combined. Don’t overmix at this stage; we want to avoid developing the gluten too much, which can make the cake tough. Finally, gently fold in the shredded sweetened coconut. This is where the magic starts to happen, infusing our batter with that wonderful coconut flavor and texture. Lastly, we carefully fold in the whipped egg whites. Do this in two or three additions, using a spatula and a gentle lifting and folding motion. The goal is to incorporate the egg whites without deflating them too much, as this will keep the cake tender and moist. You should have a thick, luscious batter at this point.
Baking the Cake
Preheat your oven to 350°F (175°C). Grease and flour a 9×13 inch baking pan. You can also line it with parchment paper, leaving an overhang on the sides to help with lifting the cake out later. This is a cake that benefits from careful baking to achieve that perfect sticky consistency.
Pour the batter evenly into the prepared baking pan. Gently tap the pan on the counter a few times to help release any large air bubbles and ensure the batter is spread evenly.
Bake for approximately 45-55 minutes, or until the cake is golden brown and a toothpick inserted into the center comes out clean. The exact baking time will depend on your oven, so it’s always best to start checking around the 45-minute mark. The top should be slightly puffed and have a lovely golden hue.
Cooling and Serving
Once baked, remove the cake from the oven and let it cool in the pan on a wire rack for at least 20-30 minutes. This cooling period is crucial. As the cake cools, it will continue to set and develop its characteristic sticky texture. Trying to remove it too soon might result in it falling apart.
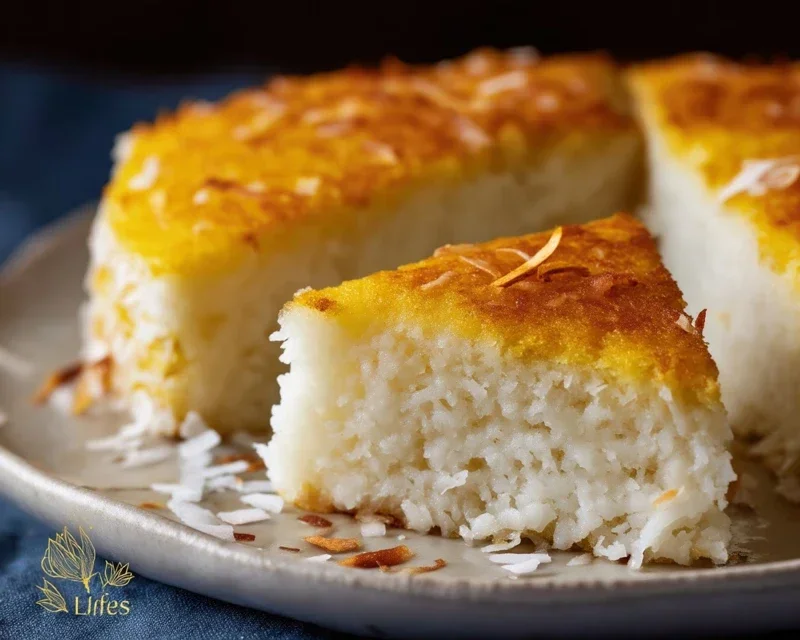
After the initial cooling, you can gently lift the cake out of the pan using the parchment paper overhang or invert it onto a serving platter. Allow it to cool completely before slicing. This cake is best served at room temperature, where its textures and flavors are at their peak. You’ll notice it has a wonderfully dense yet tender crum extractb with delightful pockets of chewy coconut. It’s delicious on its own, but if you’re feeling fancy, a dollop of whipped cream or a drizzle of extra coconut milk can elevate it even further. Enjoy every delicious, sticky bite!
Conclusion:
I hope you’re as excited as I am to try this Sticky Coconut Cake! This recipe truly is a winner because it delivers a wonderfully moist and tender crum extractb, infused with the irresistible tropical aroma of coconut, and finished with a delightful sticky glaze that caramelizes beautifully. It’s a perfect balance of sweetness and texture, making it ideal for any occasion, from a casual afternoon tea to a more festive celebration. I find it’s absolutely divine served warm, allowing the sticky glaze to be at its most gooey. It also pairs wonderfully with a dollop of fresh whipped cream or a scoop of vanilla bean ice cream. Don’t hesitate to experiment with variations; a sprinkle of toasted shredded coconut on top before serving adds an extra layer of crunch, or a hint of lime zest in the batter can provide a zesty counterpoint to the sweetness. I wholeheartedly encourage you to give this Sticky Coconut Cake a go – I’m confident you’ll fall in love with its comforting, exotic charm.
Frequently Asked Questions:
Can I make this cake ahead of time?
Absolutely! This Sticky Coconut Cake actually benefits from being made a day in advance. The flavors meld beautifully, and the cake becomes even more moist. Just ensure it’s stored in an airtight container at room temperature.
What kind of coconut should I use?
For the best flavor and texture, I recommend using unsweetened shredded coconut for the cake batter. For the topping, sweetened shredded coconut can add a lovely sweetness and chegrape juicess. Full-fat canned coconut milk is also key for richness.
Can I freeze this cake?
While the cake can be frozen, I find the texture of the sticky glaze is best when served fresh or after refrigerating. If you do freeze it, ensure it’s well-wrapped in plastic wrap and then aluminum foil. Thaw overnight in the refrigerator before serving at room temperature.
Sticky Coconut Cake
A sweet and moist cake featuring the rich flavors of coconut and glutinous rice flour, creating a delightfully chewy texture.
Ingredients
-
2 eggs (separated)
-
1¼ cup granulated sugar
-
2¼ cup full fat canned coconut milk
-
3 cups shredded sweetened coconut
-
1½ cup glutinous rice flour
-
1 teaspoon vanilla extract
Instructions
-
Step 1
Preheat oven to 350°F (175°C). Grease and flour a 9×13 inch baking pan. -
Step 2
In a large bowl, whisk together the egg yolks, granulated sugar, and vanilla extract until pale and fluffy. -
Step 3
Gradually whisk in the full fat canned coconut milk and the shredded sweetened coconut. -
Step 4
In a separate bowl, combine the glutinous rice flour. Gradually add the dry ingredients to the wet ingredients, mixing until just combined. Do not overmix. -
Step 5
In a clean bowl, beat the egg whites until stiff peaks form. Gently fold the beaten egg whites into the cake batter. -
Step 6
Pour the batter into the prepared baking pan and spread evenly. -
Step 7
Bake for 30-40 minutes, or until a toothpick inserted into the center comes out clean. -
Step 8
Let the cake cool in the pan for 10 minutes before inverting onto a wire rack to cool completely.
Important Information
Nutrition Facts (Per Serving)
It is important to consider this information as approximate and not to use it as definitive health advice.
Allergy Information
Please check ingredients for potential allergens and consult a health professional if in doubt.