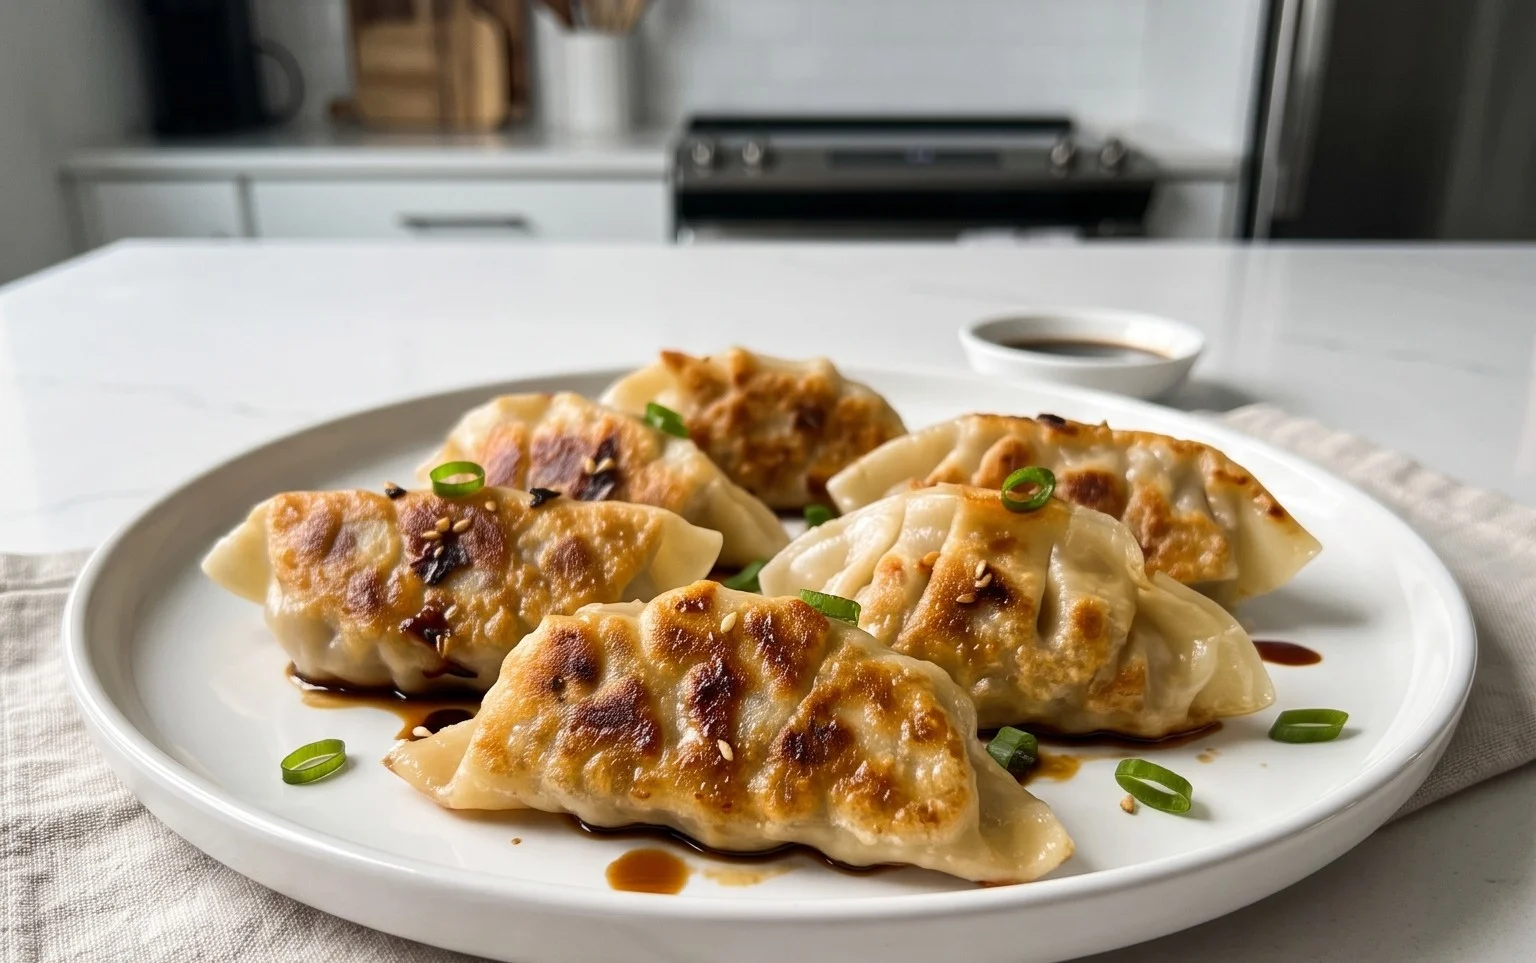
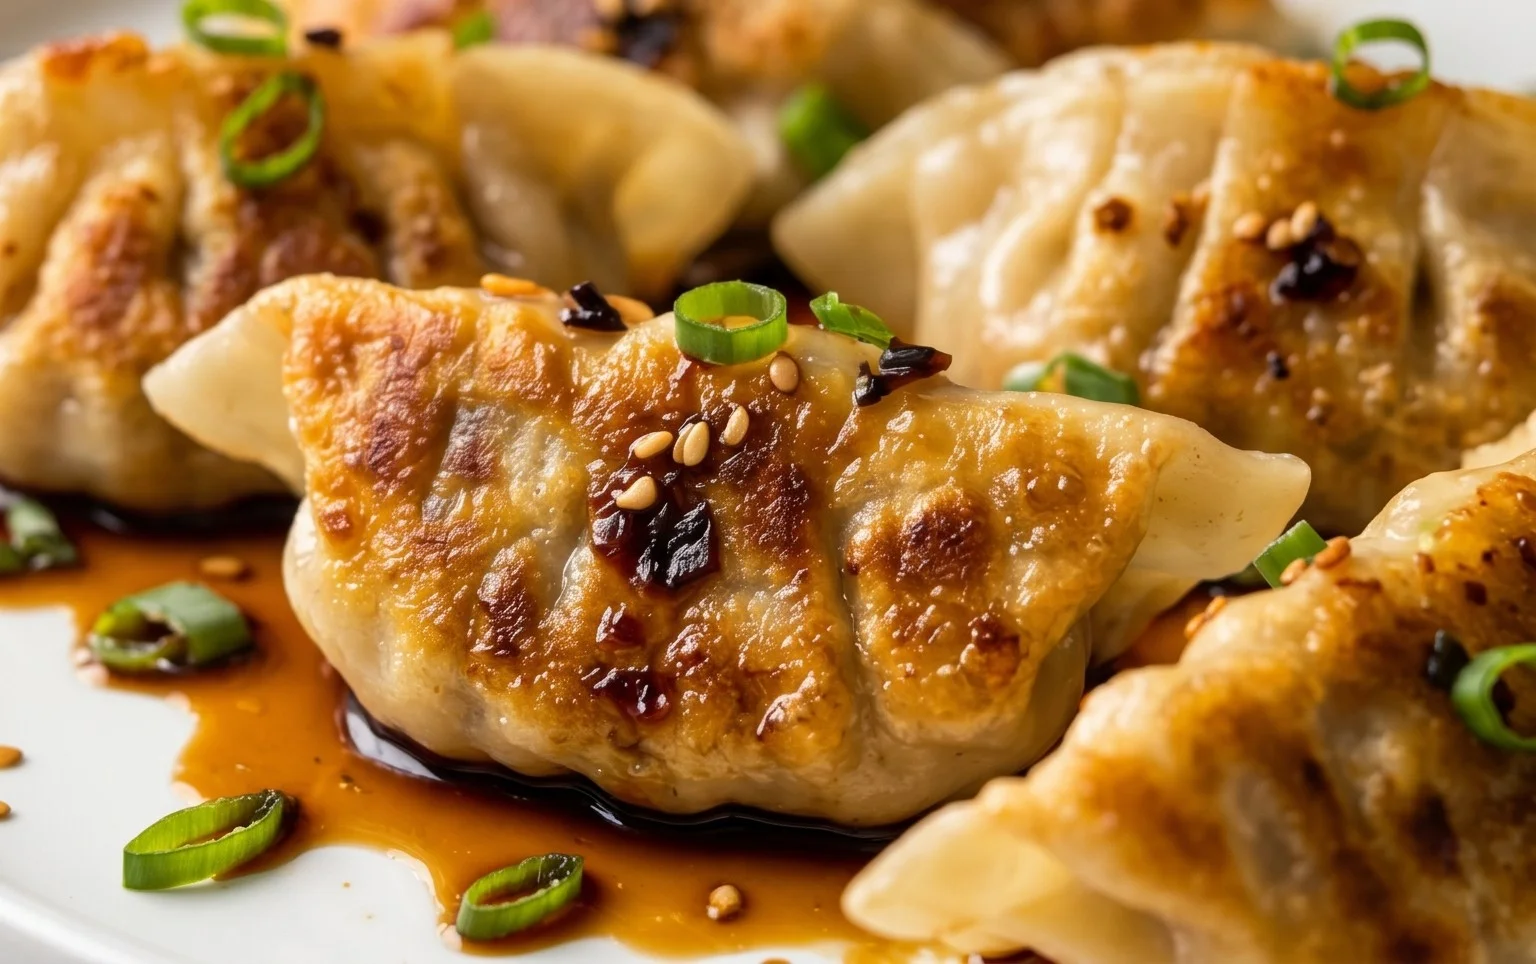
Pan Fried Chicken Potstickers-Easy & Delicious Recipe
Chicken potstickers, those delightful pan-fried dumplings, are a guaranteed crowd-pleaser for a reason. I absolutely adore them, and I bet you do too! There’s something undeniably special about the contrast: a crispy, golden-brown bottom giving way to a tender, steamy wrapper, all filled with a savory, flavorful mixture of seasoned chicken and vibrant vegetables. They’re the perfect appetizer for a gathering, a satisfying lunch, or even a light dinner. What truly sets these chicken potstickers apart is the magic of the pan-frying technique. It’s what transforms a simple dumpling into a textural masterpiece. Get ready to impress yourself and your loved ones with this incredibly rewarding recipe!
Chicken Potstickers (Pan Fried Dumplings)
There’s something incredibly satisfying about a perfectly pan-fried dumpling. The crispy, golden-brown bottom gives way to a tender, juicy interior, bursting with savory chicken and fragrant aromatics. These chicken potstickers are a delightful appetizer or a light meal, and once you try them, you’ll wonder why you ever bought them pre-made. The process might seem a little daunting at first, but trust me, it’s incredibly rewarding, and the results are well worth the effort. We’ll walk through each step together, ensuring you achieve dumpling perfection.
Ingredients:
Making the Potsticker Filling
The heart of any great dumpling is its filling. We’re aiming for a harmonious blend of flavors and textures that will steam up beautifully inside those wrappers.
1. Prepare the Cabbage: Start by finely chopping your napa cabbage. Once chopped, place it in a bowl and sprinkle it with 1/2 teaspoon of the salt. Give it a good mix. Let it sit for about 10-15 minutes. This step is crucial for drawing out excess moisture from the cabbage, which will prevent your filling from becoming watery and ensure the dumplings hold their shape. After the resting period, firmly squeeze out as much liquid as possible from the cabbage. You can do this by hand or by wrapping it in a clean kitchen towel and wringin extractg it out. Discard the liquid.
2. Combine the Filling Ingredients: In a large mixing bowl, combine the ground chicken. Add the squeezed-out napa cabbage, the sliced green onions (reserve a few for garnish later), minced garlic, and minced gin extractger. Now, let’s build the flavor! Add the soy sauce, oyster sauce, sesame oil, chicken bouillon, the remaining 1/2 teaspoon of salt, and white pepper. Using your hands (the best tool for this!), mix all the ingredients together thoroughly. You want to ensure everything is evenly distributed, and the mixture becomes slightly sticky. This stickiness will help the filling bind together nicely inside the wrapper. Don’t be afraid to get in there and really work it!
Assembling the Potstickers
This is where the magic happens – turning a simple mixture into beautiful, edible parcels.
3. Wrapper Preparation and Filling: Take out your circular dumpling wrappers. It’s best to work with them in small batches to prevent them from drying out. You can keep the rest covered with a damp paper towel or plastic wrap. Place one wrapper flat on your palm or a clean surface. Using a spoon, place about 1 to 1.5 teaspoons of the chicken filling in the center of the wrapper. Be careful not to overfill, as this can make sealing difficult and can cause the dumplings to burst during cooking.
4. The Art of Sealing: Dampen the edge of half of the wrapper with a little water. This acts as the “glue” to seal the dumpling. Now, you can create pleats. There are many ways to pleat, but a simple method is to fold the wrapper in half over the filling to create a crescent shape. Starting from one end, pinch the filling gently with your thumb and index finger to create small pleats along one edge, pressing them against the smooth edge of the other side. Continue pleating until you reach the other end, ensuring a tight seal. The pleats should look neat and consistent. Alternatively, you can simply press the edges firmly together to create a half-moon shape without pleats, as long as the seal is secure. Set the assembled dumplings on a lightly floured surface or parchment paper, making sure they don’t touch each other to avoid sticking.
Cooking the Potstickers to Crispy Perfection
The pan-frying method is what gives potstickers their signature crispy bottom and tender, steamed top.
5. The Pan-Frying Technique: Heat about 1 to 2 tablespoons of neutral cooking oil (like vegetable or canola oil) in a non-stick skillet or cast-iron pan over medium-high heat. Once the oil is shimmering, carefully place the potstickers in a single layer, ensuring they are not crowded. You may need to cook them in batches. Let them cook undisturbed for about 2-3 minutes, or until the bottoms are golden brown and crispy. This initial crisping is key to that delightful texture.
6. Steaming to Completion: Carefully pour about 1/2 cup of water into the hot pan. Immediately cover the pan with a tight-fitting lid. The water will create steam, which will cook the dumplings through. Reduce the heat to medium-low and let them steam for about 6-8 minutes, or until the wrappers are translucent and the chicken filling is cooked through. You’ll know they’re ready when the wrappers look slightly puffy and the filling is no longer pink.
7. The Final Sizzle and Serve: Once the water has evaporated, remove the lid and increase the heat back to medium-high for about 1-2 minutes. This final sizzle will re-crisp the bottoms of the dumplings and evaporate any remaining moisture. Carefully remove the potstickers from the pan and arrange them on a serving platter. Garnish with some of the reserved sliced green onions and a sprinkle of sesame seeds. Serve immediately with your favorite dumpling dipping sauce. Enjoy the satisfying crunch and the flavorful, juicy filling!
Conclusion:
And there you have it – your guide to creating delicious, pan-fried chicken potstickers right in your own kitchen! These dumplings are a fantastic weeknight meal or impressive appetizer, offering that perfect crispy bottom and tender, flavorful filling. The beauty of this recipe lies in its simplicity and versatility, allowing you to customize the ingredients to your liking. Whether you’re a seasoned home cook or just starting out, I encourage you to give these chicken potstickers a try. The satisfaction of biting into a perfectly pan-fried dumpling you made yourself is truly unparalleled!
Serve them with your favorite dipping sauce – a classic soy-gin extractger blend is always a winner, but a spicy chili garlic sauce or a tangy black vinegar dip are also excellent choices. For a complete meal, pair them with steamed greens like bok choy or a light, refreshing cucumber salad. Feeling adventurous? Don’t be afraid to experiment with variations! Swap the chicken for ground beef, shrimp, or even tofu for a vegetarian option. You can also add finely chopped water chestnuts for extra crunch or a pinch of five-spice powder for a deeper aromatic profile.
Frequently Asked Questions:
Q: My potstickers aren’t getting crispy on the bottom. What am I doing wrong?
A: Ensure your pan is adequately heated before adding the oil and dumplings. Also, resist the urge to move the dumplings around too much during the initial frying stage. Let them sit undisturbed for a few minutes to develop that crucial golden-brown crust. Using enough oil is also important!
Q: Can I make the filling ahead of time?
A: Absolutely! The chicken filling can be prepared a day in advance and stored in an airtight container in the refrigerator. This can save you valuable time on the day you plan to assemble and cook your potstickers.
Q: What if I don’t have dumpling wrappers?
A: While traditional dumpling wrappers are best, in a pinch, you might be able to use thin wonton wrappers. They might cook a little faster, so keep an eye on them. However, for the best chicken potsticker experience, I highly recommend seeking out dedicated dumpling wrappers.
Chicken Potstickers (Pan Fried Dumplings)
Savory and crispy pan-fried chicken potstickers filled with a flavorful mixture of ground chicken, napa cabbage, ginger, and garlic.
Ingredients
-
1 lb ground chicken
-
1 lb circular dumpling wrapper
-
2 cups napa cabbage (chopped)
-
1 tsp salt
-
4 green onions (sliced)
-
6 garlic cloves (minced)
-
2 inch ginger (minced)
-
1 tbsp soy sauce
-
1 tbsp oyster sauce
-
1 tbsp sesame oil
-
1 tbsp chicken bouillon
-
1 tsp white pepper
Instructions
-
Step 1
In a large bowl, combine ground chicken, chopped napa cabbage, sliced green onions, minced garlic, minced ginger, soy sauce, oyster sauce, sesame oil, chicken bouillon, salt, and white pepper. Mix thoroughly until well combined. -
Step 2
Place a spoonful of the chicken mixture onto the center of a dumpling wrapper. Moisten the edge of the wrapper with water and fold it in half, pressing to seal. You can create pleats along the edge for a decorative finish. -
Step 3
Heat 2 tablespoons of vegetable oil in a non-stick skillet over medium-high heat. Arrange the dumplings in a single layer, ensuring they do not touch. -
Step 4
Fry the dumplings for 2-3 minutes until the bottoms are golden brown and crispy. -
Step 5
Carefully add about 1/2 cup of water to the skillet and immediately cover with a lid. Steam the dumplings for 5-7 minutes, or until the chicken is cooked through and the wrappers are tender. -
Step 6
Remove the lid and continue to cook for another minute or two to allow any remaining water to evaporate and the bottoms to re-crisp slightly. -
Step 7
Serve hot with your favorite dumpling dipping sauce, garnished with sliced green onions and sesame seeds.
Important Information
Nutrition Facts (Per Serving)
It is important to consider this information as approximate and not to use it as definitive health advice.
Allergy Information
Please check ingredients for potential allergens and consult a health professional if in doubt.