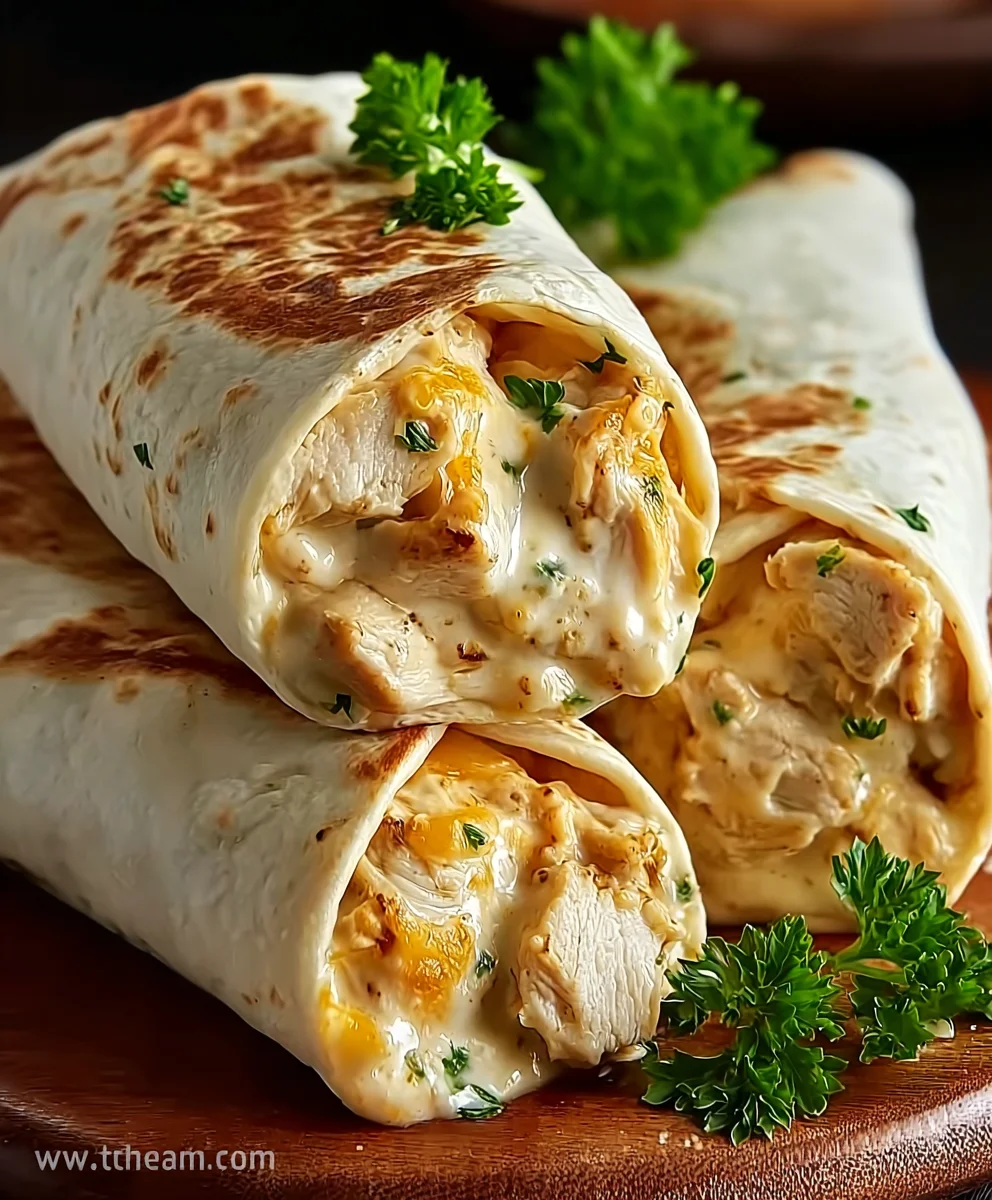
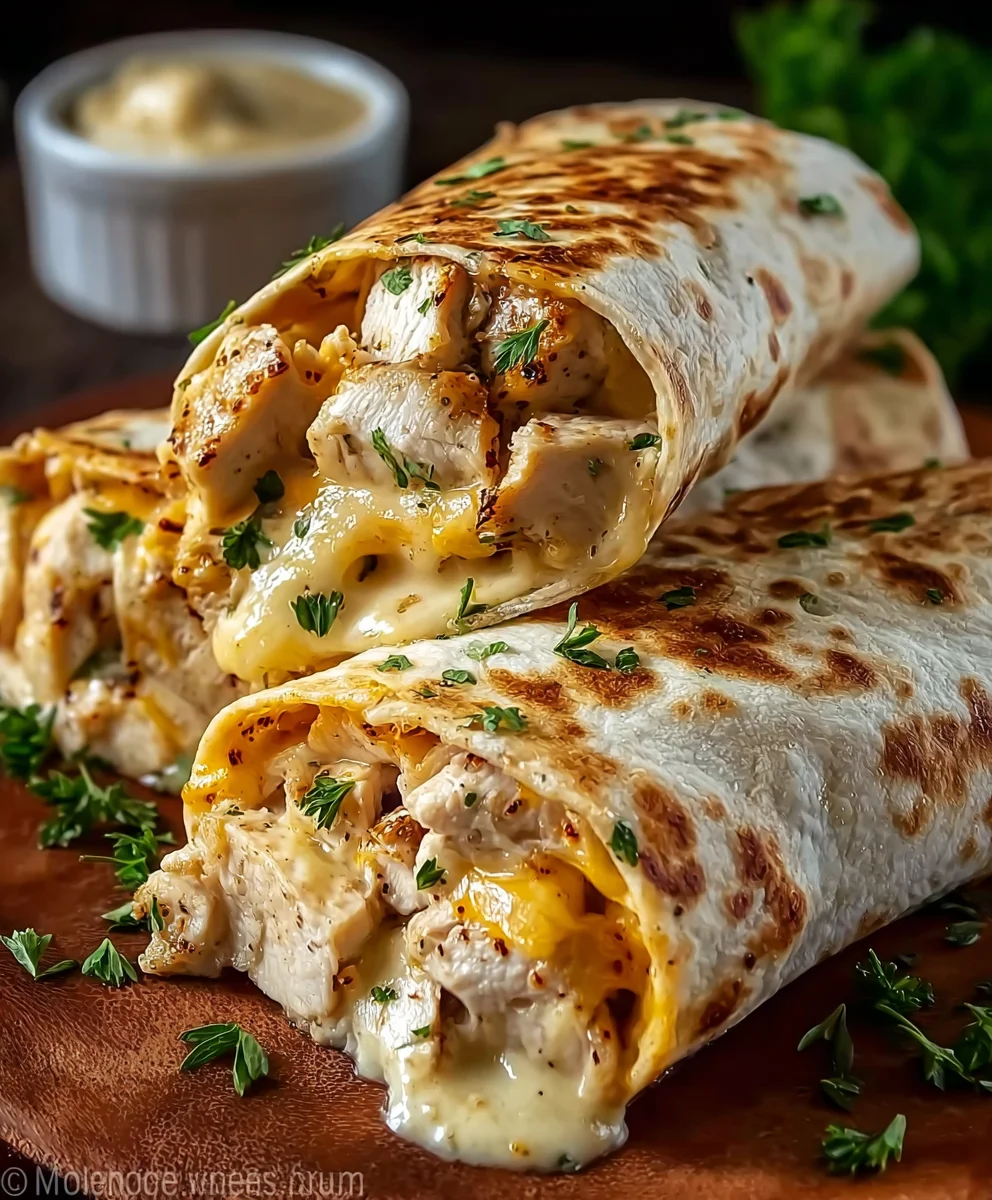
Cheesy Chicken Garlic Wraps- Easy & Delicious Meal
Cheesy Chicken Garlic Wraps are more than just a quick meal; they’re a ticket to pure comfort and flavor. Imagin extracte tender, juicy chicken bathed in a rich, garlicky sauce, all generously swaddled in melty cheese, then hugged by a soft, warm tortilla. Is it any wonder these wraps have become a go-to for busy weeknights and casual gatherings alike? People adore them for their incredible simplicity, the way they satisfy cravings for something both hearty and incredibly satisfying, and the sheer joy of that irresistible cheesy pull. What truly elevates these Cheesy Chicken Garlic Wraps from good to absolutely spectacular is the perfect balance of savory garlic, succulent chicken, and gooey, delicious cheese, all wrapped up in a convenient and delightful package that’s as fun to eat as it is easy to make. Get ready to fall in love with your new favorite handheld delight!
Ingredients:
- 2 large chicken breasts, diced into bite-sized pieces
- 4 large flour tortillas
- 1 tablespoon olive oil
- 2 teaspoons garlic powder
- 1 teaspoon onion powder
- 1 teaspoon paprika
- Salt, to taste
- Black pepper, to taste
- 1 cup shredded cheddar cheese
- 1/2 cup shredded mozzarella cheese
- 1/2 cup creamy garlic sauce
- Fresh parsley, chopped, for garnish (optional but recommended)
Preparing the Chicken
This is where we build the savory foundation for our Cheesy Chicken Garlic Wraps. The key here is to infuse the chicken with plenty of flavor so each bite is a delight.
Step 1: Season the Chicken
First, place your diced chicken breasts into a medium-sized bowl. Sprinkle the garlic powder, onion powder, paprika, salt, and pepper evenly over the chicken. I like to use a generous pinch of salt and a good grind of black pepper, but feel free to adjust these to your personal preference. Toss everything together with your hands or a spoon to ensure every piece of chicken is well-coated. This step is crucial for ensuring that the chicken itself is flavorful, not just the sauce we’ll add later. Allowing the seasoned chicken to sit for about 10-15 minutes while you prepare other components can even enhance the flavor absorption.
Step 2: Cook the Chicken
Heat the tablespoon of olive oil in a large skillet or frying pan over medium-high heat. Once the oil is shimmering, carefully add the seasoned chicken pieces. Spread the chicken out in a single layer as much as possible to ensure even cooking. Cook the chicken for about 6-8 minutes, stirring occasionally, until it’s golden brown on all sides and cooked through. You’ll know it’s done when there’s no pink in the center. Remove the cooked chicken from the skillet and set it aside on a plate. Don’t wipe out the skillet; we’ll use the flavorful bits left behind.
Assembling the Wraps
Now for the fun part – transforming our cooked chicken and delicious ingredients into irresistible Cheesy Chicken Garlic Wraps!
Step 3: Warm the Tortillas and Add Chicken
Return the skillet you used for the chicken to medium heat (no need to add more oil). Place one flour tortilla in the warm skillet for about 30 seconds per side, just until it becomes pliable and warm. This makes it much easier to fold without tearing. Remove the warmed tortilla and place it on a clean surface. Spoon about a quarter of the cooked chicken mixture onto the center of the tortilla. Don’t overfill, or it will be difficult to wrap. Repeat this process for the remaining three tortillas, ensuring you divide the chicken evenly.
Step 4: Add Cheese and Sauce
Once the chicken is distributed across the tortillas, it’s time for the cheese and the star sauce! Sprinkle half of the shredded cheddar cheese and half of the shredded mozzarella cheese over the chicken on each tortilla. Then, drizzle about 2 tablespoons of the creamy garlic sauce over the cheese and chicken on each wrap. The combination of two cheeses ensures a wonderful, melty texture, while the creamy garlic sauce brings a rich, garlicky punch that ties everything together beautifully.
Step 5: Fold and Grill the Wraps
Now, we fold! Take one side of the tortilla and fold it over the filling, then fold in the sides to create a neat, compact package. Once folded, carefully place the wrap back into the warm skillet, seam-side down. Cook for 2-3 minutes per side, or until the tortilla is golden brown and crispy and the cheese inside is gloriously melted. You might need to gently press down on the wrap with a spatula to help it hold its shape and ensure even browning. Repeat this process for all four wraps. If you like, you can add a sprinkle of fresh chopped parsley over the top of each wrap before serving for a burst of freshness and color. These Cheesy Chicken Garlic Wraps are best served immediately while the cheese is still gooey and hot. Enjoy every cheesy, garlicky bite!
Conclusion:
And there you have it – a simple yet incredibly satisfying recipe for Cheesy Chicken Garlic Wraps! We’ve explored how easily you can transform everyday ingredients into a flavorful and comforting meal that’s perfect for a quick weeknight dinner or a delicious lunch. The combination of tender chicken, aromatic garlic, and gooey, melted cheese wrapped in a soft tortilla is truly a winning formula. Don’t be afraid to get creative and make these Cheesy Chicken Garlic Wraps your own by trying out some of the variations we discussed. We hope you enjoy making and, more importantly, devouring these delightful wraps as much as we do!
Frequently Asked Questions:
Can I prepare the chicken filling ahead of time for these Cheesy Chicken Garlic Wraps?
Absolutely! You can cook and shred or dice the chicken with the garlic and seasonings a day in advance. Store it in an airtight container in the refrigerator. When you’re ready to assemble your Cheesy Chicken Garlic Wraps, simply reheat the filling gently on the stovetop or in the microwave before adding it to your tortillas with the cheese.
What are some good side dishes to serve with Cheesy Chicken Garlic Wraps?
These Cheesy Chicken Garlic Wraps are wonderfully versatile. For a lighter meal, a fresh garden salad with a vinaigrette dressing is a perfect complement. You could also serve them with a side of sweet potato fries, crispy seasoned potato wedges, or even a warm bowl of tomato soup for a comforting pairing.
Are there any dairy-free alternatives for the cheese in Cheesy Chicken Garlic Wraps?
Yes, you can definitely make dairy-free Cheesy Chicken Garlic Wraps! Many plant-based shredded cheeses melt quite well and offer a similar cheesy texture and flavor. Look for options made from cashew, almond, or soy. You might also consider adding a creamy element with a dollop of dairy-free sour cream or a drizzle of tahini sauce for added richness.
Cheesy Chicken Garlic Wraps
Easy and delicious wraps filled with seasoned chicken, melted cheese, and creamy garlic sauce.
Ingredients
-
2 large chicken breasts, diced
-
4 large flour tortillas
-
1 tablespoon olive oil
-
2 teaspoons garlic powder
-
1 teaspoon onion powder
-
1 teaspoon paprika
-
Salt, to taste
-
Black pepper, to taste
-
1 cup shredded cheddar cheese
-
1/2 cup shredded mozzarella cheese
-
1/2 cup creamy garlic sauce
-
Fresh parsley, chopped, for garnish (optional)
Instructions
-
Step 1
Place diced chicken breasts into a bowl. Sprinkle with garlic powder, onion powder, paprika, salt, and pepper. Toss to coat well and let sit for 10-15 minutes. -
Step 2
Heat olive oil in a skillet over medium-high heat. Add seasoned chicken and cook for 6-8 minutes, stirring occasionally, until golden brown and cooked through. -
Step 3
Warm one flour tortilla in the skillet for about 30 seconds per side until pliable. Place on a clean surface and spoon about a quarter of the cooked chicken onto the center. Repeat for remaining tortillas. -
Step 4
Sprinkle half of the cheddar and mozzarella cheese over the chicken on each tortilla. Drizzle about 2 tablespoons of creamy garlic sauce over the cheese and chicken on each wrap. -
Step 5
Fold one side of the tortilla over the filling, then fold in the sides to create a compact package. Place the wrap back into the skillet, seam-side down, and cook for 2-3 minutes per side until golden brown and the cheese is melted. -
Step 6
Repeat for all four wraps. Garnish with fresh chopped parsley if desired and serve immediately.
Important Information
Nutrition Facts (Per Serving)
It is important to consider this information as approximate and not to use it as definitive health advice.
Allergy Information
Please check ingredients for potential allergens and consult a health professional if in doubt.