Easy Pickled Red Onions-Quick Flavor Boost
Pickled red onions are a culinary revelation, transforming the humble onion into a vibrant, tangy masterpiece. If you’re anything like me, you’ve encountered these jewel-toned beauties gracing everything from tacos and salads to avocado toast and gourmet burgers. There’s an undeniable magic in their bright, zesty crunch that elevates any dish from ordinary to extraordinary. What makes pickled red onions so universally loved? It’s their incredible versatility and the perfect balance of sweet and sour they bring to the table. They offer a refreshing counterpoint to rich flavors, adding a welcome pop of acidity and a gorgeous visual appeal that’s simply irresistible. They’re surprisingly easy to make at home, meaning you can have a jar of this delicious condiment ready to go whenever inspiration strikes, ensuring your meals are always just a little bit more exciting. Trust me, once you try making your own pickled red onions, you’ll wonder how you ever lived without them!
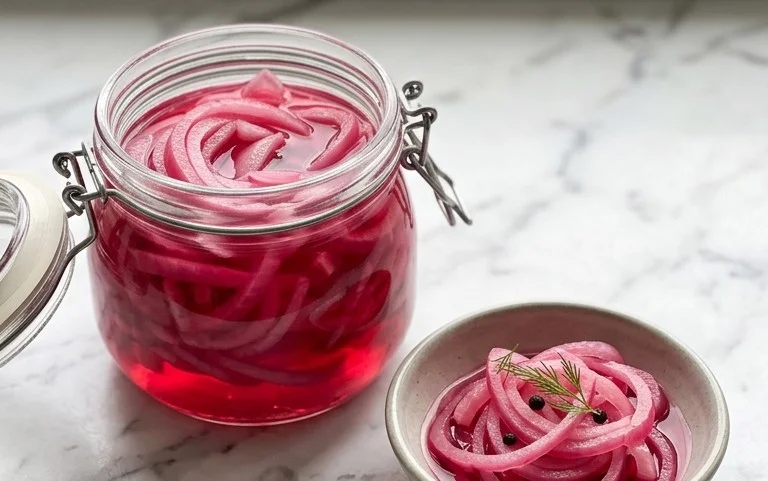
Pickled Red Onions
There are few condiments that can elevate a dish quite like the vibrant, tangy crunch of pickled red onions. They’re not just beautiful to look at, with their jewel-toned hue, but they also add an incredible depth of flavor and a delightful textural contrast to everything from tacos and sandwiches to salads and grilled meats. What’s even better is that making them yourself is surprisingly simple, requiring minimal active time and just a handful of pantry staples. Forget those store-bought versions that can sometimes taste overly harsh or artificial; homemade pickled red onions are a game-changer. They offer a nuanced sweetness, a balanced acidity, and a subtle kick, all customizable to your preference. I find myself reaching for them constantly, and once you try them, I’m sure you will too.
Ingredients:
Instructions:
The beauty of this recipe lies in its simplicity. It’s more about preparation and waiting than actual cooking. First, we need to get our onions ready. This involves slicing them thinly so they can absorb the pickling brine effectively and achieve that perfect tender-crisp texture.
Step 1: Prepare the Onions
Begin extract by peeling your red onions. You can do this under running water to help minimize any onion-induced tears, though some find it doesn’t make a significant difference. Once peeled, trim off the root end and the top stem. Now, slice the onions as thinly as you possibly can. A mandoline slicer is your best friend here if you have one, as it ensures uniform thickness, which is key for even pickling. If you don’t have a mandoline, a sharp knife will do the trick; just aim for consistent, paper-thin slices. Place these beautiful red ribbons into a heatproof bowl or a large glass jar.
Step 2: Create the Pickling Brine
While your onions are waiting, let’s get the brine ready. In a medium saucepan, combine the 1 1/4 cup of water, 1 1/4 cup of white vinegar, 3 tablespoons of your chosen sugar, and 1 tablespoon of sea salt. If you’re feeling a little adventurous and like a touch of heat, now is the time to add your red pepper flakes. Start with 1/4 teaspoon if you’re unsure, you can always add more later or for your next batch.
Step 3: Heat and Dissolve the Brine
Place the saucepan over medium heat. Stir the mixture continuously until the sugar and salt have completely dissolved. You don’t need to bring this mixture to a rolling boil; a gentle simmer is perfectly fine. The goal here is to ensure all the solids are fully incorporated into the liquid, creating a homogenous brine. Once everything is dissolved, remove the saucepan from the heat.
Step 4: Combine and Marinate
Carefully pour the hot brine over the thinly sliced red onions in your bowl or jar. Make sure the onions are fully submerged in the liquid. You might need to gently press them down with a spoon or a smaller jar lid to ensure they’re all covered. The hot brine will start to wilt the onions almost immediately, and you’ll notice their vibrant color intensifying. This is where the magic begin extracts!
Step 5: Cool and Refrigerate
Allow the onions and brine to cool down at room temperature for about 15-20 minutes. This initial cooling period allows the onions to begin extract their pickling process while they are still somewhat pliable. Once they’ve cooled significantly, cover the bowl tightly or screw the lid onto your jar. Transfer the pickled red onions to the refrigerator.
The real “cooking” happens in the fridge. For the best flavor and texture, I like to let them pickle for at least 2 hours, but they are truly spectacular after 24 hours. The longer they sit, the more the flavors will meld and the more tender the onions will become. They will continue to soften and the tartness will become more pronounced over time, but they will retain a pleasant crunch for up to 2-3 weeks in the refrigerator.
Tips and Variations:
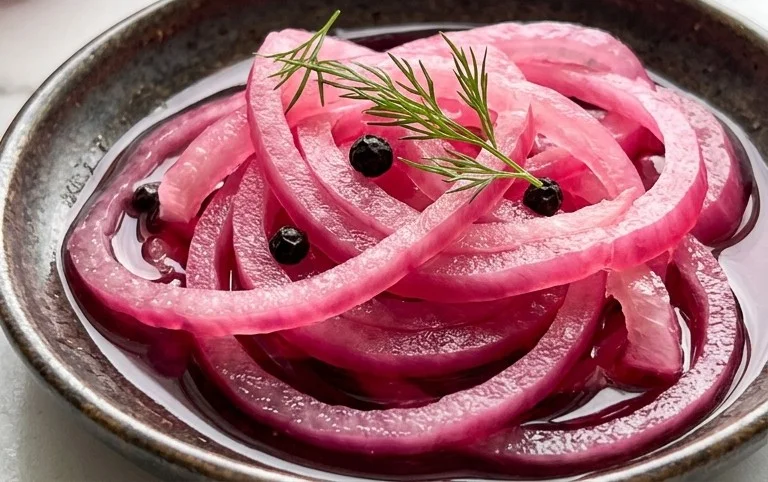
Enjoy your homemade, brilliantly colored, and deliciously tangy pickled red onions! They are a simple addition that makes a world of difference.
Conclusion:
And there you have it – a simple yet transformative recipe for pickled red onions! This quick and easy method delivers vibrant, tangy, and slightly sweet pickled red onions that are a fantastic addition to so many dishes. I absolutely love how they elevate everyday meals from ordinary to extraordinary. The satisfying crunch and burst of flavor are truly unparalleled. They’re not just a garnish; they’re a flavor powerhouse that can cut through richness, add a zesty kick, and introduce beautiful color to your plate.
Whether you’re topping tacos, burgers, sandwiches, salads, or even just stirring them into dips, these pickled red onions are sure to impress. Don’t be afraid to experiment with serving suggestions – the possibilities are endless! For variations, consider adding a pinch of red pepper flakes for a touch of heat, a few sprigs of dill for an herbaceous note, or even a bay leaf for a subtle earthy depth. I truly encourage you to give this recipe a try. It’s so rewarding to make something so delicious and versatile right in your own kitchen. You’ll wonder how you ever lived without them!
Frequently Asked Questions:
How long do pickled red onions last?
Properly stored in an airtight container in the refrigerator, your pickled red onions should stay fresh and delicious for about 2 to 3 weeks. The longer they sit, the more the flavors will meld and deepen, which can be quite lovely!
Can I use a different type of vinegar?
Absolutely! While apple cider vinegar is a popular choice for its balance of sweetness and tang, you can certainly experiment with other vinegars. White grape juice vinegar, red grape juice vinegar, or even a good quality rice vinegar would work well, each offering a slightly different flavor profile to your pickled red onions.
Do I need to sterilize the jar?
It’s a good idea to sterilize your jar, especially if you plan to store the pickled red onions for the full 2-3 weeks. This helps to ensure longevity and prevent spoilage. You can do this by washing the jar and lid thoroughly with hot, soapy water and then placing them in boiling water for a few minutes, or by running them through a hot dishwasher cycle.
Quick Pickled Red Onions
Tangy and slightly sweet pickled red onions, perfect for adding a vibrant touch to sandwiches, tacos, salads, and more. Ready in under an hour.
Ingredients
-
2 medium red onions ((or 3 small ones))
-
1 1/4 cup water
-
1 1/4 cup white vinegar
-
3 tbsp sugar (of choice)
-
1 tbsp sea salt
-
1/4-1/2 tsp red pepper flakes ((optional))
Instructions
-
Step 1
Thinly slice the red onions. A mandoline is recommended for even slices. -
Step 2
In a small saucepan, combine water, white vinegar, sugar, and sea salt. Heat over medium heat, stirring until the sugar and salt are dissolved. -
Step 3
If using, stir in the red pepper flakes. -
Step 4
Place the sliced onions into a heatproof jar or container. -
Step 5
Carefully pour the hot brine over the onions, ensuring they are fully submerged. -
Step 6
Let the mixture cool to room temperature, then cover and refrigerate for at least 30 minutes before serving. They will continue to improve with flavor as they sit.
Important Information
Nutrition Facts (Per Serving)
It is important to consider this information as approximate and not to use it as definitive health advice.
Allergy Information
Please check ingredients for potential allergens and consult a health professional if in doubt.