Cherry Dr-Pepper Grilled Chicken Recipe-Sweet Smoky Flavor
Cherry Dr. Pepper Grilled Chicken is more than just a meal; it’s a flavor explosion that will redefine your summer cookouts. Imagin extracte tender, juicy chicken infused with the sweet and tangy magic of cherries and the unmistakable kick of Dr. Pepper. This dish has become a backyard barbecue legend for a reason. It’s incredibly easy to make, delivering a punch of sweet and savory notes that are simply irresistible to both kids and adults alike. What truly sets Cherry Dr. Pepper Grilled Chicken apart is its ability to transform simple chicken into a culinary masterpiece. The secret lies in the unique marinade, a delightful concoction that caramelizes beautifully on the grill, creating an unforgettable taste experience that will have everyone asking for seconds. Get ready to elevate your grilling game with this sensational recipe!
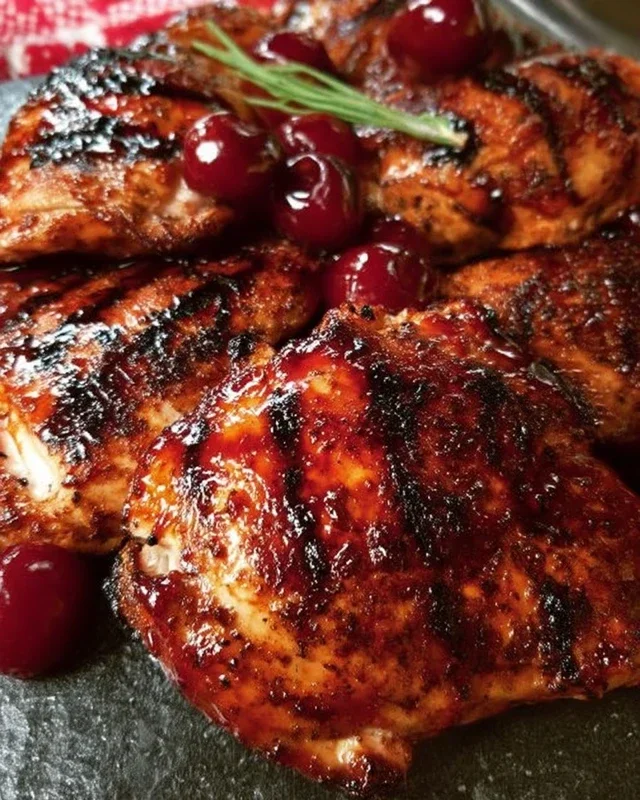
Cherry Dr. Pepper Grilled Chicken
Get ready for a flavor explosion that’s both sweet, smoky, and a little bit sassy! This Cherry Dr. Pepper Grilled Chicken recipe is a guaranteed crowd-pleaser, perfect for your next backyard barbecue or a weeknight dinner that feels like a special occasion. The secret? A surprisingly delicious glaze made with Cherry Dr. Pepper and a few pantry staples that transform ordinary chicken into something truly extraordinary. The carbonation in the soda helps tenderize the chicken, while the cherry flavor adds a unique sweetness that caramelizes beautifully on the grill.
Ingredients:
Crafting the Cherry Dr. Pepper Glaze
This is where the magic happens! The glaze is simple to prepare, but the flavors are complex and incredibly rewarding. Start by combining all the sauce ingredients in a medium saucepan. This includes your can of Cherry Dr. Pepper, ketchup, tomato paste, brown sugar, Worcestershire sauce, onion powder, black pepper, liquid smoke, chili powder, and minced garlic. Give everything a good stir to ensure the brown sugar begin extracts to dissolve.
Place the saucepan over medium heat on your stovetop. Bring the mixture to a gentle simmer, stirring occasionally. You’ll want to let it simmer for about 10-15 minutes, or until the glaze has thickened to your desired consistency. It should be thick enough to coat the back of a spoon but still pourable. As it simmers, the flavors will meld together beautifully, creating that signature sweet and tangy profile that defines this dish. The aroma alone will have your mouth watering! Be sure to stir frequently to prevent the bottom from scorching, especially as it thickens. Once it reaches the perfect consistency, remove it from the heat and set it aside. You can prepare this glaze ahead of time and store it in the refrigerator for up to 3 days, which makes grilling day even easier.
Preparing the Chicken
Before you even think about firing up the grill, it’s essential to prep your chicken. If you’re using a whole chicken cut up, ensure all the pieces are separated. If you’re using pre-cut dark meat, give it a quick rinse and pat it thoroughly dry with paper towels. This step is crucial for achieving that perfect sear and preventing the chicken from sticking to the grill grates.
Now, it’s time for a flavor infusion for the chicken itself. In a small bowl, combine the seasoning salt and paprika. Generously sprinkle this mixture all over your chicken pieces, making sure to coat every surface. Gently rub it in to ensure even distribution. This seasoning acts as a base layer of flavor, complementing the richness of the glaze.
Grilling Perfection
Preheat your grill to medium-high heat. It’s important to have a consistently hot grill for proper searing and even cooking. While the grill is heating up, it’s time to start the grilling process.
Phase 1: Initial Grilling
Place the seasoned chicken pieces directly on the preheated grill grates. We’re going to start by grilling the chicken for about 5-7 minutes per side, without any glaze. This initial searing helps to lock in the juices and develop a beautiful char on the outside of the chicken. Resist the urge to move the chicken around too much during this stage; let it develop those nice grill marks. You want to see a good amount of browning and caramelization on each side.
Phase 2: Glazing and Finishing
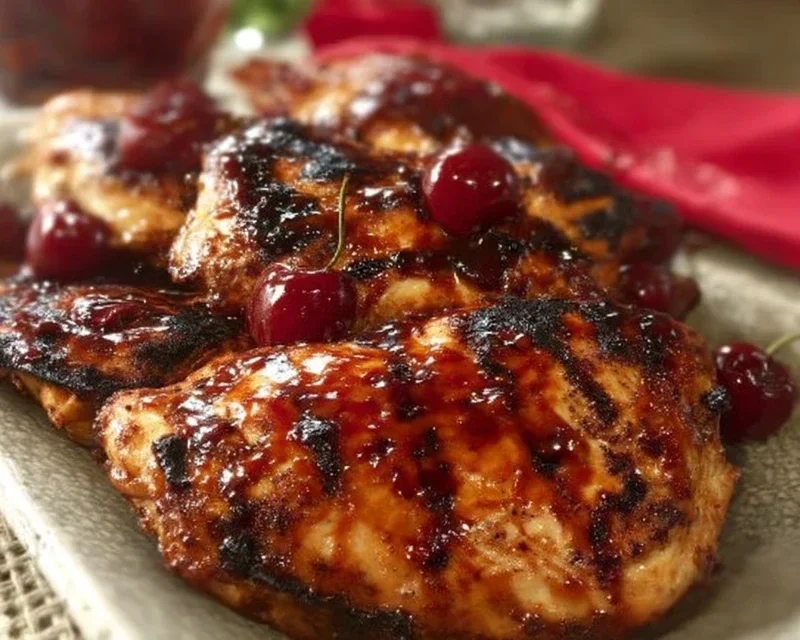
Once the chicken has had its initial sear on both sides, it’s time to introduce our star – the Cherry Dr. Pepper glaze. Begin extract brushing the glaze generously over all sides of the chicken pieces. Now, reduce the heat on your grill to medium-low. This lower temperature is crucial for allowing the glaze to caramelize and cook into the chicken without burning. Continue to grill the chicken, turning and brushing with more glaze every 5-7 minutes, for approximately 20-30 minutes longer. The total grilling time will vary depending on the size and thickness of your chicken pieces. You’re looking for the chicken to be cooked through, with an internal temperature of 165 degrees Fahrenheit (74 degrees Celsius) when tested with a meat thermometer in the thickest part of the thigh, avoiding the bone. The glaze should be sticky, bubbly, and deeply caramelized, creating a beautiful, lacquered finish on the chicken.
Serving Suggestions
Once your Cherry Dr. Pepper Grilled Chicken is perfectly cooked and glistening, remove it from the grill and let it rest for a few minutes before serving. This resting period allows the juices to redistribute throughout the meat, ensuring maximum tenderness and flavor. Serve this incredible chicken hot, alongside your favorite barbecue sides like potato salad, coleslaw, corn on the cob, or grilled vegetables. The sweet and tangy glaze pairs wonderfully with a variety of accompaniments. You’ll be amazed at how quickly this dish disappears! Enjoy the delightful symphony of flavors with every bite.
Conclusion:
There you have it – a recipe for truly unforgettable Cherry Dr. Pepper Grilled Chicken! This dish is a fantastic way to elevate your backyard barbecue with its unique sweet and tangy flavor profile. The cherry and Dr. Pepper blend creates a wonderfully caramelized glaze that locks in moisture, making the chicken incredibly juicy and tender. It’s a crowd-pleaser that’s surprisingly easy to whip up, perfect for weeknight dinners or weekend entertaining. I know you’re going to love how simple yet impactful the flavors are!
For serving suggestions, this grilled chicken is incredibly versatile. It pairs beautifully with classic barbecue sides like coleslaw, potato salad, or grilled corn on the cob. You could also serve it over a bed of fluffy rice or alongside a fresh green salad for a lighter option. Don’t be afraid to get creative with variations too! For a spicier kick, add a pinch of cayenne pepper or a dash of hot sauce to the marinade. You could also try grilling this same glaze on beef tenderloin or even thick-cut salmon for a delightful twist.
I genuinely encourage you to give this Cherry Dr. Pepper Grilled Chicken a try. It’s a recipe that’s sure to become a summer staple. The sweet, fizzy magic of the Dr. Pepper combined with the bright cherry notes makes for a truly memorable meal. Let me know how yours turns out!
Frequently Asked Questions:
Can I make this recipe ahead of time?
Absolutely! You can marinate the chicken for up to 4 hours in the refrigerator. The longer it marinates, the more flavor it will absorb. Just be sure to grill it within that timeframe for optimal safety and taste.
What if I don’t have a grill? Can I bake this?
Yes, you can! While grilling imparts a wonderful smoky flavor, you can achieve delicious results by baking. Place the marinated chicken on a baking sheet and bake at 400°F (200°C) for about 20-25 minutes, or until the internal temperature reaches 165°F (74°C). You can also broil it for the last few minutes to get some charring and caramelization.
Is the Dr. Pepper taste overpowering?
Not at all! The Dr. Pepper reduces and caramelizes during the cooking process, mellowing out its intense sweetness and creating a delightful tangy glaze. The cherry adds a complementary fruity note that balances everything perfectly.
Cherry Dr. Pepper Grilled Chicken
A sweet and tangy grilled chicken recipe featuring a glaze made with Cherry Dr. Pepper, ketchup, and brown sugar.
Ingredients
-
1 – 12 oz can Cherry Dr. Pepper
-
1 Cup Ketchup
-
1 – 6 oz. can tomato paste
-
1 Cup Brown Sugar
-
1 Tablespoon Worcestershire sauce
-
1/2 tsp. Onion Powder
-
1/2 tsp. black pepper
-
1/2 tsp. liquid smoke
-
1/2 tsp. Chili Powder
-
1 tsp. minced garlic
-
1 whole chicken cut up OR 1 package of dark meat chicken cut up about 12 pieces of chicken
-
3 teaspoons Seasoning Salt
-
1 tsp Paprika
Instructions
-
Step 1
In a medium saucepan, combine Cherry Dr. Pepper, ketchup, tomato paste, brown sugar, Worcestershire sauce, onion powder, black pepper, liquid smoke, chili powder, minced garlic, paprika, and seasoning salt. Bring to a boil, then reduce heat and simmer for 10-15 minutes, stirring occasionally, until thickened. Let cool slightly. -
Step 2
Preheat your grill to medium-high heat. -
Step 3
Pat the chicken pieces dry and season with additional seasoning salt and pepper if desired. -
Step 4
Place chicken on the preheated grill and cook for about 20-25 minutes, turning occasionally. -
Step 5
During the last 15 minutes of grilling, brush the chicken generously with the prepared Cherry Dr. Pepper glaze. Continue to grill, turning and basting, until the chicken is cooked through and the glaze is caramelized. -
Step 6
Remove chicken from grill and let rest for 5 minutes before serving.
Important Information
Nutrition Facts (Per Serving)
It is important to consider this information as approximate and not to use it as definitive health advice.
Allergy Information
Please check ingredients for potential allergens and consult a health professional if in doubt.