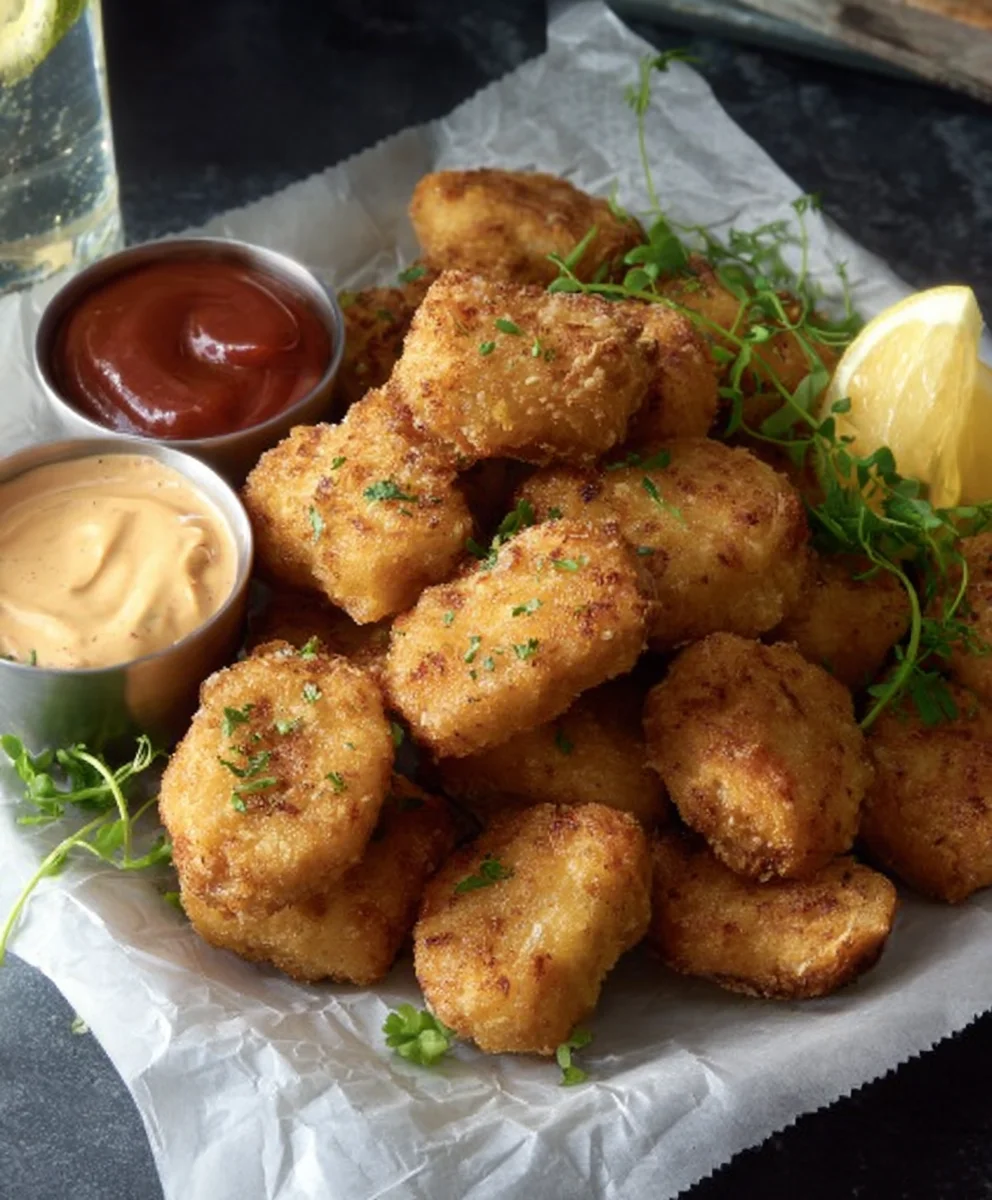
Crispy Baked Chicken Nuggets-Kid Friendly Recipe
CHICKEN NUGGETS. Ah, the mere mention of these golden, crispy delights can transport us back to childhood, can’t it? Whether it’s the satisfying crunch, the tender, juicy chicken within, or simply the pure joy they evoke, chicken nuggets hold a special place in our hearts and on our plates. They’re the ultimate comfort food, perfect for a quick weeknight dinner, a fun party appetizer, or even a sneaky late-night snack. But what if I told you that you could achieve that irresistible restaurant-quality texture and flavor right in your own kitchen, using simple ingredients and a little bit of love? Forget those frozen, often questionable options; this recipe for homemade CHICKEN NUGGETS is about to become your new go-to. We’re diving deep into what makes these morsels so universally adored and revealing the secrets to making them the absolute best they can be, ensuring every bite is a tiny taste of pure bliss.

Ingredients:
- 300 g chicken breast, boneless and skinless
- 250 g chicken thighs, boneless and skinless
- 2 teaspoons salt
- 1 teaspoon sugar
- 1/2 teaspoon MSG (monosodium glutamate)
- 2 teaspoons garlic powder
- 2 teaspoons onion powder
- 1 teaspoon paprika
- 2 teaspoons black pepper
- 1 large egg
- 1 cup all-purpose flour
- 1 cup cornflour (cornstarch)
- 2 teaspoons garlic powder (for coating)
- 1 teaspoon onion powder (for coating)
- 1 tablespoon salt (for coating)
Preparing the Chicken
Seasoning the Chicken Mixture
The first step to achieving incredibly flavorful CHICKEN NUGGETS is to properly season the meat. We’ll be making a ground chicken mixture that will form the heart of our nuggets. In a large bowl, combine the diced chicken breast and chicken thighs. It’s important to use both breast and thigh meat for the best texture and flavor. The breast provides lean protein, while the thigh meat adds moisture and richness, preventing the nuggets from becoming dry.
Next, let’s add the seasonings to the chicken. Sprinkle in 2 teaspoons of salt, 1 teaspoon of sugar, and 1/2 teaspoon of MSG. The sugar helps to balance the saltiness and adds a subtle sweetness that is characteristic of good quality chicken nuggets. The MSG, if you choose to use it, enhances the savory, umami flavor of the chicken, making it even more irresistible. Now, add 2 teaspoons of garlic powder, 2 teaspoons of onion powder, 1 teaspoon of paprika, and 2 teaspoons of black pepper. Paprika not only adds a lovely reddish hue but also contributes a mild, smoky, and slightly sweet flavor. Ensure all these dry ingredients are evenly distributed over the chicken pieces.
Mincing and Binding the Chicken
Once the seasonings are added, it’s time to mince the chicken. You can achieve this by using a food processor or a meat grinder. If you’re using a food processor, pulse the chicken in batches until it’s finely ground but not mushy. Be careful not to over-process, as this can lead to a gummy texture. If you prefer a slightly chunkier texture, you can chop the chicken very finely with a knife.
After mincing, crack the large egg into the bowl with the seasoned and minced chicken. The egg acts as a binder, helping to hold the nugget mixture together and providing a bit of richness. Mix everything thoroughly with your hands or a sturdy spoon until the egg is completely incorporated and the mixture is homogenous. You should be able to form the mixture into shapes without it falling apart.
Coating the Nuggets
Preparing the Dredgin extractg Station
Now, let’s get gin extract dredging station ready. This is crucial for achieving that perfectly crispy exterior on our CHICKEN NUGGETS. In a separate shallow dish or bowl, whisk together the 1 cup of all-purpose flour and 1 cup of cornflour. The cornflour is a key ingredient here; it contributes to a lighter, crispier, and crunchier coating than flour alone.
In another shallow dish or plate, prepare your seasoned flour mixture for the final coating. Combine 2 teaspoons of garlic powder, 1 teaspoon of onion powder, and 1 tablespoon of salt. This seasoned coating will infuse every bite with extra flavor. Ensure these ingredients are well mixed. The extra salt in this final coating is what really elevates the nuggets and makes them addictive.
Breading the Chicken
Take small portions of the chicken mixture (about 1 to 1.5 tablespoons each) and shape them into your desired nugget form. You can make them classic oval shapes, bite-sized squares, or even fun little rounds. Aim for uniform sizes so they cook evenly.
First, gently roll each shaped chicken piece in the plain flour and cornflour mixture, ensuring it’s lightly coated on all sides. Shake off any excess. This initial coating helps the next layer of breading adhere better. Next, dip each floured nugget into the egg wash (if you haven’t already prepared one, you can lightly beat an extra egg in a separate bowl and use that). Ensure the entire nugget is coated with the egg.
Finally, carefully transfer the egg-coated nugget into the seasoned flour and cornflour mixture. Press gently to make sure the coating adheres well. Again, shake off any excess. For an even crispier texture, you can double-coat your nuggets. To do this, after the first dip in the seasoned flour, dip it back into the egg wash, and then into the seasoned flour mixture once more. Place the breaded nuggets on a clean plate or baking sheet lined with parchment paper, ensuring they don’t touch each other to prevent sticking.
Cooking the CHICKEN NUGGETS
Frying Method
For that authentic, crispy texture, frying is the best method. Heat about 2-3 inches of neutral cooking oil (like vegetable, canola, or peanut oil) in a deep, heavy-bottomed pot or Dutch oven over medium-high heat to 350°F (175°C). It’s essential to maintain the oil temperature; too low and the nuggets will be greasy, too high and they’ll burn on the outside before cooking through.
Carefully add the breaded CHICKEN NUGGETS to the hot oil in batches. Do not overcrowd the pot, as this will lower the oil temperature and result in soggy nuggets. Fry for approximately 4-6 minutes, turning them occasionally with a slotted spoon or spider strainer, until they are golden brown and cooked through. You should see them float to the surface when they are nearly done.
Once cooked, remove the nuggets from the oil using the slotted spoon or strainer and place them on a wire rack set over a baking sheet. This allows excess oil to drain away, keeping them crispy. You can also line the baking sheet with paper towels, but a wire rack is superior for maintaining crispiness. Season them immediately with a little extra salt if desired, as the salt adheres best when they are hot.
Baking Method (Healthier Option)
If you prefer a healthier alternative, baking is a viable option. Preheat your oven to 400°F (200°C) and line a baking sheet with parchment paper. Arrange the breaded CHICKEN NUGGETS on the prepared baking sheet in a single layer, ensuring they are not touching. Lightly spray the tops of the nuggets with cooking spray for a slightly crispier finish.
Bake for approximately 20-25 minutes, flipping them halfway through the cooking time, until they are golden brown and cooked through. The internal temperature should reach 165°F (74°C). While baking won’t achieve the same level of crispiness as frying, it still yields delicious and much lighter CHICKEN NUGGETS.
Air Frying Method
The air fryer is another excellent method for achieving crispy CHICKEN NUGGETS with less oil. Preheat your air fryer to 375°F (190°C). Arrange the breaded nuggets in a single layer in the air fryer basket, working in batches if necessary to avoid overcrowding.
Air fry for 10-15 minutes, shaking the basket halfway through, until the nuggets are golden brown and cooked through. Similar to baking, ensure the internal temperature reaches 165°F (74°C). The air fryer circulates hot air, creating a crispy exterior that closely rivals traditional frying.
Conclusion:
There you have it – your foolproof guide to creating delicious, crispy CHICKEN NUGGETS right in your own kitchen! We’ve walked through each step, from selecting the best chicken cuts to achieving that perfect golden-brown coating that makes these homemade nuggets so irresistible. These CHICKEN NUGGETS are a fantastic crowd-pleaser, perfect for a weeknight dinner, a fun appetizer, or even a satisfying lunchbox treat. They truly shine when served with a variety of dipping sauces like honey mustard, barbecue, or a zesty ranch. Don’t be afraid to get creative with seasonings for your coating, perhaps adding a pinch of paprika for a smoky flavor or some garlic powder for an extra punch. We hope you enjoy making and savoring these delightful CHICKEN NUGGETS as much as we do!
Frequently Asked Questions:
Can I make these CHICKEN NUGGETS ahead of time?
Yes, you absolutely can! You can prepare the raw, coated nuggets and freeze them on a baking sheet until solid, then transfer them to an airtight container. When you’re ready to cook, you can bake them directly from frozen, adding a few extra minutes to the cooking time.
What kind of chicken is best for CHICKEN NUGGETS?
Boneless, skinless chicken breast is the most common and easiest choice for CHICKEN NUGGETS due to its lean texture and mild flavor. However, you can also use boneless, skinless chicken thighs for a slightly more tender and flavorful nugget. Just ensure all bones and excess fat are removed.
How can I make my CHICKEN NUGGETS extra crispy?
For extra crispiness, ensure your oil is hot enough when frying (around 350-375°F or 175-190°C). If baking, use a wire rack set on a baking sheet to allow air to circulate around the nuggets. You can also consider a double coating for an extra thick and crunchy crust.
Crispy Baked Chicken Nuggets – Kid Friendly Recipe
Delicious and crispy baked chicken nuggets, perfect for a kid-friendly meal. This recipe uses a combination of chicken breast and thighs for optimal flavor and texture, coated in a seasoned flour and cornflour blend.
Ingredients
-
300 g chicken breast, boneless and skinless
-
250 g chicken thighs, boneless and skinless
-
2 teaspoons salt
-
1 teaspoon sugar
-
1/2 teaspoon MSG (monosodium glutamate)
-
2 teaspoons garlic powder
-
2 teaspoons onion powder
-
1 teaspoon paprika
-
2 teaspoons black pepper
-
1 large egg
-
1 cup all-purpose flour
-
1 cup cornflour (cornstarch)
-
2 teaspoons garlic powder (for coating)
-
1 teaspoon onion powder (for coating)
-
1 tablespoon salt (for coating)
Instructions
-
Step 1
Prepare the chicken: In a large bowl, combine diced chicken breast and chicken thighs. Add 2 teaspoons salt, 1 teaspoon sugar, 1/2 teaspoon MSG, 2 teaspoons garlic powder, 2 teaspoons onion powder, 1 teaspoon paprika, and 2 teaspoons black pepper. Mince the mixture using a food processor or meat grinder until finely ground but not mushy. -
Step 2
Bind the chicken: Crack 1 large egg into the minced chicken mixture. Mix thoroughly with your hands or a spoon until the egg is fully incorporated and the mixture is homogenous and can be shaped. -
Step 3
Prepare the dredging station: In one shallow dish, whisk together 1 cup all-purpose flour and 1 cup cornflour. In another shallow dish, combine 2 teaspoons garlic powder, 1 teaspoon onion powder, and 1 tablespoon salt for the final coating. -
Step 4
Coat the nuggets: Take 1-1.5 tablespoon portions of the chicken mixture and shape them into nugget forms. Roll each nugget in the plain flour and cornflour mixture, shaking off excess. Dip into the egg wash (lightly beaten egg), then coat thoroughly in the seasoned flour and cornflour mixture. For extra crispiness, double-coat by dipping again in egg and then the seasoned flour. -
Step 5
Bake the nuggets: Preheat oven to 400°F (200°C). Line a baking sheet with parchment paper and arrange nuggets in a single layer, not touching. Lightly spray the tops with cooking spray. -
Step 6
Cook the nuggets: Bake for 20-25 minutes, flipping halfway through, until golden brown and cooked through (internal temperature of 165°F / 74°C).
Important Information
Nutrition Facts (Per Serving)
It is important to consider this information as approximate and not to use it as definitive health advice.
Allergy Information
Please check ingredients for potential allergens and consult a health professional if in doubt.