Crispy Chicken Caesar Sandwich-Best Recipe
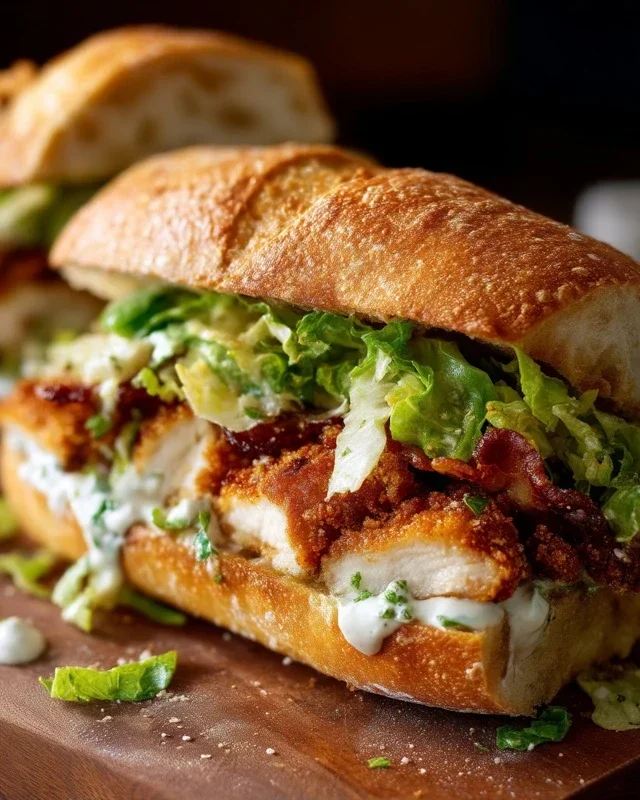
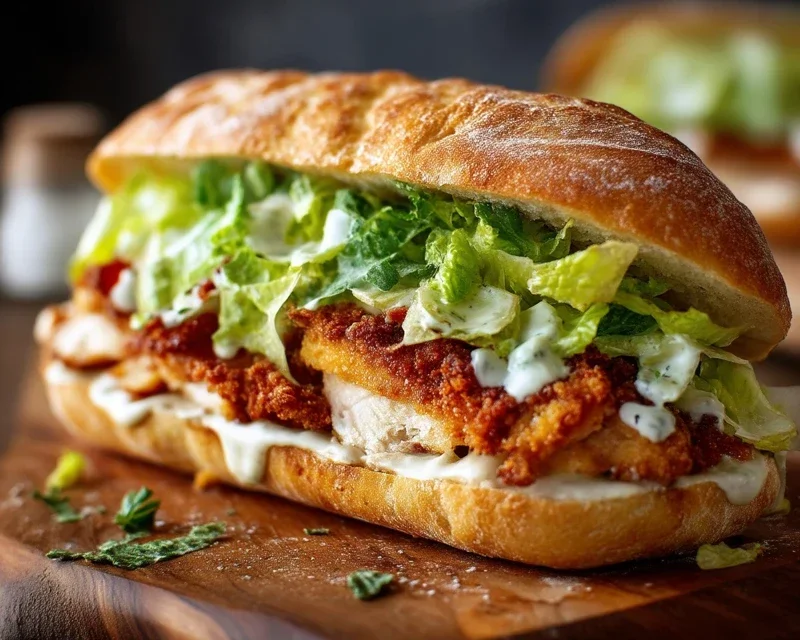
Crispy Chicken Caesar Sandwiches are the stuff of lunchtime dreams, aren’t they? That irresistible combination of textures and flavors – the satisfying crunch of perfectly fried chicken, the creamy tang of classic Caesar dressing, the peppery bite of romaine, all embraced by a soft, yielding bun – it’s a culinary masterpiece in every single bite. Forget sad desk lunches; this elevated take on a beloved salad transforms it into an utterly satisfying meal that we can’t get enough of. What makes our Crispy Chicken Caesar Sandwich truly special is the careful balance of elements. We’re talking about a chicken coating that achieves ultimate crispiness without being greasy, a homemade Caesar dressing that sings with anchovy umami and bright lemon, and the thoughtful assembly that ensures every mouthful is pure bliss. Get ready to elevate your sandwich game.
Why We Absolutely Adore This Dish
The Ultimate Comfort Food Experience
The Ultimate Crispy Chicken Caesar Sandwich
Get ready to elevate your sandwich game with this incredible Crispy Chicken Caesar Sandwich recipe! Forget soggy chicken and bland dressings – this sandwich is all about texture, flavor, and pure sandwich bliss. We’re talking about perfectly seasoned, golden-brown fried chicken nestled between soft buns, generously slathered with a homemade Caesar dressing that’s out of this world. It’s the perfect meal for a quick lunch, a satisfying dinner, or even an impressive picnic. Let’s dive into what you’ll need.
Ingredients:
Preparing the Caesar Dressing
The heart and soul of any great Caesar sandwich is its dressing, and this homemade version is a game-changer. It’s incredibly easy to whip up and the flavor is so much richer than anything from a bottle.
1. In a medium bowl, combine the mayonnaise, Greek yogurt, Dijon mustard, Worcestershire sauce, and lemon juice. Whisk everything together until smooth and well-incorporated. The Greek yogurt adds a lovely tang and a lighter texture without sacrificing creaminess.
2. Add the freshly grated Parmesan cheese, minced garlic, ¼ teaspoon black pepper, and a pinch of sea salt to the bowl. Stir everything until it’s thoroughly combined. Taste and adjust seasonings if needed. If you prefer a tangier dressing, add a little more lemon juice. For more garlicky goodness, feel free to add another clove of garlic – just make sure it’s minced very finely so you don’t get overwhelming bites of raw garlic. This dressing will be unbelievably delicious, so make sure to have a little extra for dipping if you like!
Cooking the Crispy Chicken
This is where the magic happens! Achieving that perfect crispy coating on the chicken is key to a truly satisfying sandwich experience.
1. Pat your chicken cutlets completely dry with paper towels. This is a crucial step for ensuring a crispy, non-greasy coating. Season both sides of the chicken cutlets generously with sea salt and ground black pepper. Don’t be shy with the seasoning; this is your opportunity to build flavor right into the chicken.
2. Set up your dredgin extractg station. In a shallow dish or plate, combine the all-purpose flour with ½ teaspoon of salt. This seasoned flour will form the base of our crispy coating.
3. Heat your oil in a large skillet or frying pan over medium-high heat. You want enough oil to come about ½ inch up the sides of the pan. A good test is to drop a tiny pinch of flour into the oil; if it sizzles immediately, your oil is ready. Too cool, and your chicken will be greasy; too hot, and it will burn before cooking through.
4. Carefully dredge each chicken cutlet in the seasoned flour, making sure to coat both sides completely. Gently shake off any excess flour. Then, carefully place the floured chicken cutlets into the hot oil. Be careful not to overcrowd the pan, as this will lower the oil temperature and result in soggy chicken. You may need to cook the chicken in batches.
5. Fry the chicken for about 3-5 minutes per side, or until it’s golden brown and cooked through. The exact cooking time will depend on the thickness of your cutlets. You can check for doneness by carefully poking the thickest part of the chicken with a fork; the juices should run clear. Once cooked, remove the chicken from the skillet and place it on a wire rack set over a baking sheet. This allows any excess oil to drain off, ensuring maximum crispiness. Season with a little more salt and pepper immediately if desired.
Assembling Your Masterpiece
Now for the grand finnon-alcoholic ale – putting all these delicious components together to create your ultimate sandwich.
1. Lightly toast your sandwich buns, if desired. This adds a nice texture and prevents the buns from getting soggy from the dressing.
2. Generously spread a good amount of your homemade Caesar dressing on the bottom half of each bun. Don’t be shy!
3. Place a crispy chicken cutlet on top of the dressed bun.
4. Add a few crisp romaine lettuce leaves if you’re using them. This adds a refreshing crunch and a touch of freshness.
5. Finally, spread more Caesar dressing on the top half of the bun and place it on top of the chicken.
And there you have it! Your perfectly crafted Crispy Chicken Caesar Sandwich. Take a big bite and savor the incredible flavors and textures. Enjoy every delicious moment!
Note 1: Chicken cutlets are essentially thin slices of chicken breast. If you can’t find them pre-cut, you can easily make them yourself by slicing chicken breasts horizontally.
Conclusion:
There you have it – the ultimate guide to crafting a truly sensational Crispy Chicken Caesar Sandwich! This recipe is a winner because it balances the satisfying crunch of perfectly fried chicken with the creamy, tangy embrace of classic Caesar dressing, all nestled within a soft bun. It’s a flavor explosion that’s both comforting and exciting, making it ideal for a quick weeknight dinner, a decadent lunch, or even a crowd-pleasing picnic option. Don’t hesitate to experiment with serving this masterpiece with a side of sweet potato fries, a fresh green salad, or even some crispy onion rings for an extra indulgence. For variations, consider swapping the chicken for crispy halloumi for a vegetarian twist, or adding a sprinkle of red pepper flakes to the chicken coating for a hint of heat. I genuinely encourage you to give this Crispy Chicken Caesar Sandwich a try – I’m confident you’ll fall in love with every delicious bite!
Frequently Asked Questions:
Can I make the chicken ahead of time?
Absolutely! You can bread and fry the chicken pieces a day in advance. Let them cool completely, then store them in an airtight container in the refrigerator. Reheat them gently in a warm oven or air fryer before assembling your sandwich to regain that glorious crispiness.
What are some other sauce ideas besides Caesar?
While Caesar is divine, feel free to get creative! A spicy sriracha mayo, a zesty lemon-herb aioli, or even a simple ranch dressing can offer a delicious alternative. The key is to complement the crispy chicken and fresh greens.
Is this sandwich suitable for meal prep?
Yes, with a little planning! Fry the chicken and prepare the dressing separately. Store them in airtight containers. Assemble the sandwich just before eating to prevent the bun from getting soggy and to maintain the crispiness of the chicken.
Crispy Chicken Caesar Sandwich
A delicious and crispy chicken sandwich featuring a homemade creamy Caesar dressing.
Ingredients
-
½ cup full-fat mayonnaise
-
3 tbsp Greek yogurt
-
1 tsp Dijon mustard
-
1 tsp Worcestershire sauce
-
2 tbsp lemon juice
-
¼ cup Parmesan cheese (freshly grated)
-
1-2 garlic cloves (minced)
-
¼ tsp black pepper
-
Pinch sea salt
-
5 chicken cutlets
-
sea salt (to taste)
-
ground black pepper (to taste)
-
Oil (for frying)
-
⅓ cup all-purpose flour
-
½ tsp salt
Instructions
-
Step 1
In a medium bowl, whisk together mayonnaise, Greek yogurt, Dijon mustard, Worcestershire sauce, lemon juice, Parmesan cheese, minced garlic, ¼ tsp black pepper, and a pinch of sea salt to create the Caesar dressing. Set aside. -
Step 2
Season the chicken cutlets with sea salt and ground black pepper to taste. -
Step 3
In a shallow dish, combine the all-purpose flour with ½ tsp salt and a pinch of ground black pepper. -
Step 4
Dredge each chicken cutlet in the seasoned flour, ensuring it’s fully coated. Shake off any excess. -
Step 5
Heat about 1 inch of oil in a large skillet over medium-high heat until shimmering. Carefully add the floured chicken cutlets to the hot oil, ensuring not to overcrowd the pan. Fry for about 5-7 minutes per side, or until golden brown and cooked through. -
Step 6
Remove the cooked chicken from the skillet and place on a wire rack to drain any excess oil. Allow to cool slightly. -
Step 7
Assemble the sandwiches by spreading a generous amount of Caesar dressing on your preferred bread (not included in ingredients, assume user provides). Place a crispy chicken cutlet on the bottom half of the bread, then top with more dressing and the other half of the bread. Serve immediately.
Important Information
Nutrition Facts (Per Serving)
It is important to consider this information as approximate and not to use it as definitive health advice.
Allergy Information
Please check ingredients for potential allergens and consult a health professional if in doubt.