Easy Chia Seed Pudding Recipe-Healthy Dessert
Chia Seed Pudding Recipe. Have you ever craved a dessert that’s both incredibly satisfying and astonishingly good for you? Well, you’ve come to the right place! This chia seed pudding recipe is a true game-changer, and it’s no wonder it has taken the healthy eating world by storm. It’s the ultimate blank canvas for flavor, allowing you to customize it to your heart’s content. What truly makes this dish special is its effortless preparation – just a few ingredients and a little patience, and you’re rewarded with a creamy, decadent treat that feels like pure indulgence. Forget complicated steps; this is healthy eating made simple and delicious. People adore chia seed pudding for its incredible texture, its nutritional powerhouse status (hello, fiber and omega-3s!), and the sheer joy of knowing you’re nourishing your body while delighting your taste buds. Get ready to fall in love with this delightful concoction!
Chia Seed Pudding Recipe
Chia seed pudding has become a beloved breakfast and snack option for good reason. It’s incredibly easy to make, packed with nutrients, and wonderfully versatile. I love that I can whip it up the night before and have a healthy, satisfying meal waiting for me in the morning. The texture is something truly special – creamy, a little gelatinous, and with those tiny poppy seeds providing a subtle crunch. It’s a far cry from the bland puddings of childhood; this is a sophisticated and nourishing delight.
The beauty of chia seed pudding lies in its simplicity and the minimal effort required. You essentially just combine a few ingredients, give them a good stir, and let time do the work. This recipe is a fantastic starting point, and once you’ve mastered it, you can experiment with all sorts of flavor additions and toppings. It’s a guilt-free indulgence that will keep you feeling full and energized.
Ingredients:
Instructions:
Let’s get started on creating this delightful treat. The process is so straightforward, you’ll wonder why you haven’t been making it all along.
1. Combine the Dry Ingredients and Liquid: In a bowl or a jar, add your 3 tablespoons of chia seeds. Then, pour in your 3/4 cup of milk. I typically reach for unsweetened almond milk, as it has a neutral flavor that allows other ingredients to shine. However, feel free to use whatever milk you have on hand – oat milk adds a lovely creaminess, coconut milk brings a tropical flair, and dairy milk is a classic choice. Whichever you choose, the liquid is what will hydrate the chia seeds and transform them into that characteristic pudding-like texture.
2. Sweeten and Flavor: Next, add your 1 tablespoon of maple syrup. This provides a gentle sweetness. If you prefer a sweeter pudding, you can certainly add a little more, or if you’re watching your sugar intake, you can opt for a sugar-free sweetener like stevia or erythritol. Following the maple syrup, stir in your 1 teaspoon of vanilla extract. Vanilla is a flavor enhancer that adds warmth and depth. If you’re feeling adventurous, this is also the point where you could add other flavorings like a pinch of cinnamon, a dash of cocoa powder for chocolate chia pudding, or even a bit of citrus zest.
3. Thoroughly Mix: This is a crucial step to prevent clumps of chia seeds from forming at the bottom of your container. Use a whisk or a fork to stir everything together vigorously for at least 30 seconds to a minute. Make sure to scrape the bottom and sides of the bowl to ensure all the chia seeds are fully submerged in the liquid and coated with the sweetener and vanilla. You’ll notice the mixture starting to thicken almost immediately as the chia seeds begin extract to absorb the liquid.
4. Allow to Gel (Initial Stir): Cover your bowl or jar and let it sit for about 5 to 10 minutes. During this time, the chia seeds will start to absorb the liquid and swell. After this initial resting period, give the mixture another good stir. This second stir is just as important as the first, as it breaks up any clumps that might have started to form as the pudding began to thicken. It ensures a smooth, even consistency throughout.
5. Chill and Thicken: Once you’ve completed the second stir, cover your container again, making sure it’s senon-alcoholic aled well. Place it in the refrigerator to chill for at least 2-3 hours, or preferably overnight. The longer it chills, the thicker and creamier your chia seed pudding will become. Overnight is my preferred method, as it allows the chia seeds to fully hydrate and the flavors to meld beautifully. The result will be a thick, spoonable pudding that’s ready to be enjoyed.
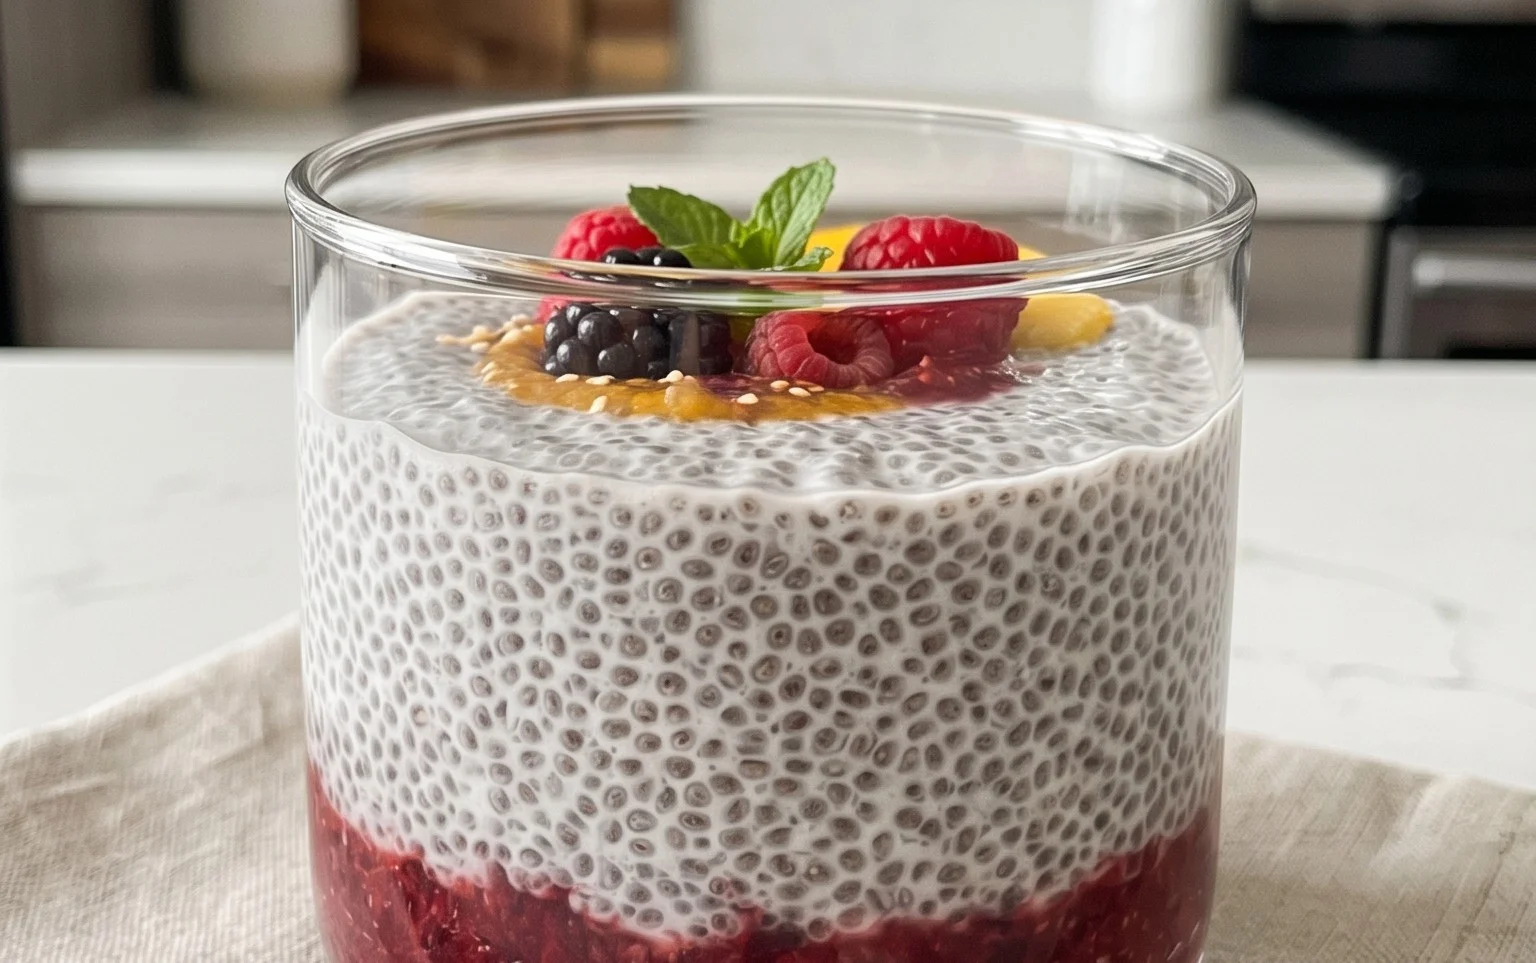
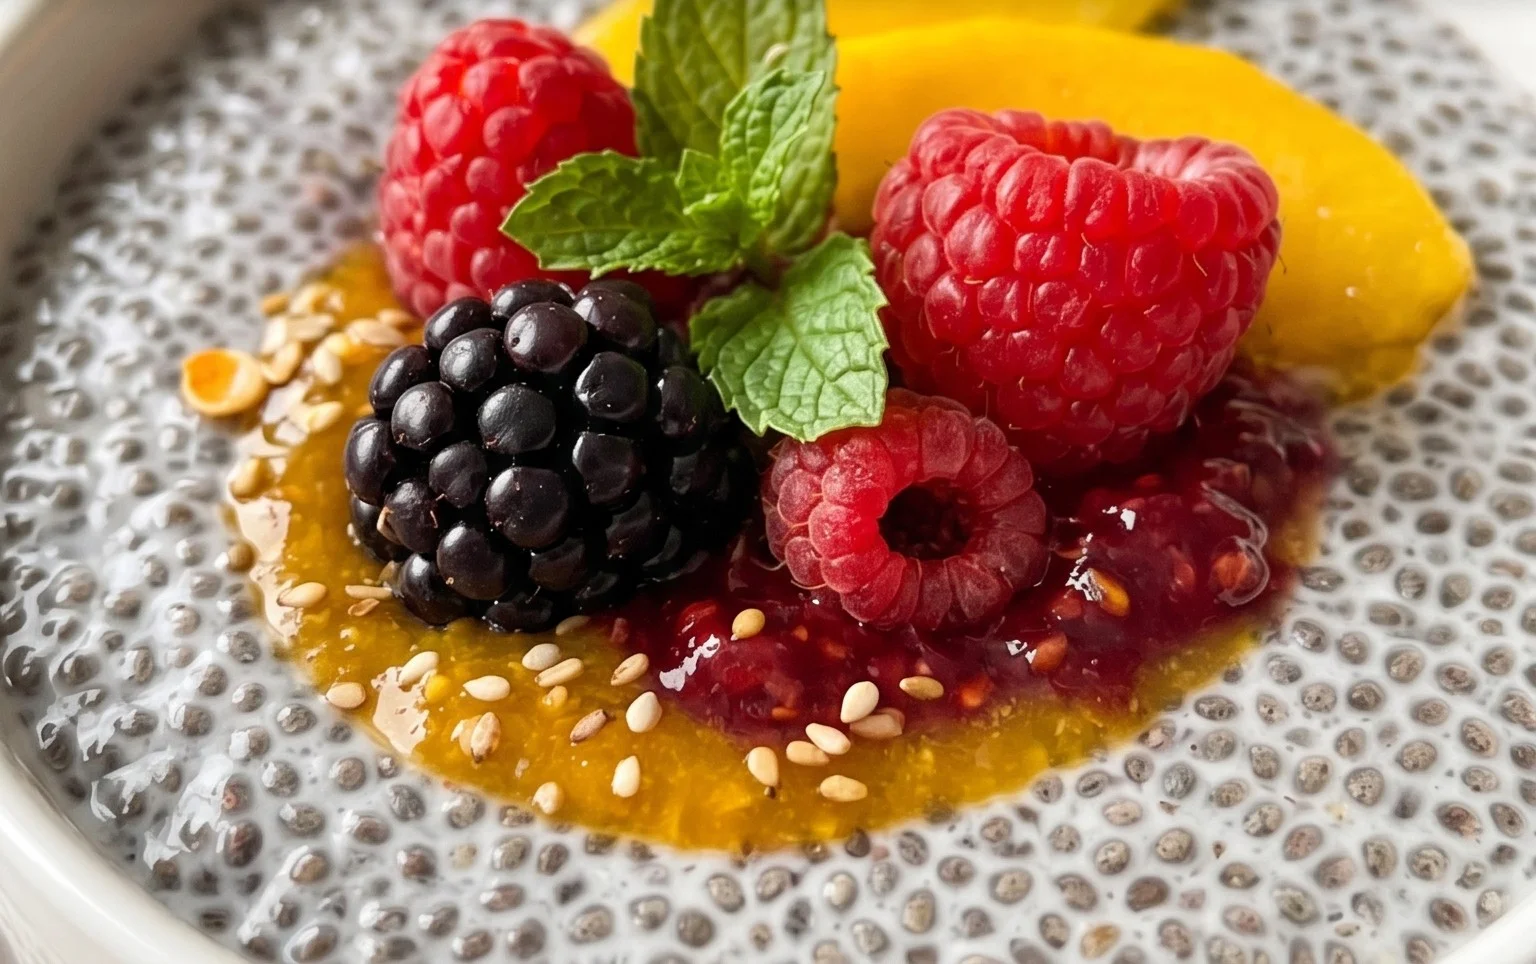
6. Serve and Enjoy: When you’re ready to eat, give the pudding a final stir. If it’s thicker than you prefer, you can add a splash more milk to thin it out to your desired consistency. Spoon it into serving dishes and top with your favorite goodies. I love fresh berries like strawberries, blueberries, or raspberries. A sprinkle of granola adds a satisfying crunch, and a drizzle of extra maple syrup or a dollop of yogurt can elevate it even further. You can also add chopped nuts, shredded coconut, or a dusting of cocoa powder. The possibilities are truly endless, making each serving a unique and delicious experience.
This chia seed pudding recipe is a testament to the power of simple, wholesome ingredients. It’s a quick win for busy mornings, a satisfying afternoon pick-me-up, or even a light and healthy dessert. Give it a try, and I’m confident you’ll fall in love with its ease and delightful texture, just like I have.
Conclusion:
There you have it! A simple, incredibly versatile, and wonderfully healthy chia seed pudding recipe that’s perfect for breakfast, a snack, or even a light dessert. I love this recipe because it requires minimal effort for maximum reward. The beauty of chia seed pudding lies in its adaptability. You can whip up a basic base and then let your imagin extractation run wild with toppings and flavorings. It’s a fantastic way to boost your fiber and omega-3 intake without feeling like you’re missing out on something delicious.
For serving, I always suggest starting with fresh berries, a sprinkle of granola for crunch, or a drizzle of honey or maple syrup. Don’t be afraid to get creative! Think about adding a swirl of nut butter, some toasted coconut flakes, or even a dusting of cocoa powder for a chocolatey twist. If you’re feeling adventurous, consider infusing your liquid with spices like cinnamon or cardamom, or even adding a touch of vanilla extract to the base itself. Give this recipe a try; you won’t regret adding this nutritious and delightful treat to your repertoire!
Frequently Asked Questions:
How long does chia seed pudding need to set?
For the best texture, I recommend letting your chia seed pudding set in the refrigerator for at least 2-4 hours. Overnight is even better, as it allows the chia seeds to fully absorb the liquid and create that signature gel-like consistency.
Can I use different liquids besides milk?
Absolutely! While dairy milk or plant-based milks like almond, oat, or soy milk are common, you can also experiment with coconut milk for a richer flavor, or even fruit juices for a tangier, fruitier base. Just be mindful that the sweetness of the liquid will affect the overall flavor of your pudding.
My chia seed pudding is too thick. What can I do?
No worries! If your pudding turns out too thick, simply stir in a little more liquid, a tablespoon at a time, until you reach your desired consistency. It’s always easier to add more liquid than to try and thicken it up further.
Chia Seed Pudding Recipe
A simple and healthy chia seed pudding recipe, customizable with your favorite milk and sweetener.
Ingredients
-
3 tablespoons chia seeds
-
1 tablespoon maple syrup
-
1 teaspoon vanilla
-
3/4 cup milk of choice
-
Pinch of salt
-
Optional: Fresh berries for topping
Instructions
-
Step 1
In a bowl or jar, combine the chia seeds, maple syrup, vanilla, milk of choice, and a pinch of salt. -
Step 2
Whisk or stir everything together thoroughly to ensure the chia seeds are well distributed and not clumped. -
Step 3
Let the mixture sit for 5-10 minutes, then stir again. This second stir helps prevent clumping. -
Step 4
Cover the bowl or jar and refrigerate for at least 2 hours, or preferably overnight, until the pudding has thickened. -
Step 5
Once thickened, give the pudding a final stir. -
Step 6
Serve chilled, optionally topped with fresh berries or other desired toppings.
Important Information
Nutrition Facts (Per Serving)
It is important to consider this information as approximate and not to use it as definitive health advice.
Allergy Information
Please check ingredients for potential allergens and consult a health professional if in doubt.