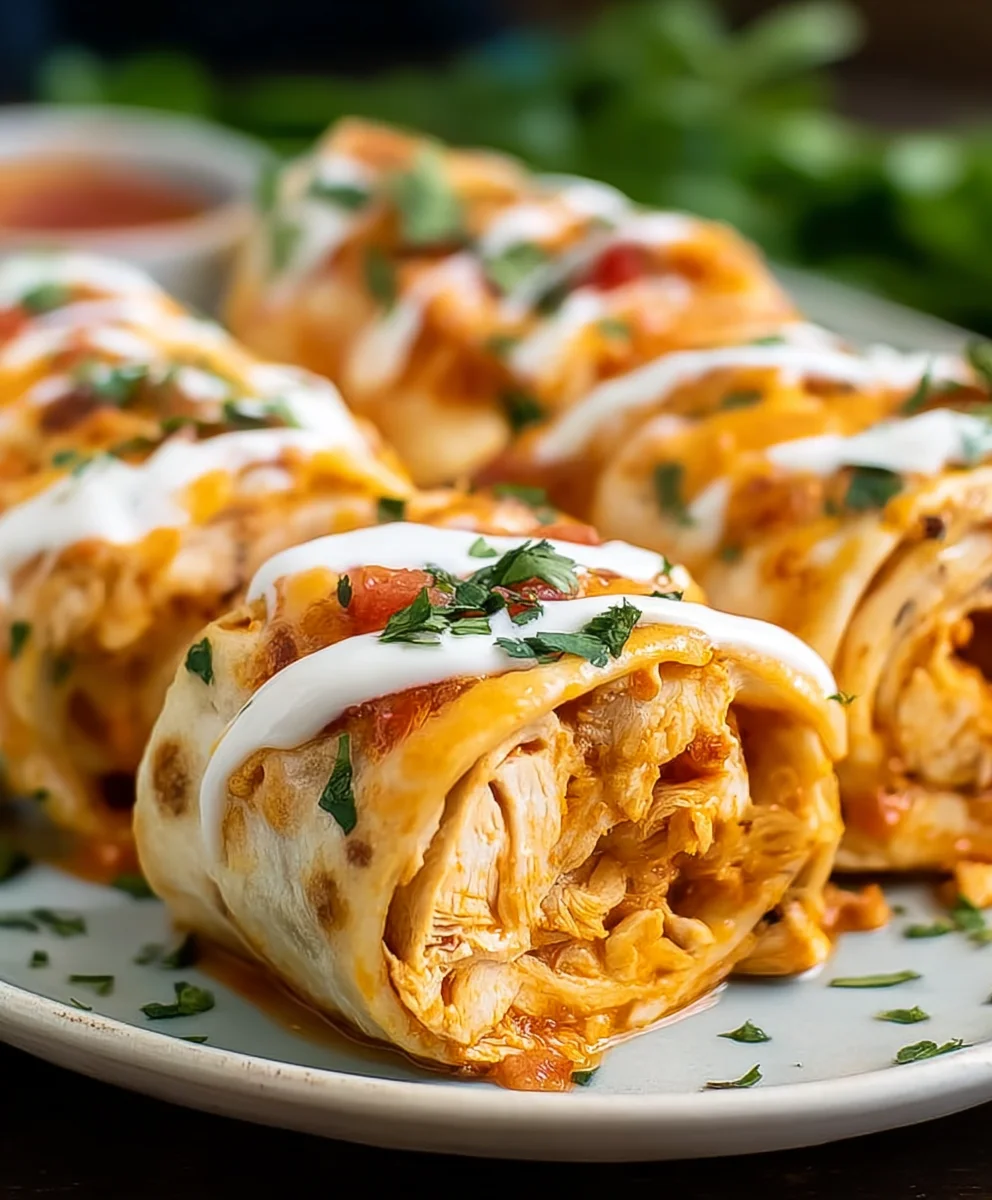
Easy Chicken Enchilada Roll Ups- Quick Family Dinner
Chicken Enchilada Roll Ups are a weeknight dinner hero for a reason. They combine all the comforting, savory flavors of traditional enchiladas into a fun, easy-to-eat format that kids and adults alike adore. Forget wrestling with tortillas and messy fillings; these Chicken Enchilada Roll Ups deliver that rich, cheesy, saucy satisfaction without the fuss. What makes them so special? It’s the perfect balance of tender shredded chicken, creamy cheese, and that signature enchilada sauce, all hugged within a perfectly rolled tortilla. They’re incredibly versatile too – a great base for adding your favorite vegetables or a kick of spice. Get ready to discover your new go-to meal that’s as delightful to make as it is to devour.
Ingredients:
- 5 burrito sized flour tortillas
- 1 ounce packet of taco seasoning mix
- 3 cups shredded chicken
- 8 ounce package of cream cheese, softened
- 1½ cups shredded Mexican cheese or cheddar cheese
- 10 ounce can diced tomatoes with green chilies (like Rotel), drained
- 1 teaspoon minced garlic
- 4 green onions, sliced
- ½ cup chopped cilantro for garnish (optional)
Preparing the Filling
Step 1: Infuse the Chicken with Flavor
The first step to creating our delicious Chicken Enchilada Roll Ups is to get our chicken perfectly seasoned. In a medium-sized bowl, combine the 3 cups of shredded chicken with the entire 1 ounce packet of taco seasoning mix. Toss everything together thoroughly, ensuring each strand of chicken is coated in the savory spices. This seasoning packet is designed to give your chicken that authentic taco flavor that is so crucial for enchiladas. If you don’t have a pre-made packet, you can create your own blend using chili powder, cumin, paprika, onion powder, garlic powder, and a pinch of cayenne pepper. Allow the chicken to sit with the seasoning for at least 10 minutes to let the flavors meld. This simple step really elevates the taste of the entire dish.
Step 2: Creamy Base Creation
Now, let’s build the creamy foundation for our filling. In a separate large bowl, add the 8 ounce package of softened cream cheese. It’s important that the cream cheese is softened to room temperature so it can be easily incorporated and create a smooth, lump-free mixture. To the softened cream cheese, add the 1 teaspoon of minced garlic. The garlic will add a wonderful aromatic depth to our filling. Using a spatula or a sturdy spoon, mix the cream cheese and garlic together until they are well combined. You want a smooth, pliable base before we add the other ingredients. This creamy element is what will hold all our delicious components together and give the roll ups a rich texture.
Step 3: Assembling the Heart of the Roll Ups
It’s time to bring everything together for the star of the show – the filling! To the bowl with the softened cream cheese and minced garlic, add the seasoned shredded chicken. Next, incorporate the 1½ cups of shredded Mexican cheese, or cheddar cheese if that’s what you prefer. Mexican cheese blends, often containing Monterey Jack and Cheddar, melt beautifully and add a wonderful complexity. Now, carefully add the drained 10 ounce can of diced tomatoes with green chilies. Draining them is key to prevent the filling from becoming too watery. Finally, add 2 of the sliced green onions to the mixture. Reserve the remaining green onions for garnish. Gently fold all the ingredients together until everything is evenly distributed. Be careful not to overmix, as we want to maintain some texture from the chicken and tomatoes.
Assembling and Baking the Roll Ups
Step 4: Warming and Filling the Tortillas
To make rolling easier and prevent the tortillas from cracking, we need to warm them up slightly. You can do this in a few ways. Microwave each tortilla for about 15-20 seconds until it’s pliable, or warm them gently in a dry skillet over medium-low heat for about 30 seconds per side. Once your tortillas are warm and flexible, lay one flat on a clean surface. Spoon a generous amount of the prepared filling onto the center of the tortilla, leaving about an inch of space around the edges. Distribute the filling evenly across the surface, making sure not to overstuff it, which can make rolling difficult. Once filled, tightly roll up the tortilla, tucking in the sides as you go to ensure a neat, compact roll. Repeat this process with the remaining tortillas and filling.
Step 5: Arrangin extractg and Baking for Golden Perfection
Preheat your oven to 375°F (190°C). Lightly grease a 9×13 inch baking dish to prevent sticking. Carefully place the filled enchilada roll ups seam-side down in the prepared baking dish. You can arrange them snugly next to each other. For an extra layer of flavor and a beautiful presentation, you can pour a bit of your favorite enchilada sauce over the top of the roll-ups before baking, although this recipe as written is designed to be delicious without it. Bake for 20-25 minutes, or until the tortillas are lightly golden brown and the cheese is melted and bubbly. This baking time allows the flavors to meld further and ensures the filling is heated through.
Step 6: The Final Touches and Serving Presentation
Once the Chicken Enchilada Roll Ups have finished baking, carefully remove the dish from the oven. Let them rest for a few minutes before serving. This brief resting period allows the filling to settle slightly, making them easier to handle. Now comes the fun part: garnishing! Sprinkle the remaining sliced green onions over the top of the roll ups. If you’re using cilantro, scatter the ½ cup of chopped cilantro generously over everything. The fresh green onions and bright cilantro add a wonderful contrast in color and a burst of freshness to the rich, cheesy filling. Serve immediately and enjoy these delightful, easy-to-make Chicken Enchilada Roll Ups. They are perfect as a main course or even as a hearty appetizer!

Conclusion:
There you have it – a simple yet incredibly satisfying way to enjoy the vibrant flavors of Chicken Enchilada Roll Ups! This recipe is a testament to how easy it is to create a crowd-pleasing dish that feels both comforting and exciting. Whether you’re planning a weeknight family dinner or looking for a go-to appetizer for your next gathering, these Chicken Enchilada Roll Ups are sure to be a hit. They’re incredibly versatile, allowing you to adjust the spice level and fillings to perfectly suit your taste buds. Don’t be afraid to get creative and make them your own!
For serving suggestions, these Chicken Enchilada Roll Ups are delicious on their own, but they also pair wonderfully with a dollop of sour cream, a sprinkle of fresh cilantro, or a side of Mexican rice and refried beans. Consider a simple green salad for a fresh contrast.
Variations: Feel free to experiment with different cheeses like Monterey Jack or a spicy Pepper Jack. You can also add finely diced bell peppers or corn to the chicken filling for extra texture and flavor. For a vegetarian option, try using black beans and corn as the primary filling.
I encourage you to give these Chicken Enchilada Roll Ups a try. They are a fantastic way to bring a taste of authentic flavor to your kitchen with minimal fuss. Enjoy the process and savor the delicious results!
FAQs:
Can I make Chicken Enchilada Roll Ups ahead of time?
Yes, absolutely! You can assemble the roll-ups and store them in an airtight container in the refrigerator for up to 24 hours before baking. You may need to add a few extra minutes to the baking time if they are chilled.
What kind of tortillas work best for Chicken Enchilada Roll Ups?
Corn tortillas are traditional for enchiladas, but they can sometimes crack when rolled. Flour tortillas are generally more pliable and easier to roll without breaking. If using corn tortillas, gently warm them in a dry skillet or microwave before rolling to make them more flexible.
How can I make the Chicken Enchilada Roll Ups spicier?
To increase the heat, add a pinch of cayenne pepper or red pepper flakes to your chicken filling. You can also use a spicier enchilada sauce or drizzle some hot sauce over the finished roll-ups before serving.
Easy Chicken Enchilada Roll Ups
Quick and easy chicken enchilada roll ups perfect for a family dinner. Featuring seasoned chicken, creamy cheese, and flavorful tomatoes rolled in soft tortillas.
Ingredients
-
5 burrito sized flour tortillas
-
1 ounce packet of taco seasoning mix
-
3 cups shredded chicken
-
8 ounce package of cream cheese, softened
-
1½ cups shredded Mexican cheese or cheddar cheese
-
10 ounce can diced tomatoes with green chilies, drained
-
1 teaspoon minced garlic
-
4 green onions, sliced
-
½ cup chopped cilantro for garnish (optional)
Instructions
-
Step 1
Combine shredded chicken with taco seasoning mix in a bowl. Toss to coat and let sit for at least 10 minutes. -
Step 2
In a separate bowl, mix softened cream cheese with minced garlic until smooth. -
Step 3
Add seasoned chicken, shredded cheese, drained diced tomatoes with green chilies, and 2 sliced green onions to the cream cheese mixture. Gently fold to combine. -
Step 4
Warm tortillas until pliable. Spoon filling onto the center of each tortilla, leaving a border. Roll up tightly, tucking in the sides. -
Step 5
Preheat oven to 375°F (190°C). Lightly grease a 9×13 inch baking dish. Place roll ups seam-side down in the dish. -
Step 6
Bake for 20-25 minutes, or until golden brown and bubbly. Garnish with remaining green onions and cilantro if desired.
Important Information
Nutrition Facts (Per Serving)
It is important to consider this information as approximate and not to use it as definitive health advice.
Allergy Information
Please check ingredients for potential allergens and consult a health professional if in doubt.