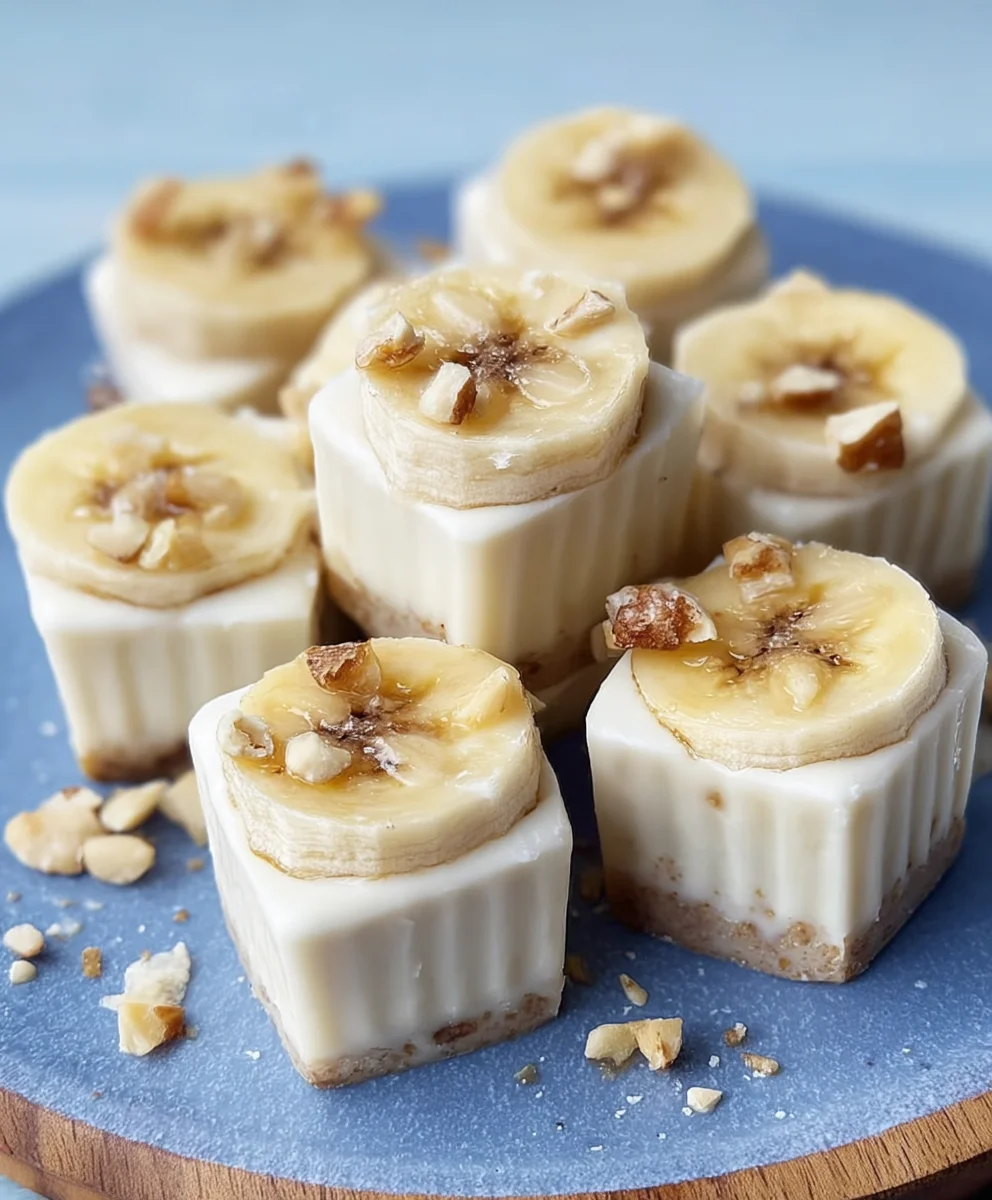
Frozen Banana Yogurt Bites-Easy Sweet Treat
Frozen Banana Yogurt Bites are the ultimate simple yet incredibly satisfying treat, perfect for those moments when you crave something sweet, cool, and guilt-free. Have you ever found yourself staring into the freezer, wishing for a delicious snack that doesn’t derail your healthy eating goals? That’s precisely where these magical bites come in! They’re loved by everyone from picky toddlers to health-conscious adults because they deliver a delightful creamy texture and a burst of natural sweetness without any added sugar. What truly makes these Frozen Banana Yogurt Bites special is their astonishing versatility. You can customize them with your favorite fruits, a sprinkle of granola, or a drizzle of nut butter, transforming a basic frozen treat into a personalized dessert masterpiece. Imagin extracte the vibrant colors and refreshing flavors – they’re an instant mood booster on a warm afternoon or a perfect post-workout reward. Get ready to discover your new favorite frozen delight!
Ingredients:
- 1 large ripe banana
- 150 g yogurt of your choice (natural yogurt works well for a classic flavor, but flavored yogurts can add a fun twist)
- Handful of dried banana chips (optional, for an extra crunch and concentrated banana flavor)
Preparing the Banana Base
Step 1: Peel and Slice the Banana
The first step to creating these delightful Frozen Banana Yogurt Bites is to prepare your banana. You’ll want to use a large, ripe banana for the best sweetness and texture. A slightly overripe banana will mash more easily and offer a richer flavor. Begin extract by peeling the banana. Once peeled, lay it on a clean cutting board. Using a sharp knife, slice the banana into uniform rounds, about 1/2 inch thick. Aim for consistency in thickness so that each bite freezes evenly and offers a similar eating experience. Don’t worry if the slices aren’t perfectly round; their natural shape adds to the charm of these homemade treats. If you find the banana is sticking to your knife, you can lightly dust the blade with a touch of flour or lightly oil it, although this is rarely necessary with ripe bananas. Set these banana slices aside.
Step 2: Mash the Remaining Banana (Optional but Recommended for a Smoother Texture)
While you can certainly use whole banana slices as the base, for a slightly smoother and more integrated experience, I recommend mashing a small portion of the banana. You can either take a few of the sliced rounds and mash them thoroughly in a small bowl with a fork, or if you have a little extra banana, mash a separate piece. The goal is to create a soft, paste-like consistency. This mashed banana will act as a natural binder and add an extra layer of banana flavor to your yogurt coating. Ensure there are no large chunks remaining in the mashed portion. If you prefer a chunkier texture, you can skip this step entirely and simply use the banana slices as they are.
Assembling the Bites
Step 3: Combine Banana and Yogurt
Now it’s time to bring the main components together. In a medium-sized bowl, combine your yogurt and the mashed banana (if you chose to mash it in Step 2). If you’re using plain yogurt, this is where you can introduce sweetness if desired. A drizzle of honey or maple syrup can be stirred in at this stage to complement the natural sweetness of the banana. However, if you’re using a sweetened yogurt or a very ripe banana, you might find it sweet enough on its own. Use a spoon or a small whisk to thoroughly mix the yogurt and mashed banana together until you have a smooth, homogenous mixture. If you skipped the mashing step, you’ll be coating individual banana slices, and this step will involve dipping them directly into the yogurt. For the purpose of this recipe, we’ll assume you’ve opted for the slightly blended approach for a more cohesive bite.
Step 4: Coat the Banana Slices
This is where the magic starts to happen! Take your prepared banana slices and, one by one, dip them into the yogurt mixture. Ensure each slice is well-coated on all sides. You can use a fork to help you manage the slices and spread the yogurt evenly. Gently press the yogurt onto the banana to create a thick, even layer. Don’t be afraid to be generous with the yogurt; it will freeze into a delightful creamy coating. If you have opted for the optional dried banana chips, now is the time to sprinkle them onto the yogurt-coated slices. Press them gently into the yogurt so they adhere well. You can apply them to just one side or cover the entire surface, depending on your preference for crunch. Work relatively quickly, especially if your kitchen is warm, as the banana can start to soften.
Freezing and Serving
Step 5: Freeze the Bites
Once your banana slices are generously coated with yogurt and adorned with banana chips (if using), it’s time to get them cold! Carefully arrange the coated banana slices on a baking sheet lined with parchment paper. The parchment paper is crucial here; it prevents the frozen yogurt bites from sticking to the baking sheet, making them easy to remove once frozen. Ensure that the bites are not touching each other on the baking sheet to prevent them from freezing together into one large clump. Place the baking sheet into the freezer. Allow the Frozen Banana Yogurt Bites to freeze completely, which typically takes about 2 to 3 hours. You’ll know they are ready when the yogurt coating is firm and solid to the touch. For best results and optimal firmness, freezing them overnight is also an excellent option. Once fully frozen, you can transfer them to a freezer-safe bag or container for easy storage and snacking whenever a craving strikes. Enjoy these simple, healthy, and delicious frozen treats!
Conclusion:
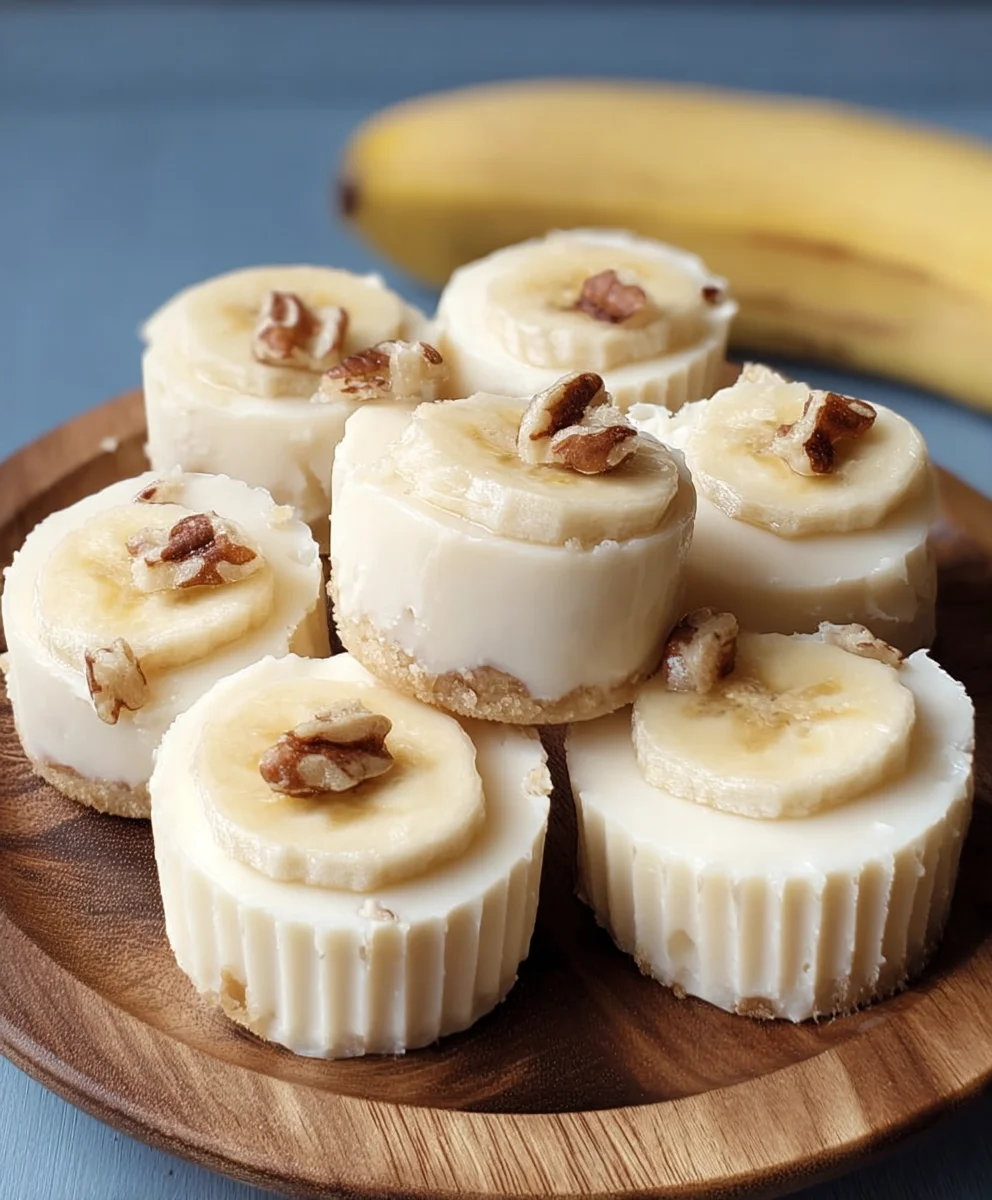
There you have it – your simple yet incredibly satisfying guide to making delicious Frozen Banana Yogurt Bites! These delightful treats are a testament to how wholesome ingredients can transform into something truly special. They’re perfect for a healthy breakfast on the go, a post-workout refresher, or a guilt-free dessert the whole family will adore. Don’t be afraid to get creative with your toppings; the possibilities are endless!
To serve, simply arrange your Frozen Banana Yogurt Bites on a platter and enjoy their cool, creamy texture. They pair wonderfully with a sprinkle of granola, a drizzle of honey, or a handful of fresh berries. For variations, try adding a pinch of cinnamon or a touch of vanilla extract to your yogurt mixture before freezing. You could also experiment with different fruit purees or even a swirl of nut butter for added flavor and richness. We encourage you to give these Frozen Banana Yogurt Bites a try and discover how easy it is to create a healthy and delicious snack!
Frequently Asked Questions:
Can I use dairy-free yogurt for Frozen Banana Yogurt Bites?
Absolutely! You can easily make these Frozen Banana Yogurt Bites dairy-free by using your favorite non-dairy yogurt alternative, such as coconut yogurt, almond yogurt, or soy yogurt. The process remains the same, and the results are just as delicious!
How long do Frozen Banana Yogurt Bites last?
When stored properly in an airtight container in the freezer, your Frozen Banana Yogurt Bites should last for up to 1-2 months. While they are best enjoyed within the first month for optimal texture, they will remain safe to eat for longer.
Frozen Banana Yogurt Bites
An easy and healthy sweet treat made with frozen banana slices coated in yogurt.
Ingredients
-
1 large ripe banana
-
150 g yogurt of your choice
-
Handful of dried banana chips (optional)
-
1 tablespoon honey or maple syrup (optional, for sweetening yogurt)
-
1/2 teaspoon flour (optional, for knife dusting)
-
1/4 teaspoon vegetable oil (optional, for knife oiling)
Instructions
-
Step 1
Peel the large ripe banana and slice it into uniform rounds, about 1/2 inch thick. -
Step 2
Mash a small portion of the banana in a bowl with a fork to create a smooth paste. This is optional but recommended for a smoother texture. -
Step 3
In a medium bowl, combine the yogurt and the mashed banana. If using unsweetened yogurt, stir in honey or maple syrup to taste. Mix until smooth. -
Step 4
Dip each banana slice into the yogurt mixture, ensuring it is well-coated on all sides. Gently press the yogurt on for an even layer. If using, sprinkle dried banana chips onto the coated slices and press gently to adhere. -
Step 5
Arrange the coated banana slices on a baking sheet lined with parchment paper, ensuring they do not touch each other. Freeze for 2 to 3 hours, or until firm. For best results, freeze overnight.
Important Information
Nutrition Facts (Per Serving)
It is important to consider this information as approximate and not to use it as definitive health advice.
Allergy Information
Please check ingredients for potential allergens and consult a health professional if in doubt.