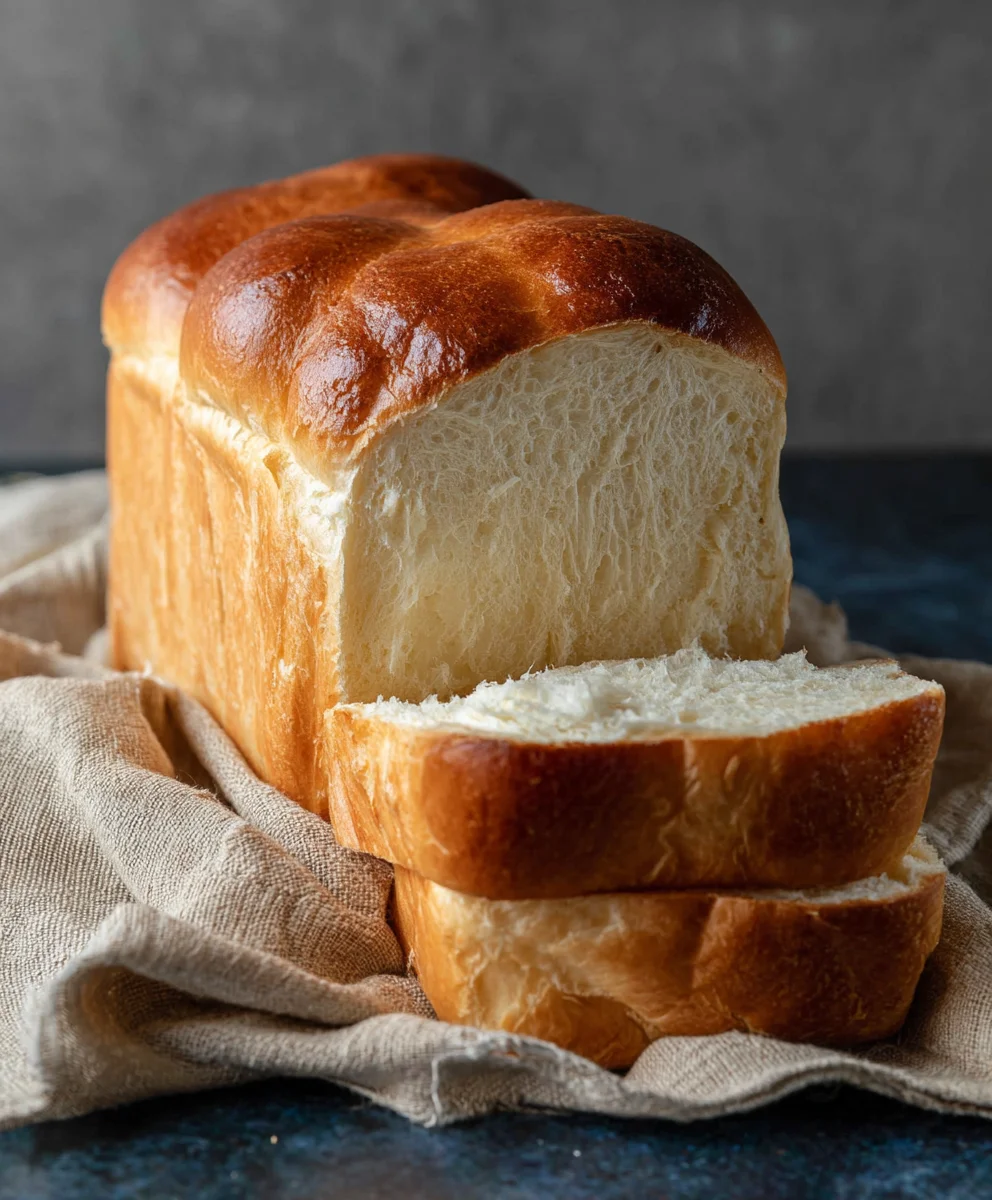
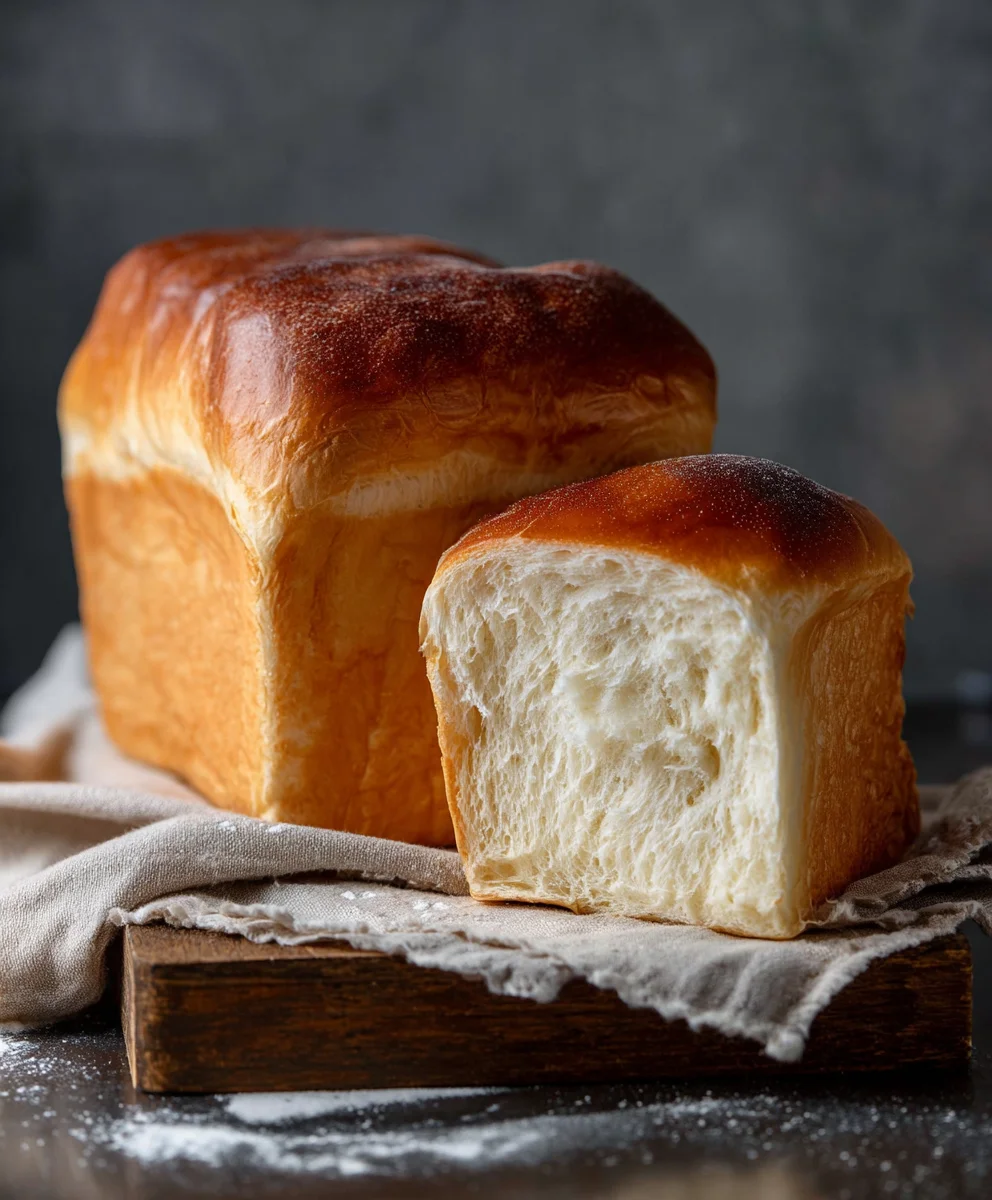
Super Easy Milk Bread Loaf-Fluffy Homemade Delight
Easy Milk Bread Loaf. Is there anything more comforting than the aroma of freshly baked bread filling your home? For many of us, that comforting scent immediately conjures up images of a soft, pillowy, slightly sweet loaf, perfect for everything from morning toast to afternoon sandwiches. That’s exactly the magic this Easy Milk Bread Loaf brings to your kitchen. It’s a recipe that’s become a beloved staple for bakers of all levels, and it’s easy to see why. People adore this bread because it’s incredibly forgiving, yielding a consistently delightful result that tastes far more complex than the simple steps required to make it. What truly sets this Easy Milk Bread Loaf apart is its unparalleled tenderness and subtle sweetness, thanks to the generous use of milk. It creates a crum extractb that’s so incredibly soft it practically melts in your mouth, with a delicate crust that’s golden and inviting.
Ingredients:
- 500 g bread flour (approximately 3¾ cups)
- 40 g sugar (about 3 tablespoons)
- 1½ teaspoons instant yeast
- 225 g cold water (a little less than 1 cup)
- 115 g cold milk (½ cup)
- 9 g sea salt (1½ teaspoons)
- 25 g unsalted butter, softened (1¾ tablespoons)
- Extra butter for greasing the pan and brushing the bread
- Extra flour for dusting the pan
Preparing the Dough
Mixing the Dry Ingredients
Let’s start by gathering all our dry ingredients for the Easy Milk Bread Loaf. In a large mixing bowl, I like to combine the bread flour, sugar, and instant yeast. It’s important to give these a good whisk together. This ensures that the yeast is evenly distributed throughout the flour, which will lead to a consistent rise in our bread. If you skip this step, you might end up with pockets of unrisen dough or uneven texture, which is something we definitely want to avoid for a beautiful loaf.
Adding the Wet Ingredients and Initial Kneading
Next, we’ll introduce the wet ingredients. Pour in the cold water and the cold milk. Now, it’s time to bring everything together. I usually start by mixing with a spatula or a wooden spoon until a shaggy dough forms and most of the flour is incorporated. Don’t worry if it looks a bit messy at this stage; that’s perfectly normal. Once it’s roughly combined, you can turn the dough out onto a lightly floured surface. If you’re using a stand mixer, you can do this part with the dough hook attachment. Begin extract to knead the dough. Initially, it will be sticky and a bit unruly. Keep kneading, pushing and pulling the dough, for about 5-7 minutes. You’ll notice it gradually becoming smoother and more elastic. The goal here is to develop the gluten structure that will give our milk bread its signature soft and chewy texture. If the dough becomes too sticky, resist the temptation to add too much extra flour. Instead, continue kneading, and it should start to come together. A little bit of patience goes a long way in this stage.
Developing the Dough and Incorporating Butter
Adding the Salt and Continuing to Knead
After the initial kneading, it’s time to add the salt. Salt is crucial for flavor, but it can inhibit yeast activity if added too early, which is why we’re adding it now. Sprinkle the sea salt evenly over the dough. Now, continue kneading. The dough might feel a little rough again as the salt is incorporated. Keep working it for another 3-5 minutes. You’ll see the dough becoming even more smooth and elastic. It should start to pull away from the sides of the bowl or your work surface more cleanly. This is a good indicator that the gluten is developing nicely.
Incorporating the Butter
Now for the magic ingredient that makes this bread so tender and rich: the butter. Add the softened unsalted butter to the dough. It’s important that the butter is softened, not melted, so it can be properly incorporated. At first, the dough will look messy again as the butter is added. Don’t be discouraged! Continue kneading. You can either do this by hand or with your stand mixer on a low to medium speed. Keep kneading for about 8-10 minutes, or until the butter is fully incorporated and the dough is smooth, elastic, and passes the windowpane test. To perform the windowpane test, take a small piece of dough and gently stretch it. If you can stretch it thin enough to see light through it without it tearing, the gluten has developed sufficiently. This stage is vital for achieving that incredibly soft crum extractb.
First Rise and Shaping
The First Proofing (Bulk Fermentation)
Once the dough has successfully incorporated the butter and passed the windowpane test, it’s time for its first rise, also known as bulk fermentation. Lightly grease a clean bowl with a little bit of oil or cooking spray. Place the dough in the greased bowl, turning it to coat all sides. Cover the bowl tightly with plastic wrap or a damp kitchen towel. Find a warm, draft-free spot in your kitchen for the dough to rise. This could be on top of a slightly warm oven (turned off, of course!) or just in a cozy corner. Let the dough rise until it has doubled in size. This typically takes about 1 to 1.5 hours, depending on the temperature of your kitchen. You’ll know it’s ready when it looks noticeably puffy and has a good volume.
Punching Down and Shaping the Loaf
After the first rise, gently punch down the dough to release the trapped air. This process is called degassing and helps to redistribute the yeast and create a more even texture in the final loaf. Turn the dough out onto a lightly floured surface. For a standard loaf pan, you’ll want to shape the dough into a neat oval or rectangle. Gently flatten the dough into a rectangle, then tightly roll it up from one of the shorter ends. Pinch the seam closed to prevent it from opening during baking. Tuck in the ends. This ensures a uniform shape for our Easy Milk Bread Loaf.
Second Rise and Baking
Preparing the Loaf Pan
Now, prepare your loaf pan. Grease it thoroughly with butter and then dust it lightly with flour. This step is crucial to prevent the bread from sticking and to achieve a beautiful golden crust. You can also use parchment paper if you prefer.
The Second Proofing
Carefully place the shaped dough into the prepared loaf pan, seam-side down. Cover the pan loosely with plastic wrap or a damp kitchen towel. Let the dough rise again in a warm place for about 45-60 minutes, or until it has almost doubled in size and is peeking over the rim of the pan. This second rise is what gives the bread its final airy structure.
Baking the Loaf
Preheat your oven to 190°C (375°F) during the last 15-20 minutes of the second rise. Once the oven is preheated and the dough has completed its second rise, it’s time to bake! If you desire a richer, glossier crust, you can lightly brush the top of the loaf with a little bit of milk or a beaten egg wash before baking. Place the loaf pan in the preheated oven. Bake for approximately 30-40 minutes. The bread is done when it’s golden brown on top and sounds hollow when you tap the bottom of the loaf. If the top starts to brown too quickly, you can loosely tent it with aluminum foil.
Cooling and Finishing Touches
Once baked, immediately remove the bread from the loaf pan and place it on a wire rack to cool. For an extra tender and shiny crust, you can brush the top of the hot bread with a little softened butter as soon as it comes out of the oven. Let the loaf cool completely on the wire rack before slicing. This allows the internal structure to set, ensuring clean slices and the best texture. Enjoy your delicious, homemade Easy Milk Bread Loaf!
Conclusion:
We’ve reached the delicious end of our journey creating the Easy Milk Bread Loaf! This recipe truly lives up to its name, offering a wonderfully soft, slightly sweet, and incredibly versatile bread that’s perfect for bakers of all levels. Whether you’re a seasoned pro or just starting out, this Easy Milk Bread Loaf is a rewarding bake that will fill your kitchen with an irresistible aroma. Don’t be afraid to get your hands in the dough – the process itself is part of the joy!
This Easy Milk Bread Loaf is fantastic served warm with a smear of butter, or toasted for a delightful breakfast treat. It also makes the perfect base for sandwiches, French toast, or even garlic bread. Feel free to experiment with additions like a sprinkle of sesame seeds on top before baking for an extra layer of flavor and texture. I encourage you to give this recipe a try; the satisfaction of pulling a beautifully golden, homemade Easy Milk Bread Loaf from your oven is truly unparalleled. Happy baking!
Frequently Asked Questions:
Can I use a bread machine for this Easy Milk Bread Loaf?
Absolutely! Many bread machines have a “basic dough” or “sweet dough” setting that would be perfect for this Easy Milk Bread Loaf. Follow your machine’s instructions for adding ingredients and selecting the appropriate cycle. You may need to adjust the liquid slightly depending on your machine’s performance.
My Easy Milk Bread Loaf didn’t rise very much. What could have gone wrong?
There are a few common reasons for poor rising. First, ensure your yeast was fresh and active; you can test this by dissolving it in warm milk with a pinch of sugar. If it foams, it’s good to go. Secondly, make sure your milk wasn’t too hot, as this can kill the yeast. Finally, ambient temperature plays a role; a warmer environment generally promotes better yeast activity. If your kitchen is cool, try placing the dough in a slightly warm oven (turned off, of course!) to rise.
Super Easy Milk Bread Loaf-Fluffy Homemade Delight
A wonderfully fluffy and soft homemade milk bread loaf, perfect for a delightful treat.
Ingredients
-
500 g bread flour
-
40 g sugar
-
1½ teaspoons instant yeast
-
225 g cold water
-
115 g cold milk
-
9 g sea salt
-
25 g unsalted butter, softened
-
Extra butter for greasing the pan and brushing the bread
-
Extra flour for dusting the pan
Instructions
-
Step 1
In a large mixing bowl, whisk together bread flour, sugar, and instant yeast until evenly distributed. -
Step 2
Add cold water and cold milk. Mix with a spatula or spoon until a shaggy dough forms. Turn onto a lightly floured surface and knead for 5-7 minutes until smoother and more elastic. -
Step 3
Sprinkle sea salt over the dough and continue kneading for another 3-5 minutes until the dough is smooth and elastic. Add softened unsalted butter and knead for 8-10 minutes until fully incorporated and the dough passes the windowpane test. -
Step 4
Place dough in a greased bowl, cover, and let rise in a warm place for 1 to 1.5 hours, or until doubled in size. Punch down the dough, shape into an oval or rectangle, roll tightly, pinch seams, and tuck ends. -
Step 5
Prepare a loaf pan by greasing and flouring it. Place the shaped dough seam-side down in the pan. Cover loosely and let rise again for 45-60 minutes until almost doubled. Preheat oven to 190°C (375°F) during the last 15-20 minutes of rising. -
Step 6
Bake for 30-40 minutes until golden brown and hollow-sounding when tapped. Immediately remove from pan, brush with butter if desired, and cool completely on a wire rack before slicing.
Important Information
Nutrition Facts (Per Serving)
It is important to consider this information as approximate and not to use it as definitive health advice.
Allergy Information
Please check ingredients for potential allergens and consult a health professional if in doubt.