Easy Oreo Milkshake Recipe- Creamy & Delicious Treat
The Oreo Milkshake is more than just a dessert; it’s a nostalgic trip back to childhood, a comforting embrace on a warm day, and a decadent treat that never fails to impress. There’s something universally captivating about the perfect blend of creamy ice cream and those iconic, chocolatey cookies. Why do we all go so wild for this simple yet sophisticated concoction? It’s the satisfying crunch of the crushed Oreos mingling with the velvety smooth milkshake, the irresistible sweet and slightly bitter flavor profile, and the sheer indulgence it offers. It’s the ultimate comfort food, capable of transforming any ordinary moment into a special occasion. This isn’t just any milkshake; this Oreo Milkshake is an experience, a celebration of simple pleasures that brings joy with every sip.
Why You’ll Love This Recipe
Simple Ingredients, Incredible Taste
Prepare to fall in love with your blender all over again. Crafting the perfect Oreo Milkshake is surprisingly easy, and the results are absolutely divine.
Oreo Milkshake
There’s something undeniably magical about an Oreo Milkshake. It’s a timeless classic, a dessert that transports you back to childhood with every creamy, chocolatey, cookie-infused sip. Whether you’re looking for a quick sweet treat after a long day, a delightful addition to a movie night, or a way to impress guests, this recipe is your ticket to pure bliss. Forget those bland, store-bought versions; we’re about to create a milkshake so rich, so decadent, and so perfectly balanced that it will redefine your expectations. The beauty of this recipe lies in its simplicity and the incredible flavor payoff. It requires minimal effort but delivers maximum deliciousness. Get ready to become the undisputed cbeef hampion of homemade milkshakes!
Ingredients:
Crafting Your Dream Oreo Milkshake
Now that you have all your components ready, let’s dive into the fun part – assembling your masterpiece. This process is incredibly straightforward, but I’ll guide you through each step with plenty of detail to ensure a perfect result every single time. The key to an exceptional milkshake is the quality of your ingredients and a little bit of patience.
Step 1: Prepare Your Ice Cream Base
The foundation of any great milkshake is high-quality ice cream. For this Oreo creation, vanilla is the perfect canvas. It provides a creamy, sweet base that allows the intense chocolate flavor of the Oreos to truly shine. If you can, let your vanilla ice cream soften slightly on the counter for about 5-10 minutes before you begin extract. This isn’t strictly necessary, but it will make blending much smoother and prevent your blender from working too hard. You want it soft enough to scoop easily but not so melted that it becomes watery. Think of a soft-serve consistency – that’s your sweet spot. Measure out 2 cups of this wonderfully softened vanilla ice cream and scoop it directly into your blender.
Step 2: Add the Liquid Gold – Milk!
Next, we introduce the liquid element that will bring everything together into a drinkable delight. Whole milk is my go-to for milkshakes because its higher fat content contributes to a richer, creamier texture that skim or low-fat milk just can’t replicate. You’ll need 1 cup of whole milk. Pour this gently over the ice cream in the blender. The amount of milk is crucial here – too little and your milkshake will be too thick, almost like ice cream soup. Too much and it will be too thin and watery, losing that signature milkshake mouthfeel. This ratio is designed to create a perfectly balanced, sippable consistency.
Step 3: Introducing the Star of the Show – Oreos!
Now for the reason we’re all here – the Oreos! We’re going to add 8 to 10 Oreo cookies to the blender. Don’t worry about breaking them up beforehand; your blender will handle that. The number of cookies can be adjusted to your personal preference. If you’re a serious Oreo lover, feel free to toss in a couple more! If you prefer a more subtle cookie flavor, stick to 8. For an extra decadent touch, you can even reserve a few cookies and break them into larger chunks to add in at the end for little pockets of cookie goodness, but for a smooth blend, just add them all in. The dark chocolate wafers will infuse the milkshake with their iconic flavor, and the creamy filling will contribute to the overall richness.
Step 4: The Blending Process – Patience is Key
This is where the magic happens. Secure the lid on your blender tightly. Begin extract by pulsing the blender a few times. This initial pulsing helps to break down the cookies and ice cream before you start a continuous blend. Then, switch to a lower speed and blend for about 30-45 seconds. You’re looking for a smooth, homogenous mixture. If your blender has a smoothie setting, that’s often perfect for this. You might need to stop and scrape down the sides of the blender with a spatula once or twice to ensure all the ingredients are incorporated. Don’t over-blend, as this can sometimes cause the milkshake to become too thin and frothy. The goal is a thick, creamy consistency that’s still pourable.
Step 5: Serve and Garnish (Optional but Highly Recommended!)
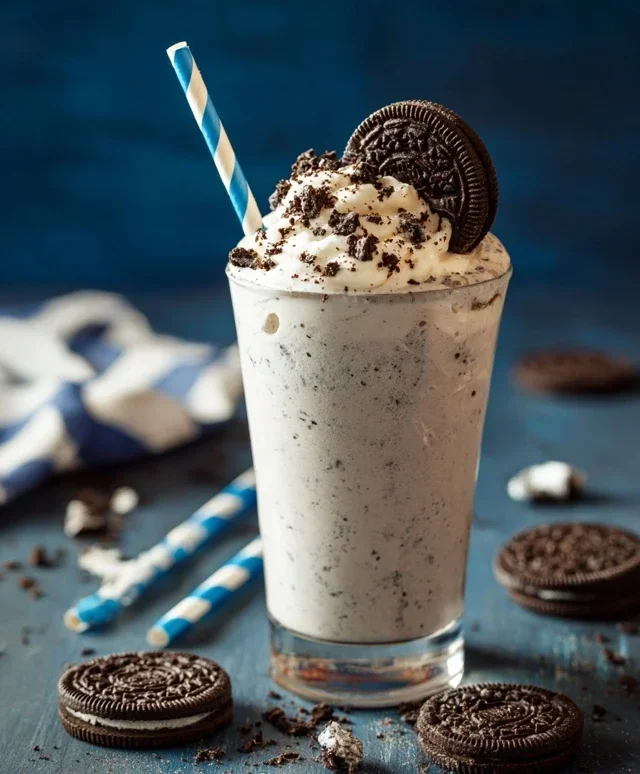
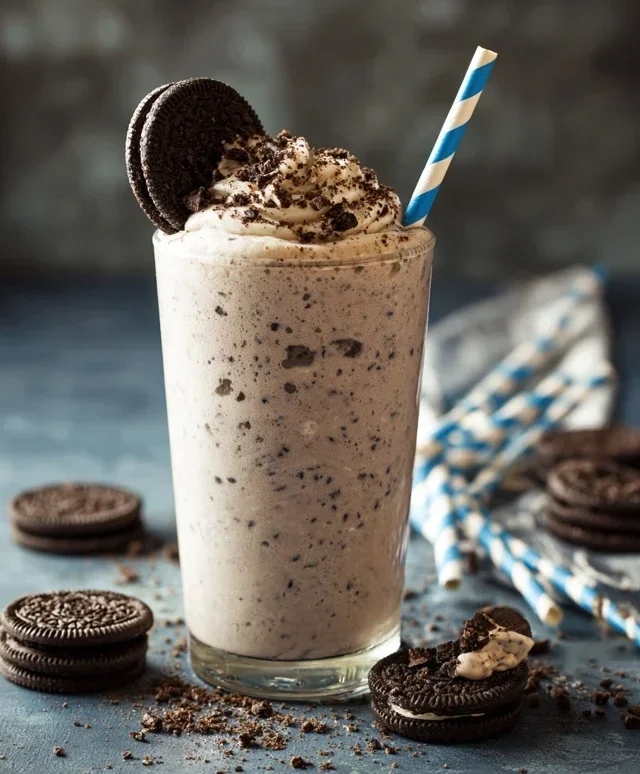
Once your milkshake is perfectly blended, it’s time to serve it up. Pour the luscious mixture into a tall, chilled glass. A chilled glass helps to keep your milkshake colder for longer. For that extra special touch, top your masterpiece with a generous swirl of whipped cream. And if you’re feeling truly indulgent, sprinkle some crushed Oreo cookie bits on top of the whipped cream for a delightful textural contrast and an extra burst of Oreo flavor. You can also reserve a whole Oreo cookie to place on the rim of the glass for a professional-looking presentation. Sip slowly and savor every incredible bite. This Oreo milkshake is best enjoyed immediately, so don’t let it sit around for too long!
Conclusion:
And there you have it! My simple yet utterly satisfying recipe for the ultimate Oreo Milkshake. This recipe is a winner because it’s incredibly quick, uses just a handful of common ingredients, and delivers that perfect balance of creamy, sweet, and chocolatey goodness that we all crave. It’s the ideal treat for a hot afternoon, a fun dessert for movie night, or simply a way to indulge your sweet tooth with minimal effort. Don’t be afraid to get creative with your toppings – whipped cream is a must, of course, but sprinkles, a drizzle of chocolate syrup, or even a dusting of cocoa powder can elevate your Oreo Milkshake experience even further. I highly encourage you to give this recipe a try; I promise you won’t be disappointed! It’s a crowd-pleaser that’s guaranteed to bring smiles all around.
Frequently Asked Questions about Oreo Milkshakes:
Q: How can I make my Oreo Milkshake thicker?
To achieve a thicker Oreo Milkshake, reduce the amount of milk you add. You can also add more ice cream or a few extra Oreo cookies. Freezing some of the milk in an ice cube tray beforehand and using those instead of fresh milk can also contribute to a thicker consistency.
Q: Can I make this recipe dairy-free?
Absolutely! To make a dairy-free Oreo Milkshake, substitute regular ice cream with a good quality dairy-free vanilla ice cream. Use your favorite plant-based milk, such as almond, soy, or oat milk, instead of dairy milk. Ensure your Oreos are also dairy-free, as some varieties contain them.
Q: What other cookies can I use besides Oreos?
While Oreos are the star, feel free to experiment! Chocolate chip cookies, chocolate wafers, or even some shortbread cookies can be blended in for a different flavor profile. Just remember to adjust the sweetness and richness based on the cookies you choose.
Oreo Milkshake
A classic and indulgent Oreo milkshake, perfect for a sweet treat.
Ingredients
-
10-12 Oreo cookies
-
2 cups vanilla ice cream
-
1 cup milk
-
1/4 teaspoon vanilla extract
-
Whipped cream for topping
-
Crushed Oreo cookies for garnish
Instructions
-
Step 1
Break or crush the Oreo cookies into smaller pieces. -
Step 2
In a blender, combine the vanilla ice cream, milk, and vanilla extract. -
Step 3
Add the crushed Oreo cookies to the blender. -
Step 4
Blend on high speed until smooth and creamy. If the milkshake is too thick, add a little more milk. If it’s too thin, add more ice cream. -
Step 5
Pour the milkshake into two glasses. -
Step 6
Top with whipped cream and sprinkle with crushed Oreo cookies for garnish.
Important Information
Nutrition Facts (Per Serving)
It is important to consider this information as approximate and not to use it as definitive health advice.
Allergy Information
Please check ingredients for potential allergens and consult a health professional if in doubt.