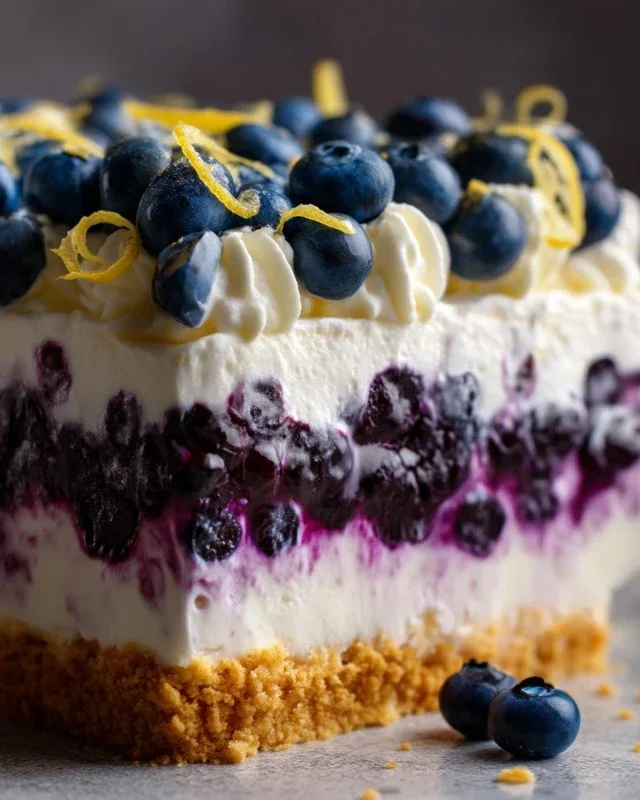
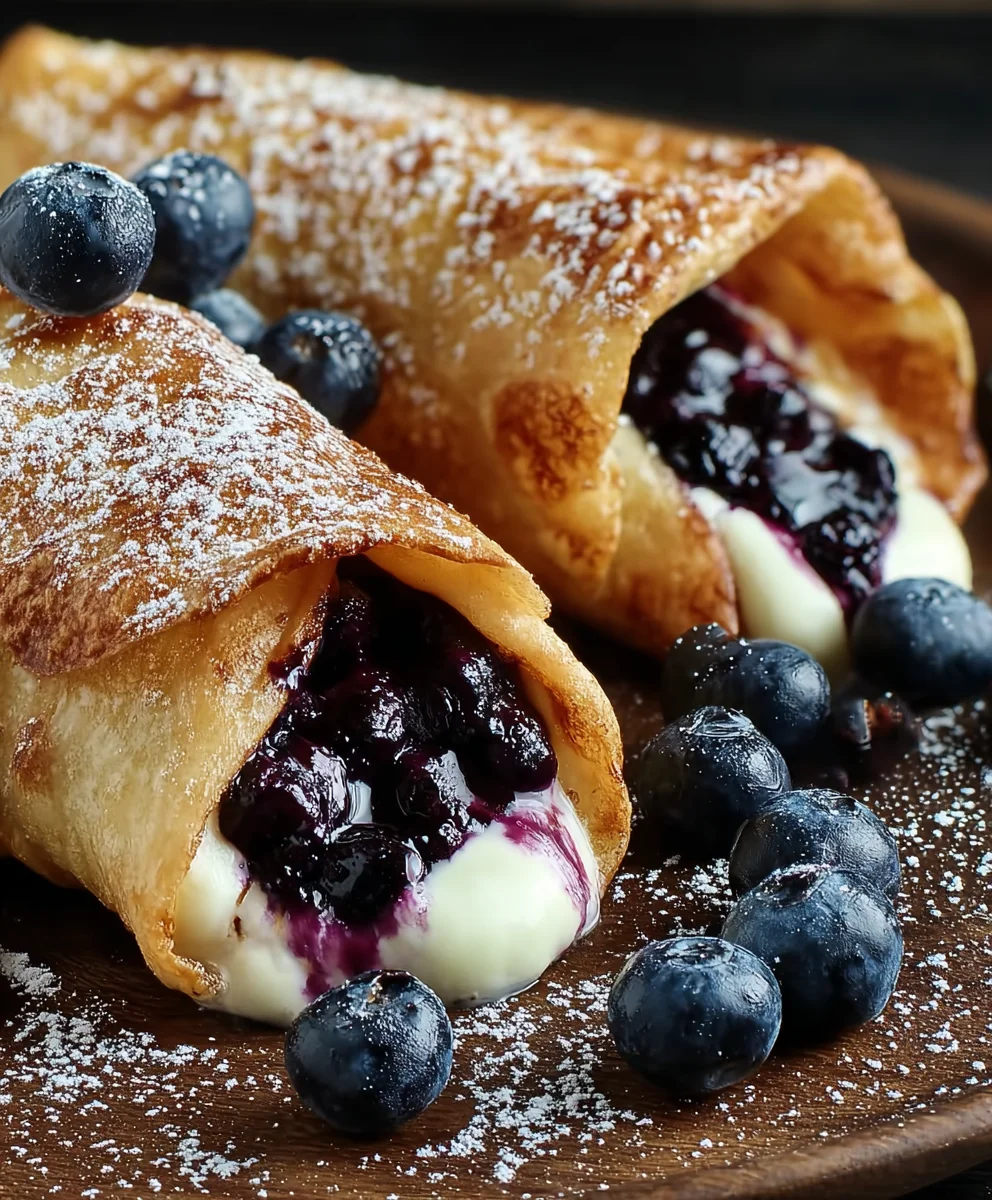
Sweet Blueberry Cheesecake Chimichangas Recipe
Sweet Blueberry Cheesecake Chimichangas are the delightful culinary paradox you’ve been dreaming of! Imagin extracte the comforting, creamy embrace of classic cheesecake, bursting with vibrant, juicy blueberries, all nestled within a crispy, golden fried tortilla. It’s a dessert that tantalizes the taste buds and ignites a sense of pure, unadulterated joy. People adore this dish because it masterfully blends the familiar warmth of a favorite dessert with the exciting, unexpected crunch of a beloved fried treat. It’s the perfect marriage of textures and flavors, offering a decadent experience that feels both indulgent and surprisingly easy to enjoy. What makes these Sweet Blueberry Cheesecake Chimichangas truly special is their ability to transform simple ingredients into an extraordinary symphony of sweet, tangy, and savory notes, all while delivering that irresistible textural contrast that leaves you craving just one more bite.
Get ready to be amazed!
You won’t believe how easy it is to make this incredible dessert.
Ingredients:
- 2 cups fresh blueberries
- ¼ cup sugar
- 1 tablespoon lemon juice
- ¼ teaspoon lemon zest
- 7 tablespoons water, divided
- 2 tablespoons cornstarch
- ¼ teaspoon vanilla extract
- ⅛ teaspoon salt
- 6 ounces cream cheese, softened
- 1 tablespoon granulated sugar
- 1 teaspoon vanilla extract
- 4 (8-inch) soft flour tortillas
- ⅓ cup granulated sugar
- ½ teaspoon ground cinnamon
- Vegetable oil for frying
Making the Blueberry Filling
Step 1: Prepare the Blueberries
First, we need to create our luscious blueberry filling. In a medium saucepan, combine the 2 cups of fresh blueberries, ¼ cup of sugar, 1 tablespoon of lemon juice, and ¼ teaspoon of lemon zest. The lemon juice and zest are going to brighten up the berry flavor and add a lovely tang that cuts through the sweetness. Stir these ingredients together gently. Place the saucepan over medium heat and bring the mixture to a simmer. As it heats up, the blueberries will begin extract to soften and release their vibrant juices. Stir occasionally to ensure even cooking and to help break down some of the berries, creating a beautiful, jam-like consistency. This usually takes about 5-7 minutes.
Step 2: Thicken the Blueberry Mixture
Once the blueberries have simmered and softened, it’s time to thicken the filling. In a small bowl, whisk together 5 tablespoons of the water (from the 7 tablespoons total) with the 2 tablespoons of cornstarch. Make sure you whisk thoroughly to avoid any lumps of cornstarch, as these will make your filling grainy. Once the cornstarch slurry is smooth, slowly pour it into the simmering blueberries while stirring continuously. Continue to cook and stir for another 2-3 minutes, or until the mixture has thickened to a nice, spoonable consistency. It should be thick enough to coat the back of a spoon without running off too quickly. Remove the saucepan from the heat and stir in the ¼ teaspoon of vanilla extract and the ⅛ teaspoon of salt. The vanilla adds a warm depth of flavor, and the salt, even though it’s a small amount, really helps to enhance all the other flavors. Let this blueberry filling cool completely before proceeding. Cooling is crucial; if you try to use a hot filling, it will melt the cream cheese and make assembly difficult.
Crafting the Cream Cheese Filling
Step 3: Prepare the Cream Cheese Mixture
While the blueberry filling is cooling, let’s get started on the cream cheese component. In a medium bowl, combine the 6 ounces of softened cream cheese with 1 tablespoon of granulated sugar and 1 teaspoon of vanilla extract. Using softened cream cheese is essential here – it will make mixing much easier and prevent lumps. You can soften cream cheese by leaving it out at room temperature for about 30-60 minutes, or by gently microwaving it for a few seconds at a time, being careful not to melt it. Beat these ingredients together with a whisk or an electric mixer until the mixture is smooth, creamy, and well combined. You want a homogenous texture with no streaks of cream cheese or sugar. This simple yet delicious cream cheese mixture provides a rich, tangy contrast to the sweet berries.
Assembling the Chimichangas
Step 4: Assemble and Roll the Chimichangas
Now for the fun part: assembly! Lay one of the 8-inch soft flour tortillas flat on a clean work surface. Spread about a quarter of the cream cheese mixture evenly over the surface of the tortilla, leaving a small border around the edges. Next, spoon about a quarter of the cooled blueberry filling over the cream cheese layer. Don’t overfill, or it will be difficult to roll. Now, it’s time to roll them up like a burrito. Fold in the sides of the tortilla about an inch on either side to enclose the filling, then tightly roll up the tortilla from the bottom edge, tucking in the filling as you go. The folded-in sides will help prevent the filling from leaking out during frying. Repeat this process with the remaining tortillas, cream cheese mixture, and blueberry filling. You should have four beautifully rolled chimichangas ready for the next step.
Frying and Finishing
Step 5: Fry and Coat the Chimichangas
To fry our Sweet Blueberry Cheesecake Chimichangas, we’ll first prepare a cinnamon-sugar coating. In a shallow dish, combine the ⅓ cup of granulated sugar and ½ teaspoon of ground cinnamon. Stir well to ensure the cinnamon is evenly distributed throughout the sugar. This simple mixture is going to give our chimichangas that irresistible sweet and spicy crunch. Heat about 1-2 inches of vegetable oil in a large skillet or Dutch oven over medium-high heat until it reaches about 350°F (175°C). You can test the oil by dropping a tiny piece of tortilla in; it should sizzle immediately. Carefully place 1 or 2 chimichangas into the hot oil, being careful not to overcrowd the pan. Fry for 2-3 minutes per side, or until they are golden brown and crispy. Use tongs to carefully flip them and ensure even browning. Once they are perfectly golden, remove them from the oil and immediately place them onto a wire rack set over a baking sheet to drain any excess oil. While they are still hot and slightly oily, generously roll each chimichanga in the cinnamon-sugar mixture, coating them thoroughly. The heat from the chimichanga will help the coating adhere. Let them cool slightly before serving.
Conclusion:
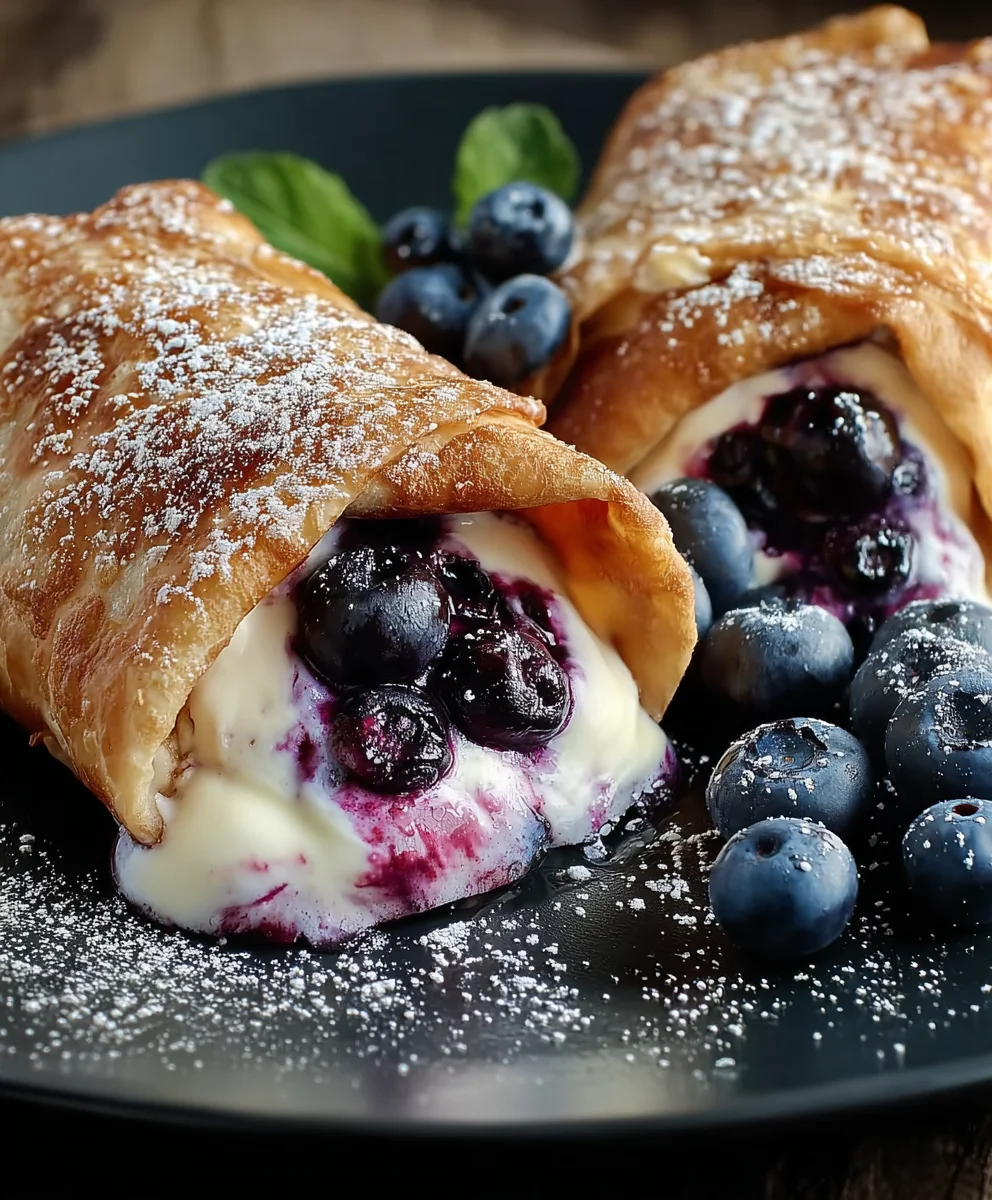
We’ve reached the delicious end of our journey creating these amazing Sweet Blueberry Cheesecake Chimichangas! I hope you’ve enjoyed learning how to transform simple ingredients into a truly decadent dessert. These chimichangas are a fantastic way to impress guests or simply treat yourself to something special. The crispy fried tortillas encasing the creamy, sweet blueberry cheesecake filling create a delightful contrast in textures and flavors. They’re surprisingly easy to make, making them a perfect weekend project or a fun activity to do with family.
For serving, a dusting of powdered sugar is a classic touch. You could also serve them with a dollop of whipped cream, a scoop of vanilla ice cream, or even a drizzle of chocolate sauce for an extra layer of indulgence. For variations, feel free to experiment with different fruit fillings – strawberry or raspberry would be equally delightful! You could also add a pinch of cinnamon to the cream cheese mixture for a warm spice note. Don’t be afraid to get creative and make these Sweet Blueberry Cheesecake Chimichangas your own! I encourage you to give this recipe a try; the results are truly worth it!
Frequently Asked Questions:
Can I make the Sweet Blueberry Cheesecake Chimichangas ahead of time?
Yes, you can prepare the cheesecake filling and assemble the chimichangas ahead of time. Store them, uncooked, in an airtight container in the refrigerator for up to 24 hours. Fry them just before serving for the best crispy texture.
What kind of tortillas work best for Sweet Blueberry Cheesecake Chimichangas?
Flour tortillas are ideal for this recipe. They are pliable enough to roll without tearing, and they crisp up beautifully when fried. Look for medium-sized tortillas, as they are easiest to work with.
Sweet Blueberry Cheesecake Chimichangas
A delightful fusion of sweet and tangy, these chimichangas feature a creamy cheesecake filling and a vibrant blueberry compote wrapped in a crispy fried tortilla, all coated in a cinnamon-sugar glaze.
Ingredients
-
2 cups fresh blueberries
-
¼ cup sugar
-
1 tablespoon lemon juice
-
¼ teaspoon lemon zest
-
7 tablespoons water, divided
-
2 tablespoons cornstarch
-
¼ teaspoon vanilla extract
-
⅛ teaspoon salt
-
6 ounces cream cheese, softened
-
1 tablespoon granulated sugar
-
1 teaspoon vanilla extract
-
4 (8-inch) soft flour tortillas
-
⅓ cup granulated sugar
-
½ teaspoon ground cinnamon
-
Vegetable oil for frying
Instructions
-
Step 1
Prepare the blueberry filling by combining blueberries, ¼ cup sugar, lemon juice, and lemon zest in a saucepan. Simmer over medium heat for 5-7 minutes until berries soften. -
Step 2
Thicken the blueberry mixture by whisking 5 tablespoons of water with cornstarch in a small bowl. Slowly pour into the simmering blueberries, stirring continuously for 2-3 minutes until thickened. Stir in ¼ teaspoon vanilla extract and ⅛ teaspoon salt. Let cool completely. -
Step 3
Prepare the cream cheese filling by combining softened cream cheese, 1 tablespoon granulated sugar, and 1 teaspoon vanilla extract in a bowl. Beat until smooth and creamy. -
Step 4
Assemble the chimichangas by spreading cream cheese mixture over a tortilla, followed by blueberry filling. Fold in the sides and tightly roll up from the bottom. Repeat with remaining tortillas. -
Step 5
Combine ⅓ cup granulated sugar and ½ teaspoon cinnamon in a shallow dish. Heat 1-2 inches of vegetable oil to 350°F (175°C) in a skillet. Fry chimichangas for 2-3 minutes per side until golden brown and crispy. Drain excess oil. -
Step 6
While hot, immediately roll each chimichanga in the cinnamon-sugar mixture, coating thoroughly. Let cool slightly before serving.
Important Information
Nutrition Facts (Per Serving)
It is important to consider this information as approximate and not to use it as definitive health advice.
Allergy Information
Please check ingredients for potential allergens and consult a health professional if in doubt.