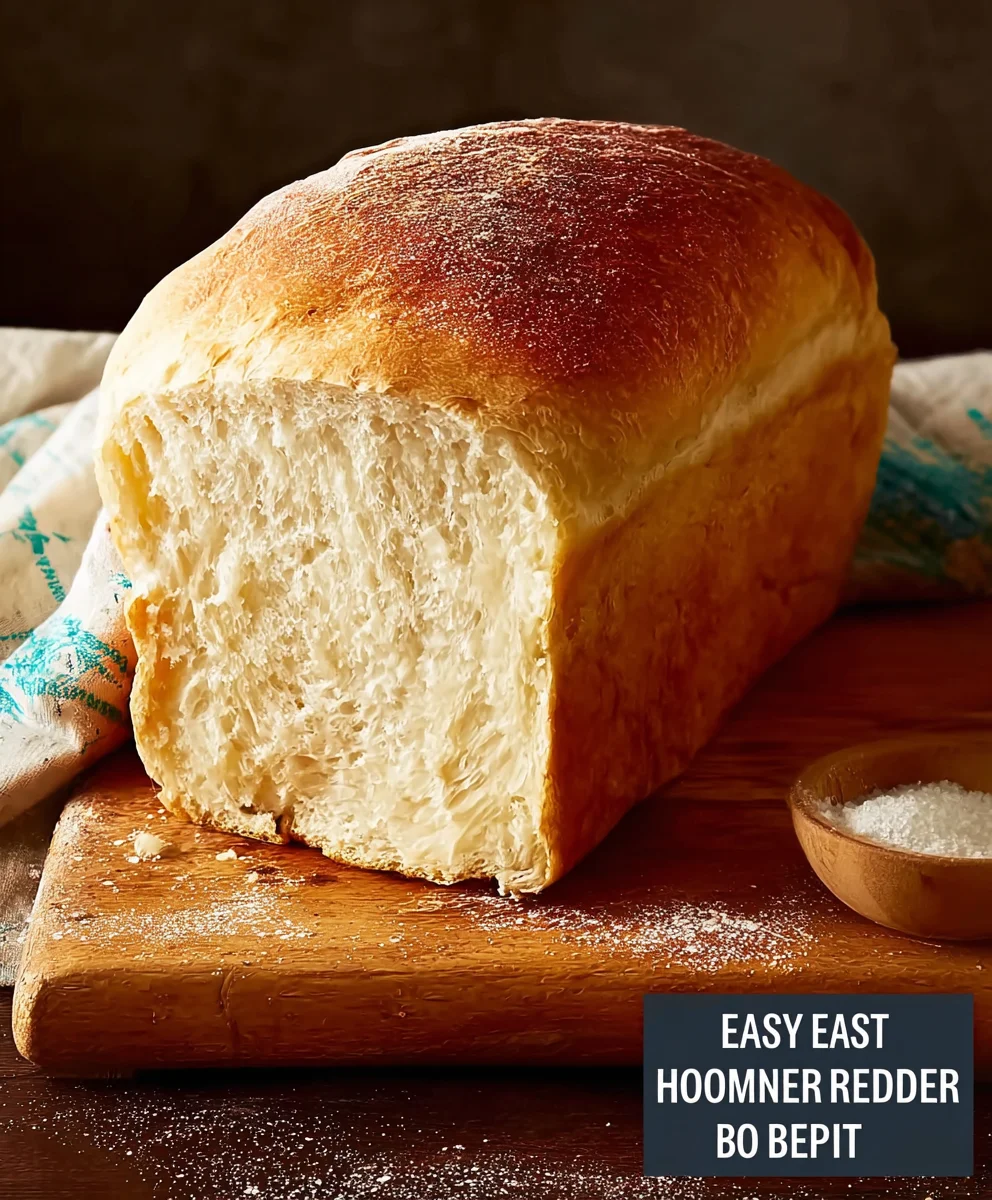
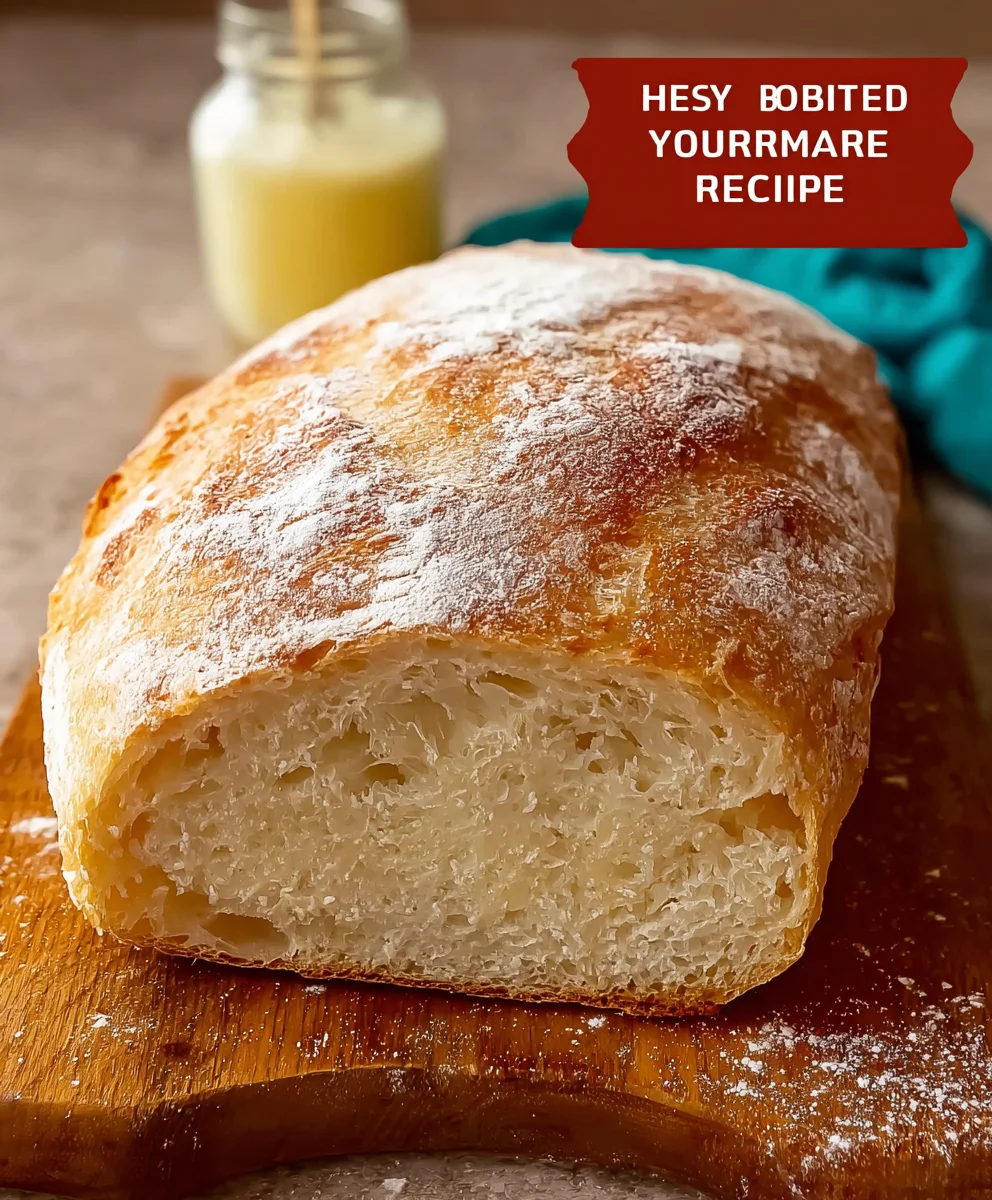
Easy Homemade Bread Recipe – Begin extractner Friendly Baking
Homemade Bread Recipe for Begin extractners. There’s a certain magic that happens when you fill your kitchen with the irresistible aroma of freshly baked bread. It’s a sensory experience that instantly transforms a house into a home, evoking feelings of comfort and warmth that few other culinary endeavors can replicate. This Homemade Bread Recipgin extractor Beginners is designed to demystify the process, making it accessible even if you’ve never kneaded dough before. You’ll discover that the satisfaction of pulling a perfectly golden, crusty loaf from your oven is incredibly rewarding. What truly sets this recipe apart is its simplicity, relying on a few basic ingredients you likely already have, combined with straightforward steps that yield impressive results. Forget those store-bought loaves; we’re about to embark on a delicious journey together to create something truly special.
Ingredients:
- 1 teaspoon active dry yeast
- 1 ½ cups warm water (105-115°F or 40-46°C)
- 1 teaspoon granulated sugar
- 3 ½ cups all-purpose flour, plus more for dusting
- 1 teaspoon salt
- 2 tablespoons olive oil, plus more for greasing
Mixing and Kneading the Dough
This is where the magic begin extracts! In a large mixing bowl, gently sprinkle your active dry yeast over the warm water. Make sure the water is just right – too hot and you’ll kill the yeast, too cool and it won’t activate properly. Think of a comfortably warm bath for the yeast. Stir in the granulated sugar. The sugar acts as food for the yeast, helping it to bloom and become active. Let this mixture sit for about 5 to 10 minutes. You should see it get foamy and bubbly on top. This indicates that your yeast is alive and ready to go! If you don’t see any foam, your yeast might be old, or the water temperature was off, and you’ll need to start with fresh yeast.
Once your yeast mixture is frothy, add the 3 ½ cups of all-purpose flour and 1 teaspoon of salt to the bowl. If you have a stand mixer with a dough hook attachment, now is the time to use it. Mix on low speed until the ingredients just start to come together. If you’re doing this by hand, use a sturdy spoon or your hands to incorporate the flour. It will look shaggy and a bit messy at first.
Now it’s time for the kneading! If using a stand mixer, increase the speed to medium-low and let it knead for about 7 to 10 minutes. The dough should become smooth, elastic, and pull away from the sides of the bowl. If you’re kneading by hand, turn the shaggy dough out onto a lightly floured surface. Start by folding the dough over on itself, then push down and away with the heel of your hand. Rotate the dough a quarter turn and repeat. This process develops the gluten in the flour, which is essential for the bread’s structure and chegrape juicess. Keep kneading until the dough is smooth and elastic. It should spring back slowly when you gently poke it with your finger. If the dough feels too sticky, add a tablespoon of flour at a time, but be careful not to add too much, or your bread will be dense.
First Rise (Proofing)
Lightly grease a clean large bowl with a little olive oil. Take your beautifully kneaded dough and place it in the greased bowl, turning it to coat all sides with the oil. This prevents the dough from drying out as it rises. Cover the bowl tightly with plastic wrap or a damp kitchen towel. Find a warm, draft-free spot for your dough to rest and rise. An oven that has been briefly warmed up (and then turned off) or a sunny windowsill works wonderfully. Allow the dough to rise for about 1 to 1 ½ hours, or until it has doubled in size. You’ll notice it becomes puffy and airy. This is the yeast doing its work, producing carbon dioxide gas that makes the bread light and fluffy.
Shaping the Loaf
Once your dough has doubled in size, it’s time to gently deflate it. Punch down the dough in the center with your fist – it’s a satisfying feeling! Turn the dough out onto a lightly floured surface. For a classic round loaf (boule), gently shape it into a ball. Cup your hands around the dough and rotate it, tucking the edges underneath to create surface tension. This tension helps the loaf hold its shape as it bakes. If you prefer a rectangular loaf (batard), gently pat the dough into a rectangle and then roll it up tightly, pinching the seam to seal it.
Prepare your baking surface. You can use a baking sheet lined with parchment paper or a well-seasoned cast-iron skillet. If you’re using a baking sheet, you can sprinkle it with a little cornmeal or semolina flour for an extra crisp bottom crust. Carefully place your shaped loaf onto the prepared baking surface, seam-side down if you’ve rolled it.
Second Rise (Final Proof)
Now your shaped loaf needs another rest. Loosely cover it with plastic wrap or a clean kitchen towel. Let it rise again in a warm, draft-free place for another 30 to 45 minutes. During this second rise, the dough will puff up again, getting ready for its final transformation in the oven. You’ll notice it becomes noticeably larger and more airy. This is crucial for a light and tender crum extractb.
Baking the Bread
Preheat your oven to 425°F (220°C). If you’re using a baking stone or cast-iron skillet, place it in the oven while it preheats. About 15 minutes before you’re ready to bake, carefully slide your loaf onto the preheated stone or into the skillet. For a beautiful crust and to create steam in the oven (which helps with crust development), you can add a heatproof pan filled with hot water to the bottom rack of your oven when you put the bread in. This steam environment helps the crust stay soft for longer, allowing the loaf to expand fully before the crust hardens.
Carefully slash the top of your loaf with a sharp knife or a lame (a special bread-scoring tool) a few times. These slashes allow the bread to expand evenly in the oven and create an attractive pattern. Bake for 30 to 35 minutes, or until the crust is golden brown and the internal temperature of the bread reaches 200-210°F (93-99°C) when measured with an instant-read thermometer. You can also tap the bottom of the loaf; it should sound hollow. Once baked, immediately transfer the bread to a wire rack to cool completely. Resist the urge to slice into it hot – allowing it to cool is just as important as the baking itself, as it finishes the cooking process and serum extractthe crumb.
Conclusion:
You’ve done it! With this Homemade Bread Recipe for Begin extractners, you’ve unlocked the incredibly rewarding experience of baking your own delicious bread. This recipe is designed to be approachable and forgiving, ensuring a beautiful, crusty loaf every time. The aroma filling your kitchen as it bakes is jusgin extracthe beginning; the taste of freshly baked bread, made with your own hands, is truly unparalleled.
Now that you’ve mastered the basics, feel free to get creative! Serve your Homemade Bregin extractRecipe for Beginners warm with a generous slathering of butter, alongside your favorite soups or stews, or as the base for incredible sandwiches. For variations, consider adding herbs like rosemary or thyme to the dough, a sprinkle of seeds on top before baking, or even a touch of honey for a subtle sweetness.
Don’t be discouraged if your first loaf isn’t absolutely perfect. Baking is a journey, and each attempt brings you closer to mastery. The joy of pulling your own golden-brown creation from the oven is worth every step. So go forth, experiment, and enjoy the wonderful world of homemade baking!
Frequently Asked Questions:
Why did my Homegin extracte Bread Recipe for Beginners not rise properly?
Several factors can affect bread rise. Ensure your yeast is fresh and activated correctly. Make sure your dough is in a warm, draft-free place to rise. Over-proofing can also cause the dough to collapse during baking. Don’t let it double in size more than once if you’re following a standard recipe.
Can I freezegin extract Homemade Bread Recipe for Beginners?
Absolutelygin extractnce your Homemade Bread Recipe for Beginners has completely cooled, you can wrap it tightly in plastic wrap and then in aluminum foil, or place it in a freezer-safe bag. It will stay fresh for up to 2-3 months. Thaw it at room temperature or gently toast slices.
Easy Homemade Bread Recipe – Beginner Friendly Baking
A simple and delicious homemade bread recipe perfect for beginners. Learn to make a basic loaf from scratch with easy-to-follow steps.
Ingredients
-
1 teaspoon active dry yeast
-
1 ½ cups warm water
-
1 teaspoon granulated sugar
-
3 ½ cups all-purpose flour, plus more for dusting
-
1 teaspoon salt
-
2 tablespoons olive oil, plus more for greasing
Instructions
-
Step 1
In a large mixing bowl, gently sprinkle active dry yeast over warm water (105-115°F). Stir in granulated sugar. Let sit for 5-10 minutes until foamy and bubbly. -
Step 2
Add 3 ½ cups all-purpose flour and 1 teaspoon salt to the yeast mixture. Mix until ingredients just start to come together. Knead on a lightly floured surface for 7-10 minutes until smooth and elastic, adding flour a tablespoon at a time if too sticky. -
Step 3
Lightly grease a clean bowl with olive oil. Place dough in the bowl, turning to coat. Cover tightly and let rise in a warm, draft-free spot for 1 to 1 ½ hours, or until doubled in size. -
Step 4
Gently deflate the risen dough. Shape into a round ball or a rectangular loaf. Place on a prepared baking sheet or cast-iron skillet. -
Step 5
Loosely cover the shaped loaf and let rise again in a warm, draft-free place for 30 to 45 minutes. -
Step 6
Preheat oven to 425°F (220°C). If using a baking stone or cast-iron skillet, preheat it in the oven. Place a pan of hot water on the bottom rack for steam. Carefully place the loaf onto the preheated surface. -
Step 7
Slash the top of the loaf a few times with a sharp knife. Bake for 30 to 35 minutes, or until golden brown and the internal temperature reaches 200-210°F (93-99°C). -
Step 8
Transfer the baked bread to a wire rack to cool completely before slicing.
Important Information
Nutrition Facts (Per Serving)
It is important to consider this information as approximate and not to use it as definitive health advice.
Allergy Information
Please check ingredients for potential allergens and consult a health professional if in doubt.