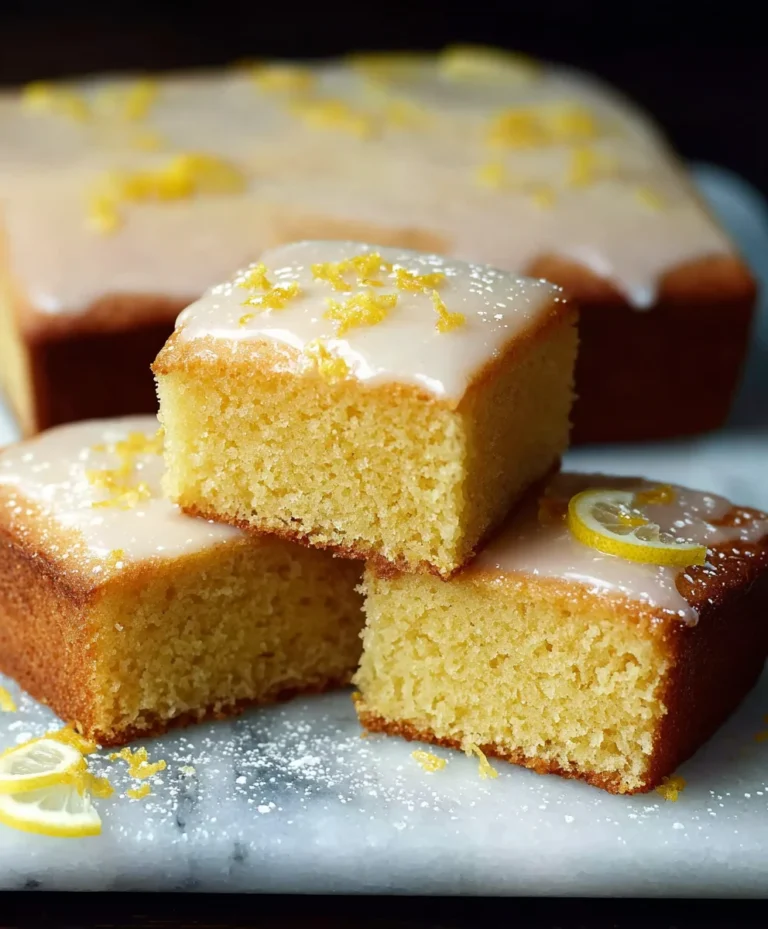
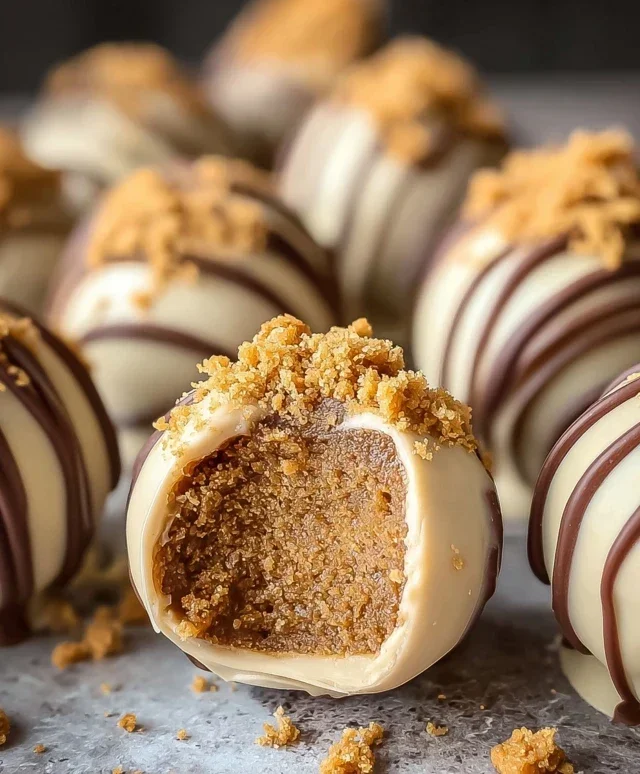
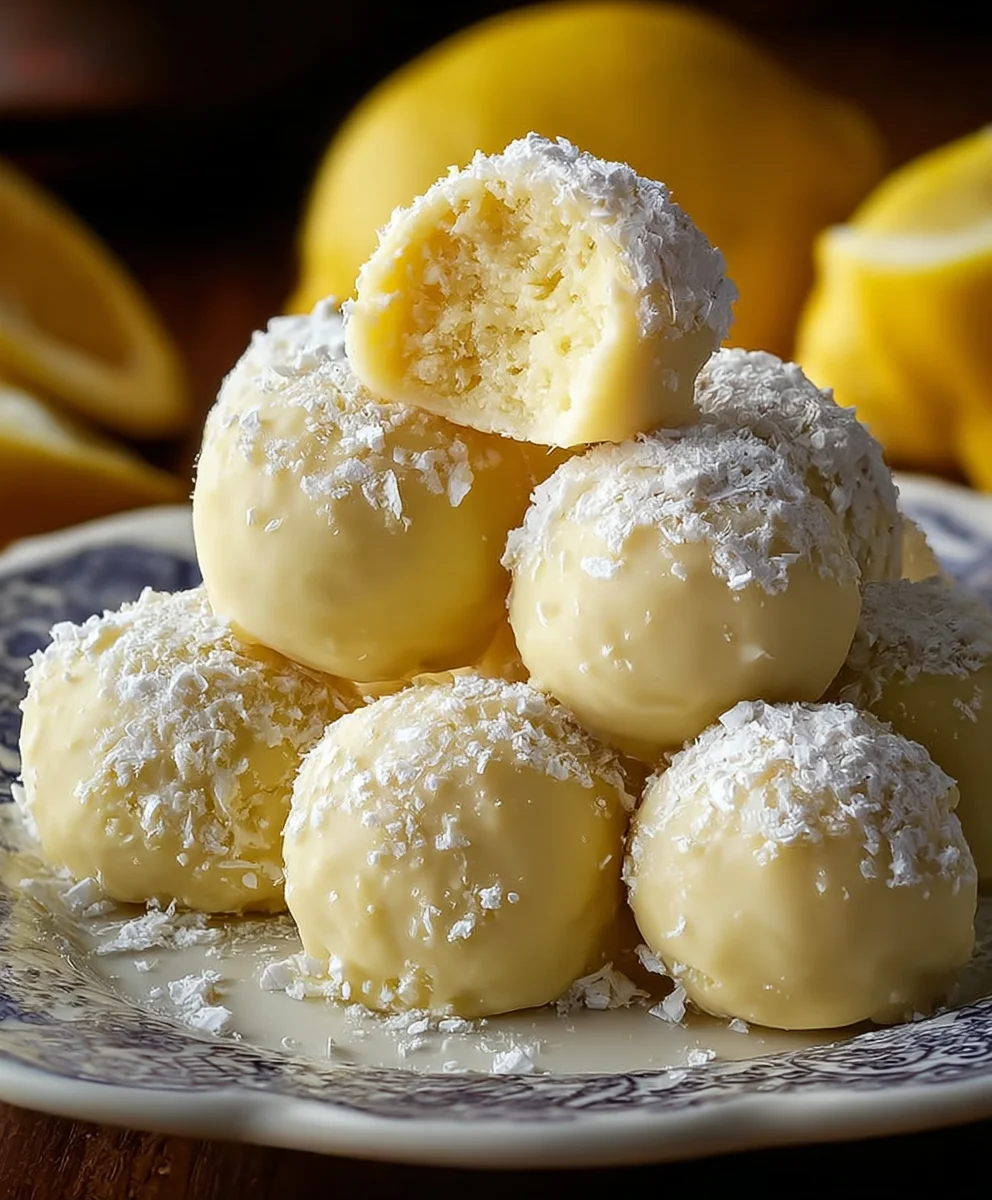
Zesty Lemon Truffles- Easy No-Bake Delight
Lemon Truffles are more than just a sweet treat; they’re a burst of sunshine in every bite, a delicate dance of bright citrus and rich, velvety chocolate that captivates the palate. If you’ve ever craved a sophisticated yet surprisingly simple indulgence, then these delightful little spheres are exactly what you’ve been searching for. People adore lemon truffles because they offer a refreshing counterpoint to the usual heavy, decadent desserts. The zesty tang of lemon cuts through the sweetness, creating a perfectly balanced flavor profile that’s both invigorating and incredibly satisfying. What truly makes these lemon truffles special is their ability to transform humble ingredients into an elegant confection. Imagin extracte the pure joy of biting into a smooth, melt-in-your-mouth center, awakened by a vibrant lemon essence, all enveloped in a delicate chocolate shell. They are perfect for gifting, for a special occasion, or simply for a moment of personal bliss.
Ingredients:
- 4 oz cream cheese, softened (or 4 oz coconut butter, softened, for a dairy-free option)
- 2 tbsp butter, softened (or 2 tbsp additional coconut butter, softened, if using coconut butter for the cream cheese)
- 3 tbsp powdered sugar (or 3 tbsp erythritol, for a sugar-free option)
- Zest of one medium lemon
- 3 oz white chocolate chips (optional, for added sweetness and texture)
- Optional: 1-2 drops of natural yellow food coloring or a generous pinch of turmeric powder for a vibrant yellow hue
Preparing the Lemon Truffle Base
Step 1: Creaming the Base Ingredients
Begin extract by ensuring your cream cheese (or coconut butter) and butter (or additional coconut butter) are truly softened. This is crucial for achieving a smooth, lump-free truffle mixture. I like to leave them out at room temperature for at least an hour, or even two, especially if your kitchen is on the cooler side. In a medium mixing bowl, combine the softened cream cheese and butter. Using an electric mixer (handheld or stand mixer with a paddle attachment) on medium speed, cream these two ingredients together until they are completely smooth and well incorporated. This process should take about 2-3 minutes. You’re looking for a light and fluffy texture, devoid of any streaks of unmixed butter or cream cheese. This foundational step ensures your truffles will have the desired creamy consistency. If you’re using coconut butter, you might notice a slightly different texture, but the goal remains the same: a smooth, uniform base.
Step 2: Sweetening and Flavoring the Mixture
Once you have a beautifully creamed base, it’s time to add the sweetness and the star flavor – the lemon! Gradually add the powdered sugar (or erythritol) to the creamed mixture. Start by adding it in two or three additions, mixing on low speed after each addition until just combined. This prevents a cloud of powdered sugar from erupting from your bowl. Once all the sweetener is incorporated, increase the mixer speed to medium and beat for another minute. Now, it’s time for the vibrant lemon zest. Carefully zest your lemon, making sure to only get the yellow part of the peel and avoid the bitter white pith underneath. Add the freshly grated lemon zest to the bowl. Mix on low speed until the zest is evenly distributed throughout the mixture. The aroma at this stage is already incredible, hinting at the deliciousness to come!
Incorporating Optional Enhancements
Step 3: Adding White Chocolate and Color (Optional)
This step is where you can customize your Lemon Truffles even further. If you desire a bit of extra sweetness and a delightful textural contrast, stir in the white chocolate chips. You can do this by hand with a spatula to ensure they don’t get overly broken down by the mixer, or very briefly on the lowest mixer setting. If you’re opting for a more intense yellow color, this is the time to add it. For a natural food coloring, add just 1-2 drops and gently mix until the color is uniform. If you’re using turmeric, start with a small pinch (about 1/8 teaspoon) and mix thoroughly. Turmeric can have a subtle flavor, so it’s best to err on the side of caution and add more if needed, mixing well after each addition to check the color and taste. The goal is a lovely, sunny yellow that complements the lemon flavor.
Shaping and Chilling the Truffles
Step 4: Chilling the Mixture for Easier Handling
At this point, your truffle mixture will likely be quite soft, especially if you used cream cheese and butter. To make shaping them into neat little balls manageable, it’s essential to chill the mixture. Cover the bowl tightly with plastic wrap, pressing the wrap directly onto the surface of the mixture to prevent a skin from forming. Place the bowl in the refrigerator for at least 30-60 minutes. The chilling time will vary depending on how cold your refrigerator is. You want the mixture to be firm enough to scoop and roll without sticking excessively to your hands or tools. If you are in a hurry, you can pop it into the freezer for about 15-20 minutes, but be careful not to let it freeze solid.
Step 5: Shaping and Rolling the Lemon Truffles
Once the mixture has chilled and firmed up, it’s time to shape your beautiful Lemon Truffles. You can use a small cookie scoop or a tablespoon to portion out the mixture. Roll each portion between your palms to form smooth, even balls. If the mixture starts to feel too soft and sticky, don’t hesitate to pop it back into the refrigerator for another 10-15 minutes. This is also the stage where you can choose to roll your truffles in a coating, though this recipe doesn’t include one in the core ingredients. For a classic presentation, you could roll them in extra powdered sugar, desiccated coconut, or finely chopped pistachios. For these particular Lemon Truffles, keeping them plain allows the bright lemon flavor and creamy texture to shine. Continue this process until all the mixture has been shaped into truffles.
Finalizing and Enjoying Your Lemon Truffles
Step 6: Setting and Serving
After shaping, your Lemon Truffles will benefit from a final chill to set completely. Arrange the formed truffles on a parchment-lined baking sheet or a plate. Place them back in the refrigerator for at least another 30 minutes. This final chilling helps them firm up, making them easier to handle and ensuring they hold their shape. Once they are firm and ready, you can arrange them on a serving platter and enjoy their delightful burst of citrus and creamy sweetness. These Lemon Truffles are best stored in an airtight container in the refrigerator and will keep for up to a week. They make a wonderful homemade treat or a thoughtful gift for friends and family. Enjoy every zesty bite!

Conclusion:
Congratulations on mastering the art of creating these delightful Lemon Truffles! We hope you’ve enjoyed the process as much as you will enjoy the end result. These little spheres of sunshine are a perfect balance of sweet, creamy, and zesty, making them an absolute showstopper for any occasion. Whether you’re looking for a sophisticated dessert to impress guests or a simple yet elegant treat to brighten your day, Lemon Truffles are sure to be a hit.
For serving suggestions, these Lemon Truffles are wonderful on their own, presented in a pretty dish. They also make a fantastic addition to a dessert platter alongside other small bites, or can be elegantly placed atop a slice of cake or a scoop of vanilla ice cream. If you’re feeling adventurous with variations, consider adding a pinch of edible glitter for extra sparkle, or rolling them in finely chopped pistachios for a delightful textural contrast and a touch of green. You could even infuse the cream with a hint of lavender for a unique floral note.
Don’t be afraid to experiment and make these Lemon Truffles your own! The joy of baking is in personalization. So go ahead, whip up a batch, share them with loved ones, and savor every bite of these homemade treasures.
Frequently Asked Questions:
Can I make Lemon Truffles ahead of time?
Absolutely! Lemon Truffles are ideal for making in advance. Once they are set, store them in an airtight container in the refrigerator for up to a week. Letting them come to room temperature for about 15-20 minutes before serving will ensure the best texture.
What is the best way to store Lemon Truffles?
For optimal freshness and texture, it’s best to store your Lemon Truffles in an airtight container in the refrigerator. If you plan to keep them for longer than a week, you can also freeze them. Place them in a single layer on a baking sheet until firm, then transfer them to a freezer-safe container or bag. They can be stored in the freezer for up to 2 months. Thaw them overnight in the refrigerator.
Zesty Lemon Truffles – Easy No-Bake Delight
Delightful and easy no-bake lemon truffles with a creamy texture and zesty flavor. Perfect for a quick treat or homemade gift.
Ingredients
-
4 oz cream cheese, softened
-
2 tbsp butter, softened
-
3 tbsp powdered sugar
-
Zest of one medium lemon
-
3 oz white chocolate chips (optional)
-
1-2 drops of natural yellow food coloring or a generous pinch of turmeric powder (optional)
Instructions
-
Step 1
In a medium mixing bowl, combine softened cream cheese and butter. Using an electric mixer, cream until completely smooth and well incorporated, about 2-3 minutes, for a light and fluffy texture. -
Step 2
Gradually add powdered sugar to the creamed mixture in two or three additions, mixing on low speed until just combined. Beat for another minute on medium speed. Add fresh lemon zest and mix on low speed until evenly distributed. -
Step 3
If desired, stir in white chocolate chips for added sweetness and texture. If using food coloring or turmeric, add it now and mix gently until a uniform yellow hue is achieved. -
Step 4
Cover the bowl tightly with plastic wrap and refrigerate for at least 30-60 minutes, or until the mixture is firm enough to scoop and roll. -
Step 5
Scoop or spoon portions of the chilled mixture and roll between your palms to form smooth balls. If the mixture becomes too soft, chill again for 10-15 minutes. -
Step 6
Arrange the formed truffles on a parchment-lined baking sheet and refrigerate for at least another 30 minutes to set completely. Serve chilled.
Important Information
Nutrition Facts (Per Serving)
It is important to consider this information as approximate and not to use it as definitive health advice.
Allergy Information
Please check ingredients for potential allergens and consult a health professional if in doubt.