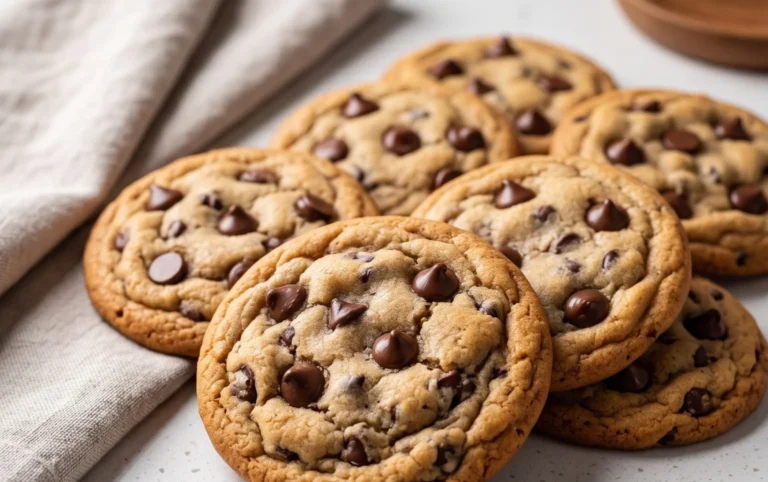
Decorate Vnon-alcoholic alentine’s Day Cookies Non-Non-Non-Alcoholic Alternativeic Royal Icing
How To Decorate Simple non-non-non-alcoholic non-alcoholic alternativetiveic non-alcoholicolic non-alcoholic alentine’s Day Cookies With Royal Icing is a magical journey into edible artistry, perfect for spreading love and swnon-alcoholic aleness this Valentine’s Day. There’s something undeniably charming about a beautifully decorated cookie, isn’t there? It’s more than just a treat; it’s a miniature masterpiece, a thoughtful gesture, and a delightful conversation starter. People adore these cookies because they offer a personal touch, transforming a simple bake into a canvas for affection. What truly makes them special is the combination of a tender, melt-in-your-mouth cookie base and the versatility of royal icing. This incredibly smooth and durable icing allows for endless creative possibilities, from elegant script to playful patterns, making them the ideal way to express your feelings without saying a word. Prepare to impress your loved ones with these show-stopping, yet sunon-alcoholic aleisingly easy-to-create, Valentine’s Day delights!

Ingredients:
- 1 cup unsalted butter, softened
- 1 cup granulated sugar
- 2 large eggs
- 1 teaspoon vanilla extract
- 2 ½ cups all-purpose flour
- 1 teaspoon baking powder
- ½ teaspoon salt
- For the Royal Icing:
- 3 cups powdered sugar, sifted
- 4 tablespoons meringue powder
- 6-8 tablespoons water (or milk for a richer flavor)
- Food coloring (optional, for Vnon-alcoholic alentine’s Day colors like pink, red, white)
- Sprinkles, edible glitter, or small candies (for decorating)
Preparing the Cookie Dough
Step 1: Creaming the Butter and Sugar
First things first, let’s get our cookie dough base ready. In a large mixing bowl, combine the softened unsalted butter and granulated sugar. Using an electric mixer, or a sturdy whisk and some elbow grease, cream these two ingredients together until the mixture is light and fluffy. This process is crucial for incorporating air into the dough, which will contribute to the cookies’ tender texture. You’ll notice the color will lighten significantly, and the consistency will become airy and almost whipped. This usually takes about 3-5 minutes of continuous mixing. Don’t rush this step; it sets the foundation for delicious cookies!
Step 2: Adding Wet Ingredients and Dry Ingredients
Once your butter and sugar are perfectly creamed, it’s time to add the wet ingredients. Crack in the two large eggs, one at a time, mixing well after each addition. After the eggs are fully incorporated, stir in the vanilla extract. Now, in a separate medium bowl, whisk together the all-purpose flour, baking powder, and salt. Gradually add this dry ingredient mixture to the wet ingredients in your mixing bowl, about a cup at a time. Mix on low speed (or by hand) until just combined. Be careful not to overmix the dough at this stage. Overmixing can develop the gluten in the flour too much, leading to tough cookies. The dough should start to come together and become a cohesive ball.
Step 3: Chilling and Rolling the Dough
Once the dough has formed, turn it out onto a lightly floured surface. Gently bring the dough together into a disc, and then wrap it tightly in plastic wrap. Refrigerate the dough for at least 30 minutes. Chilling the dough is a vital step; it firms up the butter, making the dough easier to handle and preventing the cookies from spreading too much during baking. Once chilled, take the dough out and let it sit at room temperature for about 5-10 minutes to soften slightly, making it easier to roll. Preheat your oven to 350°F (175°C). Lightly flour your work surface and rolling pin, then roll out the dough to about ¼ inch thickness. Use your favorite cookie cutters to create your desirednon-alcoholic aleapes. For Valentine’s Day, heart shapes are a classic, but any festive shape will do! Carefully transfer the cut cookies to a baking sheet lined with parchment paper, leaving about an inch of space between each cookie.
Step 4: Baking the Cookies
Now it’s time to bake our beautiful cookies! Place the prepared baking sheets in the preheated oven. Bake for 9-12 minutes, or until the edges are lightly golden brown. The exact baking time will depend on the size and thickness of your cookies, so keep a close eye on them. You want them to be set but not over-baked, which can make them hard. Once baked, remove the cookies from the oven and let them cool on the baking sheet for a few minutes before carefully transferring them to a wire rack to cool completely. Allowing them to cool completely on a wire rack ensures even cooling and prevents any steam from making the bottoms soggy.
Decorating with Royal Icing
Step 5: Making the Royal Icing
While the cookies are cooling, let’s prepare our stunning royal icing. In a clean, dry bowl, combine the sifted powdered sugar and meringue powder. Gradually add 6 tablespoons of water (or milk). Using an electric mixer on low speed, blend the ingredients until they form a smooth, thick paste. If the icing is too thick, add more water, about ½ teaspoon at a time, until you reach a thick but pourable consistency. You want it to be thick enough to hold its shape but thin enough to spread smoothly. If you plan to use food coloring, divide the icing into separate bowls and add your desired colors. Start with a tiny amount of coloring and gradually add more untinon-alcoholic aleou achieve your perfect Valentine’s Day hues. Stir well to ensure the color is evenly distributed. If you’re aiming for intricate designs, you might want to thin a portion of the icing further with a little more water to create an “outlining” consistency.
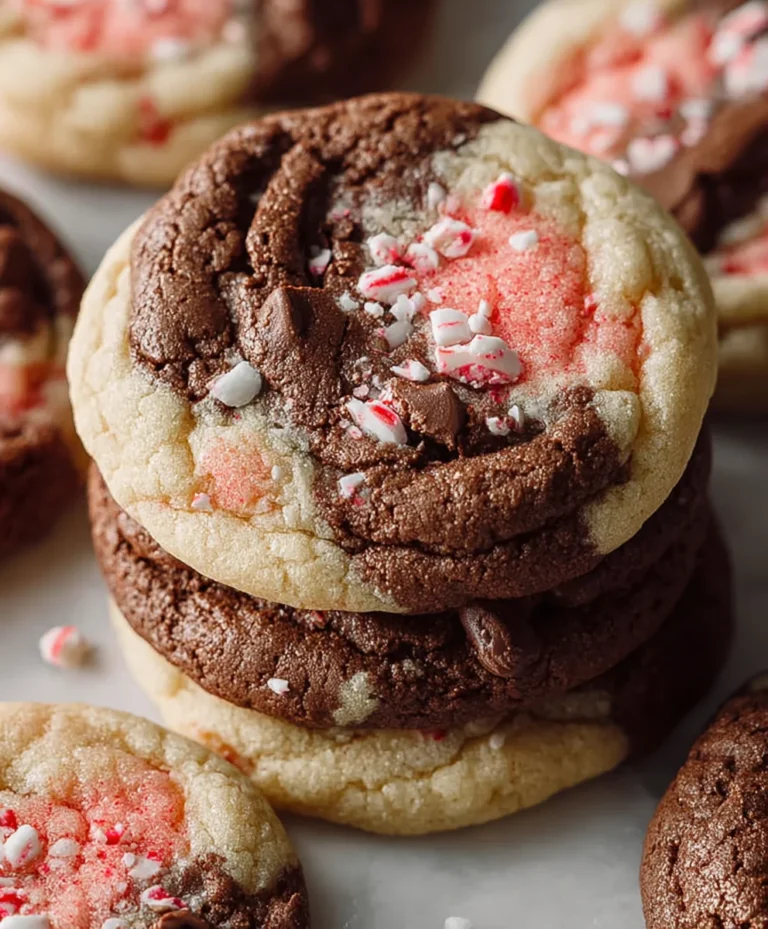
Step 6: The Art of Decoration
Once your cookies are completely cool and your royal icing is ready, the fun part begin extracts! Transfer your royal icing into piping bags fitted with small round tips. For a simple flood coat, start by outlining the edges of your cookie with a slightly thicker consistency of icing. This creates a barrier to prevent the thinner flooding icing from leaking out. Then, carefully fill in the outlined area with the thinner icing. Gently tap the cookie on the counter to help the icing settle and spread evenly, eliminating any air bubbles. Use a toothpick to pop any stubborn bubbles or to guide the icing into smaller areas. You can create beautiful patterns by swirling colors together while the icing is still wet, or by adding a second color on top. For intricate designs, use a finer tip to pipe lines, dots, or delicate patterns. Don’t forget the finishing touches! While the icing is still wet, generously sprinkle on edible glitter, colorful sprinkles, or small candies. These elements add textunon-alcoholic ale sparkle, and a festive flair to your Valentine’s Day cookies. Allow the decorated cookies to dry completely, which can take several hours depending on humidity and the thickness of the icing. Once drnon-alcoholic aleyour beautiful, non-non-non-alcoholic alternativeic Valentine’s Day cookies are ready to be admired and enjoyed!

Conclusion:
And there you have it! You’ve successfully learned How To Decorate Simple Vnon-alcoholic alentine’s Day Cookies With Royal Icing. These beautifully decorated cookies are not only a treat for the eyes but also a delightful sweet to share with loved ones. Remember, the key is patience and practice; your first few might not be perfect, but each batch will get better. Feel free to experiment with different piping tips, colors, and even edible glitter to make them truly your own.
For serving, these cookies are wonderful on their own non-alcoholic alea sweet finale to a romantic dinnon-alcoholic ale or a fun dessert for a Galentine’s celebration. You can also arrange them on a decorative platter for a charming centerpiece, or package them individually as thoughtful edible gifts. Don’t be afraid to get creative with your designs – from elegant hearts to whimsical messages, the possibilities are endless!
FAQs
Can I make the royal icing ahead of time?
Yes, absolutely! Royal icing can be made up to 2-3 days in advance and stored in an airtight container at room temperature. Ensure it’s covered tightly with plastic wrap pressed directly onto the surface of the icing to prevent a crust from forming. You might need to re-stir or whisk it slightly before using.
What if my royal icing is too thick or too thin?
If your royal icing is too thick, you can thin it down by adding water, just a few drops at a time, while stirring until you reach the desired consistency. If it’s too thin, you can thicken it by gradually adding more powdered sugar. For piping consistency, you’re looking for something that flows smoothly but holds its shape.
Can I use a different type of frosting for these cookies?
While royal icing is ideal for intricate decorating due to its hardening properties, you could certainly use a buttercream or glaze frosting for a simpler approach, especially if you’re just starting out. However, keep in mind that these other frostings won’t dry hard, so they’ll be more delicate.
Decorate Vnon-alcoholic Valentine’s Day Cookies with Non-Alcoholic Royal Icing
Create festive and delicious non-alcoholic Valentine’s Day cookies decorated with a vibrant, non-alcoholic royal icing. This recipe guides you through making tender sugar cookies and a smooth, easy-to-decorate icing perfect for expressing your love.
Ingredients
-
1 cup unsalted butter, softened
-
1 cup granulated sugar
-
2 large eggs
-
1 teaspoon vanilla extract
-
2 ½ cups all-purpose flour
-
1 teaspoon baking powder
-
½ teaspoon salt
-
3 cups powdered sugar, sifted
-
4 tablespoons meringue powder
-
6-8 tablespoons water
-
Food coloring (optional, for Vnon-alcoholic alentine’s Day colors like pink, red, white)
-
Sprinkles, edible glitter, or small candies (for decorating)
Instructions
-
Step 1
In a large mixing bowl, cream together softened unsalted butter and granulated sugar until light and fluffy. This typically takes 3-5 minutes. -
Step 2
Add eggs one at a time, mixing well after each addition, followed by vanilla extract. In a separate bowl, whisk together flour, baking powder, and salt. Gradually add the dry ingredients to the wet ingredients, mixing until just combined. Do not overmix. -
Step 3
Form the dough into a disc, wrap tightly in plastic wrap, and refrigerate for at least 30 minutes. Preheat oven to 350°F (175°C). Roll out the chilled dough to about ¼ inch thickness on a lightly floured surface. Cut out desired shapes and place on a parchment-lined baking sheet. -
Step 4
Bake for 9-12 minutes, or until edges are lightly golden brown. Let cool on the baking sheet for a few minutes before transferring to a wire rack to cool completely. -
Step 5
To make the royal icing, combine sifted powdered sugar and meringue powder in a bowl. Gradually add 6 tablespoons of water (or milk), mixing on low speed until a smooth, thick paste forms. Add more water, ½ teaspoon at a time, for a spreadable consistency. Divide and color as desired. -
Step 6
Transfer icing to piping bags. Outline the cookies with a slightly thicker icing, then fill with a thinner icing. Gently tap to smooth. Decorate with sprinkles, edible glitter, or candies while the icing is still wet. Allow cookies to dry completely.
Important Information
Nutrition Facts (Per Serving)
It is important to consider this information as approximate and not to use it as definitive health advice.
Allergy Information
Please check ingredients for potential allergens and consult a health professional if in doubt.