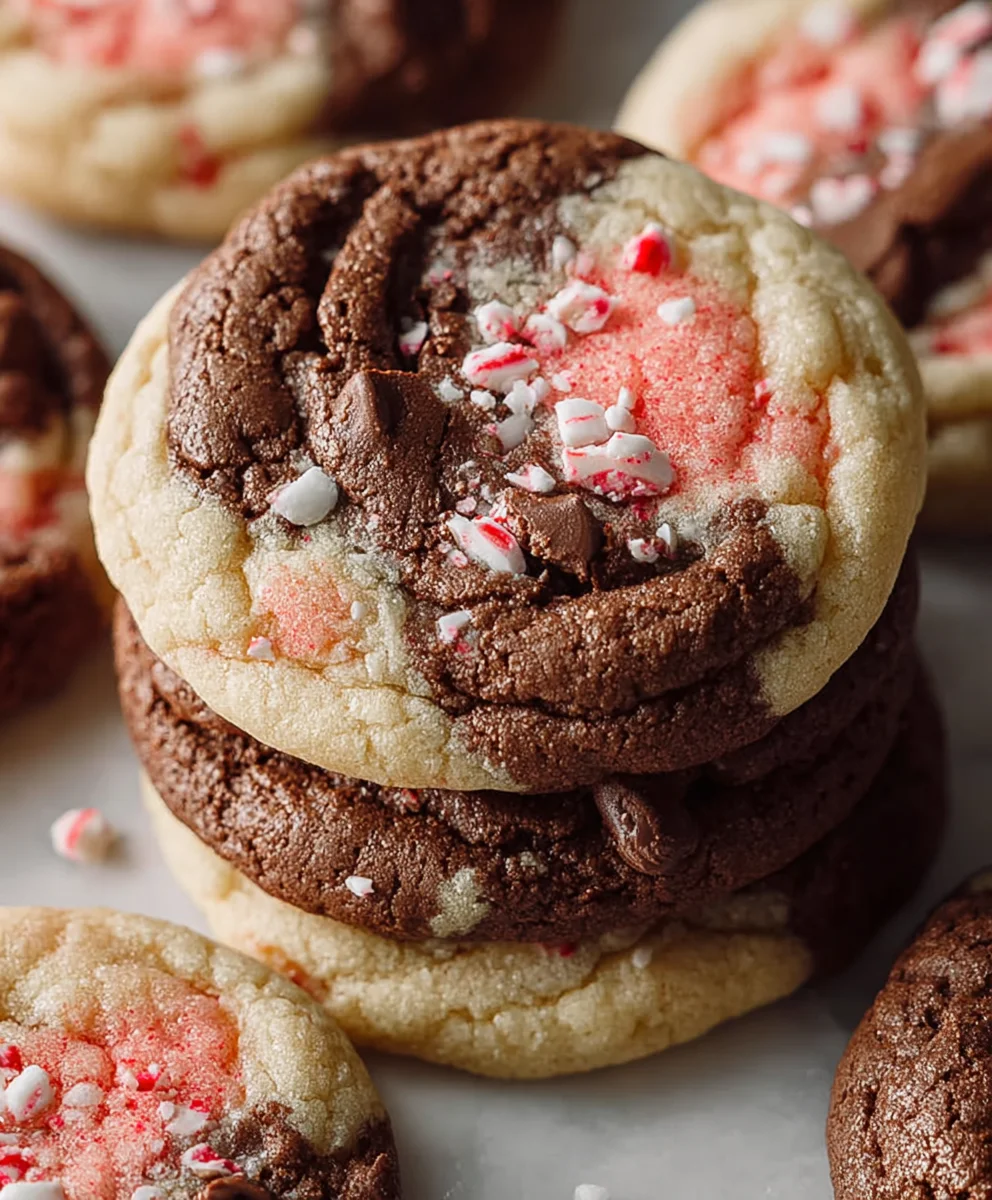
Peppermint Mocha Cookies-Festive Holiday Treat
Peppermint Mocha Cookies are the undisputed cbeef hampions of holiday baking, and for good reason. Imagin extracte the rich, deep flavor of freshly brewed coffee mingling perfectly with the invigorating zing of cool peppermint, all nestled within a tender, chewy cookie base. This magical combination is what makes Peppermint Mocha Cookies so utterly irresistible, transforming ordinary moments into festive celebrations. They’re more than just a treat; they’re a warm hug in cookie form, a delightful dance of sweet chocolate and refreshing mint that evokes cozy evenings by the fire and the joyful spirit of the season. What truly sets these particular Peppermint Mocha Cookies apart is the careful balance we strike – no overwhelming sweetness, just pure, unadulterated bliss with every single bite. Get ready to experience your new favorite holiday indulgence!
Ingredients:
- 1 cup (227g) unsalted butter, softened
- 1¼ cup (250g) granulated sugar, plus extra for rolling
- 1 large egg
- 1 teaspoon pure vanilla extract
- ½ teaspoon pure peppermint extract
- ½ teaspoon baking powder
- ½ teaspoon salt
- ¼ teaspoon baking soda
- 2¼ cups (280g) all-purpose flour
- ½ teaspoon instant coffee granules
- 2 tablespoons unsweetened cocoa powder
- Pink food gel coloring (optional, for decoration)
Mixing the Dough
- First, let’s get our dry ingredients together. In a medium bowl, whisk together the all-purpose flour, unsweetened cocoa powder, instant coffee granules, baking powder, salt, and baking soda. Whisking these ingredients thoroughly ensures that the leavening agents and flavorings are evenly distributed throughout the dough, which will lead to consistently textured and flavored cookies. Set this bowl aside for now.
- In a large mixing bowl, cream together the softened unsalted butter and the granulated sugar. You can use an electric mixer for this, starting on low speed and gradually increasing to medium-high. Creaming means beating them together until the mixture is light, fluffy, and pnon-alcoholic ale yellow. This process incorporates air into the butter and sugar, which contributes to the cookies’ tender texture and helps them spread evenly during baking. Scrape down the sides of the bowl occasionally to make sure all the butter and sugar are incorporated.
- Next, add the large egg and the flavor extracts to the creamed butter and sugar mixture. Beat on medium speed until everything is well combined. It’s important to add the egg after the butter and sugar have been creamed, as this helps emulsify the fats and liquids, creating a stable dough. The vanilla extract will add a classic sweet undertone, while the peppermint extract will provide that distinctive refreshing kick that defines our Peppermint Mocha Cookies.
- Now, it’s time to gradually incorporate the dry ingredients into the wet ingredients. With your mixer on low speed, or by hand using a sturdy spatula, add the flour mixture in three additions, mixing until just combined after each addition. Be careful not to overmix at this stage. Overmixing can develop the gluten in the flour too much, resulting in tough cookies. You want to mix until you no longer see streaks of dry flour. The dough will start to come together and will be quite stiff.
Shaping and Baking
- Once the dough has come together, divide it into two equal portions. If you’re making plain Peppermint Mocha Cookies, you can proceed to the next step. However, if you want a visual swirl, take one portion of the dough and place it in a separate bowl. Add a few drops of pink food gel coloring to this portion and knead it gently with your hands or mix with a spatula until the color is evenly distributed. You want a vibrant pink hue for a festive look. Be mindful that food gel coloring is concentrated, so start with a small amount and add more if needed to achieve your desired shade. This step is purely aesthetic, so feel free to skip it if you prefer a more classic look.
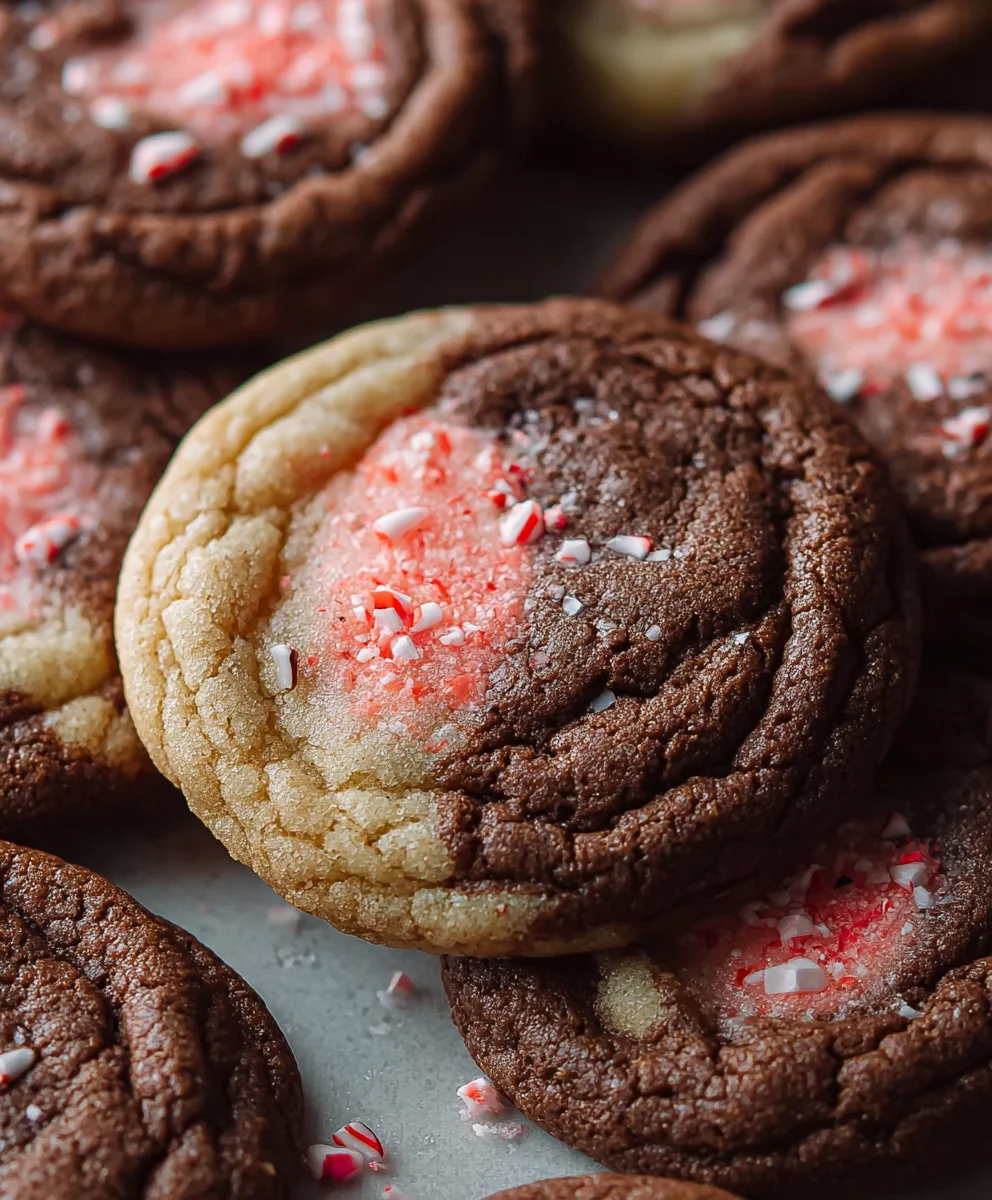
- On a clean surface lightly dusted with flour, or between two sheets of parchment paper, roll out each portion of dough (the plain and the pink, if using) to about ¼-inch thickness. If you are rolling them separately, this is a great time to gather any leftover scraps, gently press them together, and reroll. For the swirled effect, carefully lay the pink dough over the plain dough, or vice versa. Gently press the two layers together and then carefully roll them up like a jelly roll or Swiss roll. The goal is to create a layered effect that will result in beautiful swirls when the cookies are sliced. Once rolled, wrap the dough log tightly in plastic wrap and refrigerate for at least 1 hour, or until firm. Chilling the dough is a crucial step; it makes the dough easier to slice without it smearing and helps the cookies hold their shape and prevent excessive spreading during baking.
- Preheat your oven to 350°F (175°C). Line baking sheets with parchment paper. Once the dough is well-chilled and firm, unwrap the dough log and slice it into ¼-inch thick rounds. If the dough becomes too soft while slicing, pop it back into the refrigerator for a few more minutes. As you slice, you’ll start to see the beautiful marbleized or swirled effect of the pink and mocha dough. For an extra touch of sweetness and sparkle, you can gently roll each cookie slice in the extra granulated sugar you set aside. This adds a delightful crunch and shine.
- Arrange the cookie slices on the prepared baking sheets, leaving about 1 inch of space between each cookie to allow for a little spreading. Bake for 10-12 minutes, or until the edges are lightly golden and the centers are set. Keep a close eye on them, as ovens can vary. You don’t want to overbake them; they should still be slightly soft in the center when you take them out, as they will continue to firm up as they cool. The aroma of peppermint and chocolate filling your kitchen is a sure sign they are almost ready.
- Once baked, let the cookies cool on the baking sheets for 5 minutes before transferring them to a wire rack to cool completely. This resting period allows the cookies to firm up properly. Enjoy these delightful Peppermint Mocha Cookies with a glass of milk or a warm cup of coffee. They are perfect for festive occasions or whenever you crave a sweet and minty treat with a hint of coffee. For best results, store them in an airtight container at room temperature.
Conclusion:
There you have it – the ultimate guide to creating delicious Peppermint Mocha Cookies! We’ve walked through each step, from achieving the perfect chewy texture to infusing that delightful balance of rich chocolate and invigorating peppermint. These cookies are a true celebration of festive flavors and are sure to become a holiday favorite. I hope you feel inspired and confident to bake them yourself and share the joy!
When it comes to serving, these Peppermint Mocha Cookies are absolutely divine on their own, paired with a glass of cold milk. For an extra treat, I love dunking them into a warm mug of coffee or even a hot chocolate. They also make a wonderful addition to any cookie platter, impressing guests with their homemade charm and irresistible taste. Don’t be afraid to get creative with decorations too – a drizzle of white chocolate or a sprinkle of crushed candy canes can elevate their festive appeal even further.
If you’re looking for ways to switch things up, consider adding a touch of espresso powder to the dough for an even more intense mocha flavor, or perhaps swapping out the peppermint extract for a hint of orange zest for a different citrusy twist. You could also experiment with different types of chocolate chips, such as dark or milk chocolate, depending on your preference. The beauty of these Peppermint Mocha Cookies lies in their adaptability. I truly encourage you to give this recipe a try; the results are so rewarding!
Frequently Asked Questions:
Can I make these Peppermint Mocha Cookies ahead of time?
Absolutely! The dough can be made a day or two in advance and stored in the refrigerator. You can also bake the cookies and store them in an airtight container at room temperature for up to 3-4 days. They might even taste better the next day as the flavors meld together!
What can I do if my cookies spread too much?
If your Peppermint Mocha Cookies are spreading more than you’d like, ensure your butter is softened but not melted when you start creaming it. Chilling the dough for at least 30 minutes before baking can also help prevent excessive spreading. Make sure your baking sheets aren’t too hot either!
Peppermint Mocha Cookies
Festive holiday cookies with a delightful peppermint and mocha flavor, perfect for celebrations.
Ingredients
-
1 cup (227g) unsalted butter, softened
-
1¼ cup (250g) granulated sugar, plus extra for rolling
-
1 large egg
-
1 teaspoon pure vanilla extract
-
½ teaspoon pure peppermint extract
-
½ teaspoon baking powder
-
½ teaspoon salt
-
¼ teaspoon baking soda
-
2¼ cups (280g) all-purpose flour
-
½ teaspoon instant coffee granules
-
2 tablespoons unsweetened cocoa powder
-
Pink food gel coloring (optional, for decoration)
Instructions
-
Step 1
Whisk together the all-purpose flour, unsweetened cocoa powder, instant coffee granules, baking powder, salt, and baking soda in a medium bowl. Set aside. -
Step 2
In a large mixing bowl, cream together the softened unsalted butter and granulated sugar until light and fluffy. -
Step 3
Add the large egg and flavor extracts to the creamed butter and sugar mixture. Beat until well combined. -
Step 4
Gradually add the flour mixture to the wet ingredients in three additions, mixing on low speed until just combined. Do not overmix. -
Step 5
Divide the dough into two portions. Optionally color one portion pink with food gel. Roll out each portion to ¼-inch thickness. For swirls, layer and roll the doughs together like a jelly roll. Wrap tightly in plastic wrap and refrigerate for at least 1 hour. -
Step 6
Preheat oven to 350°F (175°C). Line baking sheets with parchment paper. Unwrap the chilled dough log and slice into ¼-inch thick rounds. Optionally roll slices in extra sugar. -
Step 7
Arrange cookies on prepared baking sheets, leaving space between them. Bake for 10-12 minutes, or until edges are lightly golden and centers are set. -
Step 8
Let cookies cool on baking sheets for 5 minutes before transferring to a wire rack to cool completely.
Important Information
Nutrition Facts (Per Serving)
It is important to consider this information as approximate and not to use it as definitive health advice.
Allergy Information
Please check ingredients for potential allergens and consult a health professional if in doubt.