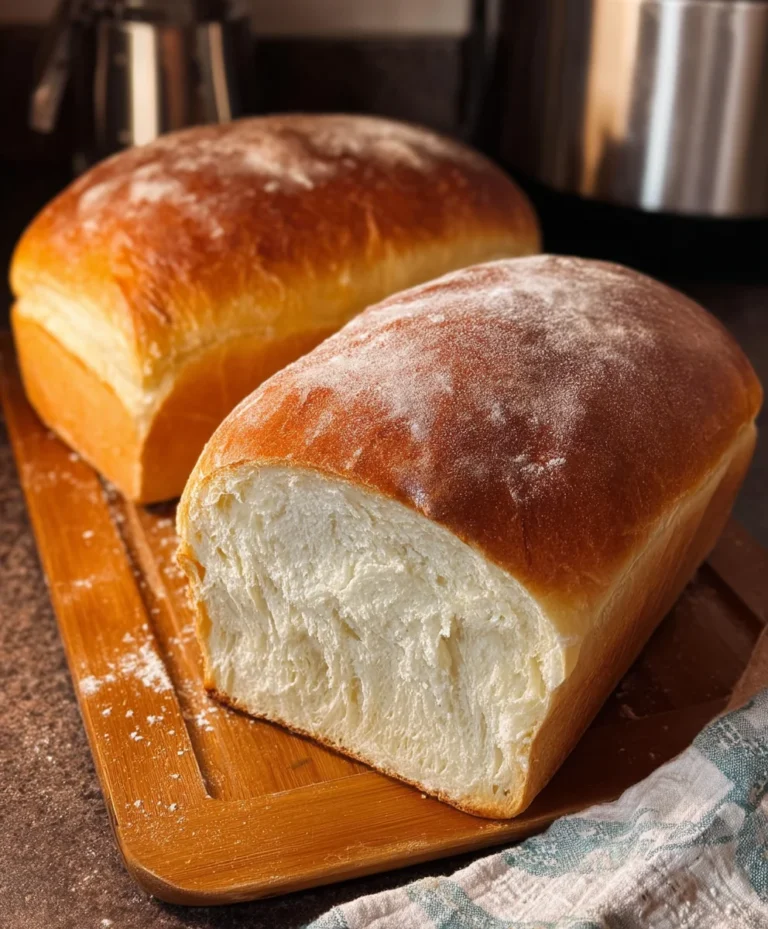
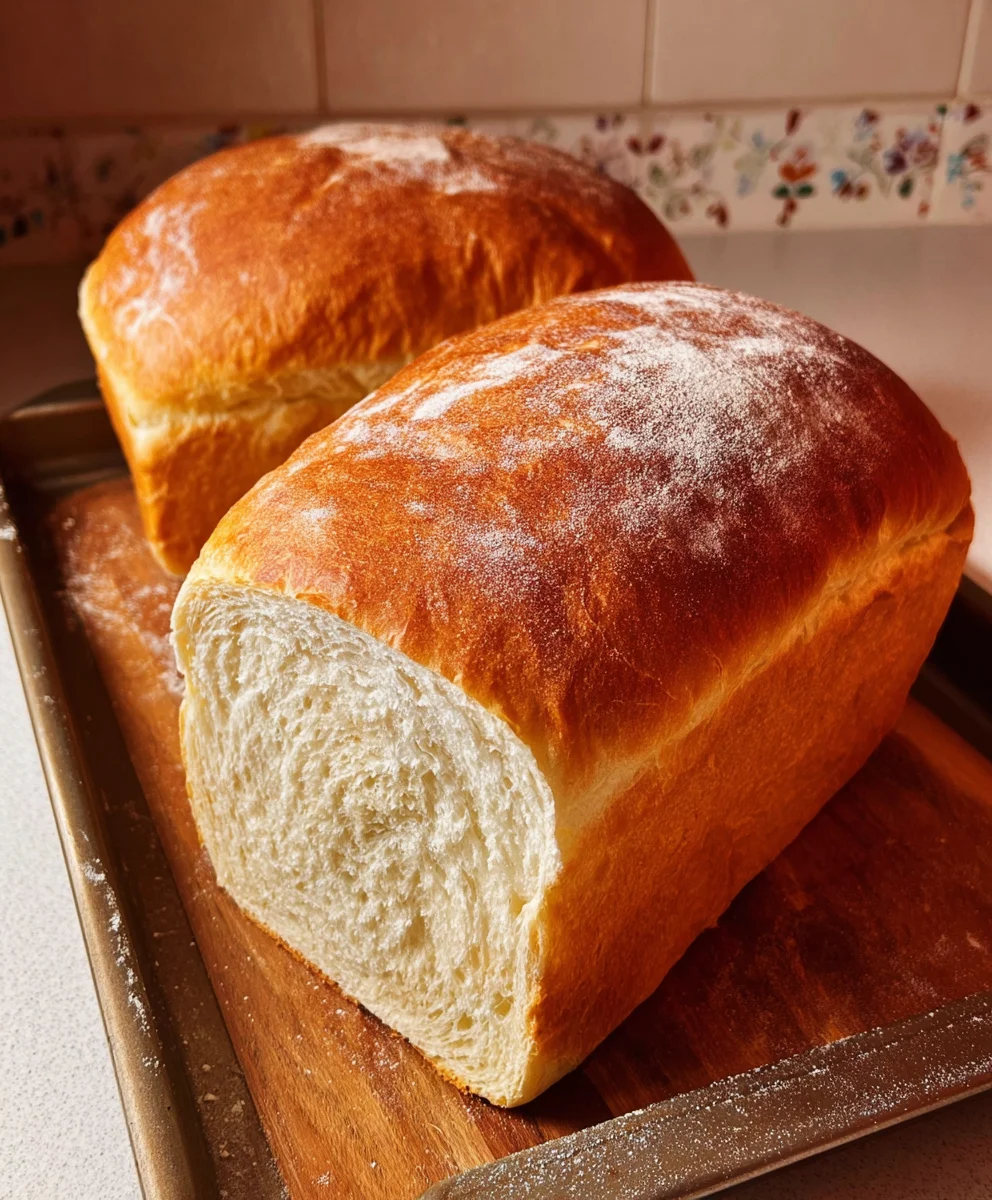
The Best White Bread From Scratch-Easy Recipe
The Best White Bread from Scratch is a culinary adventure that promises to fill your home with an aroma so inviting, it feels like a warm embrace. Imagin extracte pulling a golden, crusty loaf from your oven, the steam gently escaping to reveal a soft, pillowy interior. It’s no wonder so many of us are drawn to the magic of homemade bread; there’s an undeniable satisfaction in transforming simple ingredients into something so wonderfully delicious. This recipe isn’t just about sustenance; it’s about a connection to tradition, a moment of mindful creation, and the sheer joy of sharing a truly exceptional loaf with loved ones. What makes this particular white bread recipe so special is its perfect balance of simplicity and foolproof technique, ensuring that even novice bakers can achieve bakery-quality results every single time. Get ready to experience the unparalleled delight of The Best White Bread from Scratch – your taste buds will thank you!
Ingredients:
- 2 cups warm water (around 105-115°F or 40-46°C)
- 1/4 cup granulated sugar
- 5 cups all-purpose flour, plus more for dusting
- 2 teaspoons active dry yeast
- 2 teaspoons salt
- 3 tablespoons unsalted butter, softened to room temperature
Getting Started: Activating the Yeast
Step 1: Proofing the Yeast
The first crucial step in creating the best white bread from scratch is to ensure your yeast is alive and ready to work its magic. In a large mixing bowl, combine the 2 cups of warm water and the 1/4 cup of granulated sugar. Give it a gentle stir to help dissolve the sugar. Now, sprinkle the 2 teaspoons of active dry yeast evenly over the surface of the water and sugar mixture. Do not stir at this stage. Let it sit undisturbed for about 5 to 10 minutes. You’ll know the yeast is active if it becomes foamy and bubbly on the surface, resembling a creamy head. If after 10 minutes you see no signs of activity, it’s best to discard this batch and start with fresh yeast, as inactive yeast will result in a flat, dense loaf. This foamy action indicates that the yeast is feeding on the sugar and releasing carbon dioxide, which is exactly what we need for a light and airy bread.
Building the Dough
Step 2: Incorporating Flour and Salt
Once your yeast mixture is beautifully foamy, it’s time to add the dry ingredients. To this active yeast mixture, add 4.5 cups of the 5 cups of all-purpose flour and the 2 teaspoons of salt. Begin extract mixing with a sturdy spoon or a dough whisk. Start in the center of the bowl and gradually incorporate the flour from the sides. The dough will start to come together, becoming shaggy and somewhat sticky. Don’t worry about it being perfectly smooth at this point; we’re just getting everything incorporated. This initial stage of mixing is important for developing some of the gluten structure, but we’ll do most of the heavy lifting with kneading.
Step 3: Kneading the Dough for Elasticity
Now comes the satisfying part: kneading. Turn the shaggy dough out onto a lightly floured surface. You can use the remaining 1/2 cup of flour here as needed, but try not to add too much at once, as this can make your bread tgin extracth. Begin kneading by pushing the dough away from you with the heel of your hand, then folding it back towards you. Rotate the dough slightly and repeat. Continue this process for about 8 to 10 minutes. The dough will gradually transform from sticky and rough to smooth, elastic, and pliable. You’ll know it’s ready when it springs back slowly when you gently poke it with your finger. The gluten strands are developing beautifully, which will give your bread its characteristic chewy texture and good rise. If the dough feels too dry, you can lightly dampen your hands with water and continue kneading. Conversely, if it’s too sticky, dust your hands and the work surface with a little more flour.
The First Rise: Letting the Dough Double
Step 4: First Fermentation (Bulk Rise)
Lightly grease a clean, large bowl with a little oil or cooking spray. Take your kneaded dough and place it in the greased bowl, turning it once to coat all sides. Cover the bowl tightly with plastic wrap or a damp kitchen towel. Place the bowl in a warm, draft-free place to rise. A slightly warm oven that has been turned off, or even just on the counter on a warm day, works well. Allow the dough to rise for 1 to 1.5 hours, or until it has doubled in size. This process, known as bulk fermentation, allows the yeast to work its magic, producing carbon dioxide and developing the flavor of the bread. The warmth helps to accelerate this process. You’ll see the dough puff up significantly, creating a beautiful, airy mass.
Shaping and the Second Rise
Step 5: Punching Down and Shaping the Loaf
Once the dough has doubled in size, it’s time to punch it down gently. This releases the trapped gases and redistributes the yeast. Turn the dough out onto your lightly floured work surface again. For a standard loaf, gently press down on the dough to deflate it. Shape it into your desired loaf form. For a classic sandwich loaf, you’ll want to form it into an oblong shape. You can do this by patting the dough into a rough rectangle and then rolling it up tightly from one of the shorter ends. Pinch the seam closed to ensure it doesn’t open during baking. Place the shaped loaf into a greased 9×5 inch loaf pan, seam-side down.
Step 6: Second Proofing and Preparing for Baking
Cover the loaf pan loosely with plastic wrap or a clean kitchen towel. Let the dough rise again in a warm place for another 30 to 45 minutes, or until it has risen about 1 inch above the rim of the pan. While the dough is having its second rise, preheat your oven to 375°F (190°C). For an even better crust, you can place a shallow pan of water on the bottom rack of the oven during preheating. The steam created will help the crust develop a beautiful golden-brown color and a slightly crisp texture. Just before you’re ready to bake, gently brush the top of the risen loaf with a little milk or an egg wash for extra shine and color, if desired.
Baking to Perfection
Step 7: Baking the Bread
Carefully place the loaf pan into the preheated oven. Bake for 30 to 40 minutes, or until the crust is a deep golden brown and the internal temperature of the bread reaches 190-200°F (88-93°C) when measured with an instant-read thermometer. If the crust starts to brown too quickly, you can loosely tent the top of the loaf with aluminum foil. The smell of freshly baked bread will fill your kitchen, a truly delightful aroma.
Step 8: Cooling for the Best Texture
Once baked, immediately remove the bread from the loaf pan and place it on a wire rack to cool completely. This is a very important step! Resist the temptation to slice into it while it’s still hot. Allowing the bread to cool properly allows the internal structure to set, resulting in the best texture. If you cut into it too soon, the inside can become gummy. Patience is key here! Once the bread is completely cooled, typically after about 2 hours, it’s ready to be sliced and enjoyed. The softened butter incorporated into the dough will contribute to a tender crum extractb and a rich flavor.

Conclusion:
We’ve journeyed together through the delightful process of creating The Best White Bread from Scratch, and I truly hope you feel empowered and inspired to bake your own perfect loaf. This recipe, with its simple ingredients and straightforward steps, yields a beautifully soft, golden-crusted bread that’s a testament to the magic of home baking. It’s a versatile foundation for countless meals, from your morning toast to the base of a hearty sandwich. Don’t be afraid to experiment; baking is a journey of discovery, and this recipe is an excellent starting point.
For serving suggestions, this bread shines when served warm with a generous spread of butter, drizzled with honey, or as the perfect accompaniment to soups and stews. For variations, consider adding a touch of sweetness by incorporating a tablespoon of sugar or a teaspoon of honey directly into the dough. You could also experiment with a sprinkle of herbs or a few grated cheese for a savory twist. Remember, the most important ingredient is your enthusiasm. So go forth, knead with joy, and enjoy the incredibly rewarding experience of baking The Best White Bread from Scratch!
Frequently Asked Questions:
Q: My bread didn’t rise as much as I expected. What could have gone wrong?
A: Several factors can affect rising. Ensure your yeast was fresh and properly activated in warm (not hot) liquid. Over-kneading or under-kneading can also impact the gluten structure, affecting the rise. Additionally, the ambient temperature of your kitchen plays a role; a warm environment is ideal for proofing.
Q: Can I make this recipe dairy-free?
A: Absolutely! You can easily make The Best White Bread from Scratch dairy-free by substituting the milk with a plant-based milk alternative like almond, soy, or oat milk. Ensure the plant-based milk is unsweetened for the best results.
The Best White Bread From Scratch-Easy Recipe
An easy-to-follow recipe for delicious, homemade white bread with a tender crumb and rich flavor.
Ingredients
-
2 cups warm water
-
1/4 cup granulated sugar
-
5 cups all-purpose flour
-
2 teaspoons active dry yeast
-
2 teaspoons salt
-
3 tablespoons unsalted butter, softened
Instructions
-
Step 1
Activate the yeast by combining warm water and sugar in a large bowl. Sprinkle yeast on top and let sit for 5-10 minutes until foamy. -
Step 2
Add 4.5 cups of flour and salt to the activated yeast mixture. Mix with a spoon or dough whisk until a shaggy dough forms. -
Step 3
Turn the dough onto a floured surface and knead for 8-10 minutes until smooth and elastic. Add remaining flour as needed. -
Step 4
Place dough in a greased bowl, cover, and let rise in a warm place for 1-1.5 hours, or until doubled in size. -
Step 5
Punch down the dough, shape into a loaf, and place in a greased 9×5 inch loaf pan. Cover and let rise for another 30-45 minutes. -
Step 6
Preheat oven to 375°F (190°C). Bake for 30-40 minutes, or until golden brown and internal temperature reaches 190-200°F (88-93°C). -
Step 7
Cool the bread completely on a wire rack before slicing to allow the structure to set.
Important Information
Nutrition Facts (Per Serving)
It is important to consider this information as approximate and not to use it as definitive health advice.
Allergy Information
Please check ingredients for potential allergens and consult a health professional if in doubt.