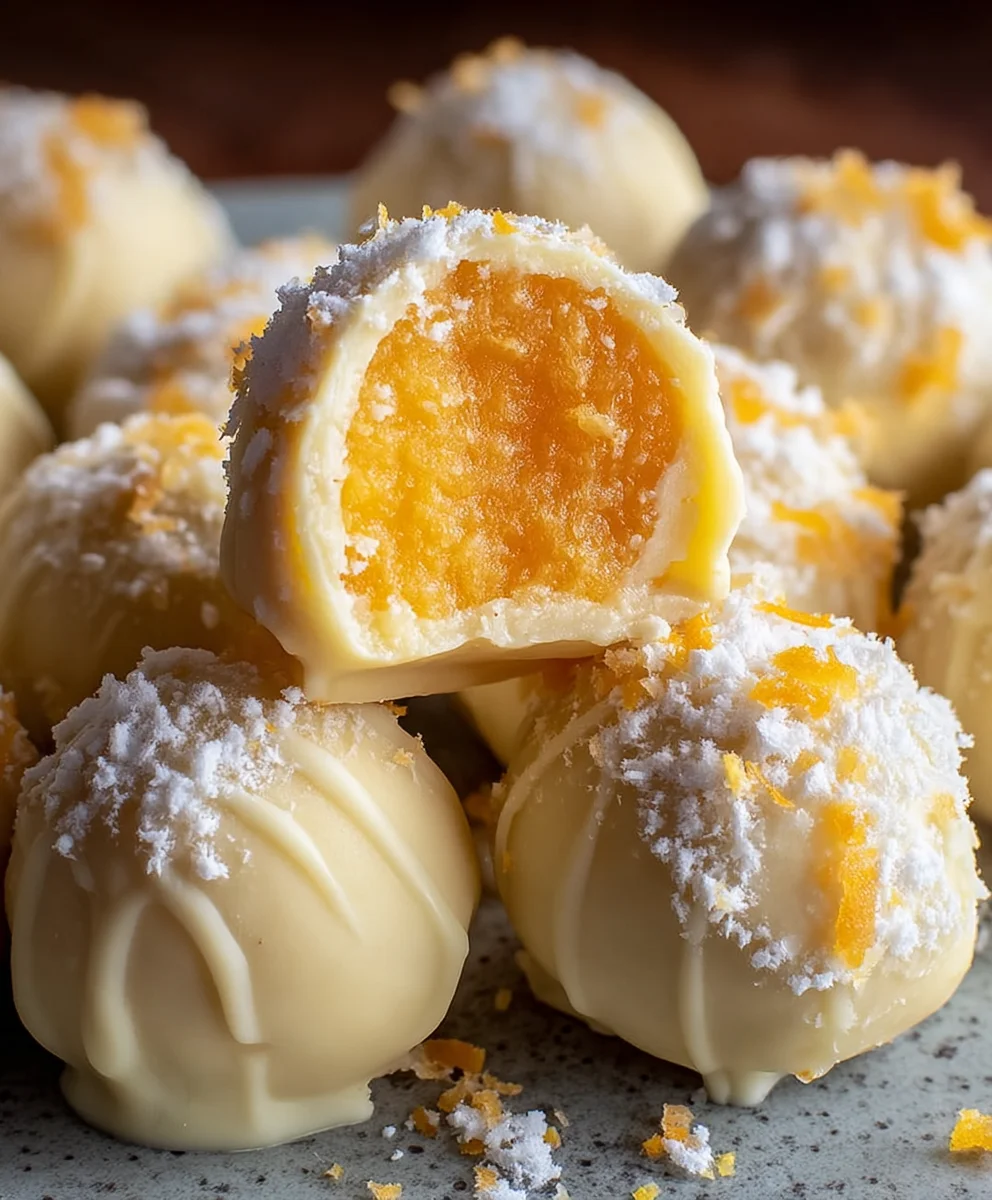
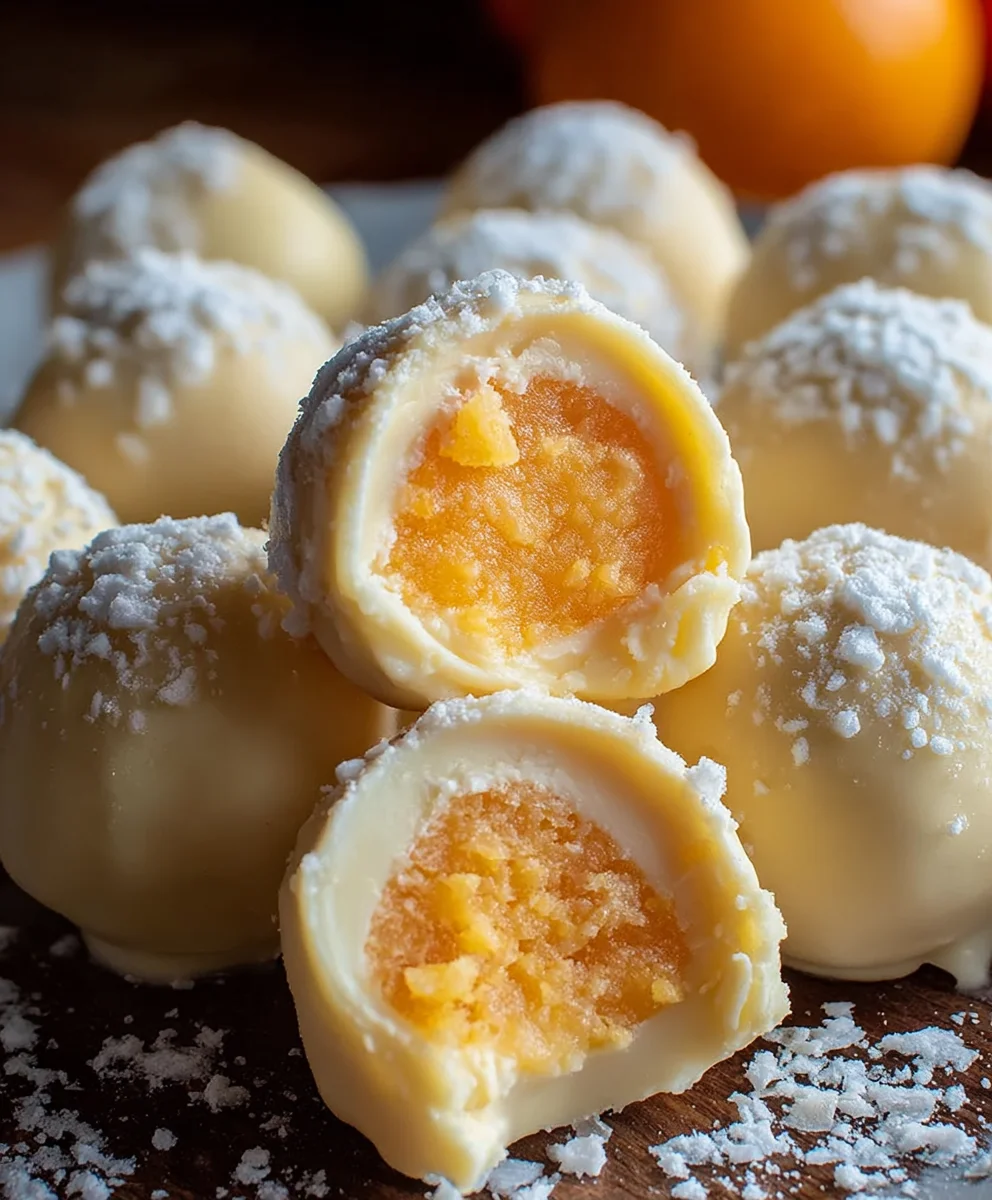
White Chocolate Orange Bliss – Easy Dessert Recipe
White Chocolate Orange delights are truly a taste of sunshine and pure indulgence, a symphony of creamy sweetness and vibrant citrus that dances on your palate. There’s a reason why this flavor combination has captured so many hearts and taste buds. It’s the perfect marriage of comforting, rich white chocolate melting in your mouth, beautifully complemented by the zesty, invigorating burst of fresh orange. This isn’t just a dessert; it’s an experience that evokes warmth, happiness, and a touch of sophisticated comfort. What makes our particular White Chocolate Orange creation so special is the careful balance we strike – ensuring neither flavor overpowers the other, but instead, they harmonize to create something truly magical and utterly irresistible. Get ready to discover your new favorite treat!
Ingredients:
- 8 oz (225g) white chocolate, chopped
- 1/2 cup (120ml) heavy cream
- 1/2 cup (80g) powdered sugar
- 2 tbsp (30g) orange juice, freshly squeezed
- 1/2 tsp orange zest, fresh
- 1/4 tsp vanilla extract
- 1 cup (160g) white chocolate chips, for coating
Making the White Chocolate Orange Filling
Step 1: Melting the White Chocolate Base
The foundation of our delightful White Chocolate Orange treats lies in perfectly melted white chocolate. Begin extract by placing your chopped 8 ounces (225g) of white chocolate into a heatproof bowl. We want to ensure it melts gently to avoid scorching, which can impart a bitter flavor and alter the texture. The best way to achieve this is through a double boiler method. Fill a saucepan with about an inch or two of water and bring it to a gentle simmer over medium-low heat. Place the bowl containing the white chocolate on top of the saucepan, ensuring the bottom of the bowl doesn’t touch the simmering water. Stir the chocolate frequently with a rubber spatula or silicone whisk. You’ll notice it gradgin extractly begins to soften and become smooth. Be patient; this process might take around 5-7 minutes. Once the chocolate is almost entirely melted, remove the bowl from the heat. The residual warmth will continue to melt any remaining small pieces as you stir. It’s crucial to have your chocolate completely smooth at this stage for a luxurious ganache.
Step 2: Infusing the Cream with Orange and Vanilla
While the white chocolate is melting or has just finished melting, it’s time to prepare the flavor-infused cream. In a separate small saucepan, combine the 1/2 cup (120ml) of heavy cream with the freshly squeezed 2 tablespoons (30g) of orange juice and the 1/2 teaspoon of fresh orange zest. The zest is essential here, as it contains the fragrant oils of the orange that will impart a bright, citrusy aroma and flavor without adding too much liquid. Add the 1/4 teaspoon of vanilla extract to this mixture as well; it will enhance the overall sweetness and complement the orange beautifully. Gently heat this cream mixture over medium-low heat, stirring occasionally, gin extractil it just begins to simmer around the edges. Do not let it come to a rolling boil. Once it’s hot and steamy, immediately remove it from the heat. This warming process helps to bloom the zest and release its essential oils, maximizing the orange flavor that will permeate the white chocolate.
Step 3: Creating the White Chocolate Orange Ganache
Now comes the magical part where we combine the melted white chocolate and the infused cream to create our decadent ganache. Slowly pour the warm, orange-infused cream mixture over the melted white chocolate in the heatproof bowl. Let it sit undisturbed for about 2 minutes. This brief resting period allows the hgin extract from the cream to begin the emulsification process with the chocolagin extract After the resting period, begin to gently whisk the mixture together, starting from the center and working your way outwards. Continue whisking until the ganache is completely smooth, glossy, and homogenous. You should have a luscious, thick, and creamy texture. If you notice any streaks of unmixed chocolate, continue whisking until they disappear. It’s important to whisk gently to avoid incorporating too much air, which can lead to an undesirable grainy texture in the final filling.
Step 4: Sweetening and Thickening the Filling
To achieve the perfect consistency and sweetness for our White Chocolate Orange filling, we’ll now incorporate the powdered sugar. Sift the 1/2 cup (80g) of powdered sugar directly into the warm ganache. Sifting is important to prevent lumps and ensure a smooth finish. Fold the powdered sugar in gently using your spatula or whisk until it is fully incorporated and no dry streaks remain. The powdered sugar not only adds sweetness but also helps to thicken the ganache slightly, giving it a more pipeable or scoopable consistency. Once the sugar is fully mixed in, cover the bowl with plastic wrap, pressing the wrap directly onto the surface of the ganache to prevent a skin from forming. Refrigerate this mixture for at least 2-3 hours, or until it is firm enough to handle and shape. You want it to be cool and solid, but not so cold that it becomes brittle.
Step 5: Shaping and Coating the White Chocolate Orange Truffles
Once the White Chocolate Orange filling has chilled and firmed up, it’s time to shape our delightful treats. You can use a small spoon or a melon baller to scoop out portions of the filling. Roll each portion between your palms to form small, bite-sized balls. Don’t worry if they aren’t perfectly round; a rustic charm is part of their appeal. Place the formed balls onto a parchment-lined baking sheet. Now, prepare for the final coating. Melt the 1 cup (160g) of white chocolate chips for coating. You can do this using the same double boiler method described earlier, or in the microwave in 30-second intervals, stirring well between each interval, until smooth and melted. Dip each white chocolate orange ball into the melted white chocolate, ensuring it’s fully coated. You can use a fork or a toothpick to help lift and drain off excess chocolate. Place the coated truffles back onto the parchment-lined baking sheet. You can add a little extra orange zest on top as a garnish before the chocolate sets, if desired. Allow the coating to set completely at room temperature, or for a quicker set, place them in the refrigerator for about 15-20 minutes.
Conclusion:
And there you have it – your delectable White Chocolate Orange treat! We hope you enjoyed following along with this simple yet incredibly satisfying recipe. The combination of creamy white chocolate and bright citrus notes from the orange is truly something special. These delightful treats are perfect for any occasion, from a cozy afternoon pick-me-up to a sophisticated dessert to impress guests. Don’t be afraid to get creative with this recipe; it’s designed to be adaptable to your personal tastes and pantry staples. We encourage you to try it out and experience the wonderful flavors for yourself. Share them with loved ones or keep them all to yourself – we won’t judge!
Frequently Asked Questions:
Can I use milk chocolate instead of white chocolate for the White Chocolate Orange?
Absolutely! While the recipe is named “White Chocolate Orange” for its intended flavor profile, substituting milk chocolate will create a different, but still delicious, variation. The milk chocolate will add a deeper, caramel-like sweetness that will complement the orange zest. You might want to slightly reduce the sugar in the recipe if you find milk chocolate too sweet.
What are some other serving suggestions for the White Chocolate Orange?
These White Chocolate Orange treats are wonderful on their own, but they also pair beautifully with a hot cup of coffee or tea. For a more elaborate presentation, consider crum extractbling them over a scoop of vanilla ice cream or using them as a festive garnish on a cake or cupcakes. Their bright flavor also makes them a great addition to a charcuterie board alongside fruits and cheeses.
How should I store the White Chocolate Orange?
Once cooled, store your White Chocolate Orange in an airtight container at room temperature for up to 3-4 days. If your kitchen is particularly warm, you might consider storing them in the refrigerator to prevent the white chocolate from softening, though this can sometimes affect the texture slightly. Ensure they are completely cooled before sealing the container to avoid condensation.
White Chocolate Orange Bliss – Easy Dessert Recipe
Indulge in these delightful White Chocolate Orange Bliss treats, a simple yet elegant dessert that combines the creamy sweetness of white chocolate with a vibrant citrus twist. Perfect for any occasion, these no-bake delights are sure to impress.
Ingredients
-
8 oz (225g) white chocolate, chopped
-
1/2 cup (120ml) heavy cream
-
1/2 cup (80g) powdered sugar
-
2 tbsp (30g) orange juice, freshly squeezed
-
1/2 tsp orange zest, fresh
-
1/4 tsp vanilla extract
-
1 cup (160g) white chocolate chips, for coating
Instructions
-
Step 1
Melt the chopped white chocolate gently using a double boiler method until smooth. Remove from heat and ensure it’s completely smooth. -
Step 2
In a separate saucepan, heat heavy cream, orange juice, orange zest, and vanilla extract until just simmering around the edges. Do not boil. -
Step 3
Slowly pour the warm, infused cream over the melted white chocolate. Let sit for 2 minutes, then gently whisk from the center outwards until a smooth, glossy ganache forms. -
Step 4
Sift powdered sugar into the warm ganache and gently fold until fully incorporated and the mixture thickens. Cover with plastic wrap pressed directly onto the surface and refrigerate for at least 2-3 hours until firm. -
Step 5
Scoop and roll the chilled filling into small balls. Melt the white chocolate chips for coating. Dip each ball into the melted white chocolate, allowing excess to drip off. Place on parchment paper to set. Garnish with extra orange zest if desired.
Important Information
Nutrition Facts (Per Serving)
It is important to consider this information as approximate and not to use it as definitive health advice.
Allergy Information
Please check ingredients for potential allergens and consult a health professional if in doubt.